Have you checked out all my blogs?


Dollhouse Minis: http://joannesminis.blogspot.com/


18” Dolls: http://joannes18dolls.blogspot.com/


General Crafts: http://joannes-place.blogspot.com/


Wednesday, September 29, 2021

Herb Swirl Rolls


This week I have a really simple yet absolutely delicious recipe for rolls. They start out as a can of Crescent Rolls from the grocery store dairy case but we are going to transform them into something really special. 


These are perfect alongside a bowl of warm soup on a chilly night and they are very quick and easy to make.


Do be careful not let the dough fall apart too much as you remove it from the can since we need to pinch all those seams together and create two dough pieces to work with.

You can find a downloadable/printable version of this recipe here.

Herb Swirl Rolls


2 Tablespoons olive oil

1 teaspoon dried Italian herb seasoning

¼ teaspoon onion powder

¼ teaspoon garlic powder

1 can (8 oz) Refrigerated Crescent Rolls


Heat oven to 375° F.


Grease 4 cups of a muffin pan.


In a small bowl combine the oil with the seasonings and mix well.


Unroll the can of dough and divide into 2 pieces along the long perforation line. Firmly pinch all the other perforations together forming 2 pieces of dough.


Brush the oil mixture over one piece of dough. You might not need all of the oil mixture.


Carefully place the 2nd piece of dough on top of the one you spread with the oil mixture.


Cut into 4 long strips.


Twist each strip 5 or 6 times. 


Then coil to form a roll.


Place each formed roll in a prepared cup in the muffin pan.


Bake at 375° F for 15 to 20 minutes until golden brown and cooked through.


Remove from the pan immediately.


Serve warm,


Wednesday, September 22, 2021

Roasted Veggie Soup


This week's recipe is for a wonderful soup. I love soup in the fall and winter and actually look forward to the temperature dropping to so I can start making bowls of comforting warm soups. 


This one I found and played with a bit and decided it was the perfect bowl to start off soup season 2021-2022.


You can change it up a bit and I have some suggestions for you but I look in your fridge, pantry and the local produce market and use what looks good to you.


This time I used a green bell pepper (I always try to find one in the store that is starting to turn either yellow or red (sometimes orange) I like the flavor better but I don't have to pay the extra for the more mature peppers. On other occasions I have used my beloved Poblano Peppers in this soup. They give it just a bit of heat which is wonderful. The green peppers just looked a lot fresher this week at the store so I went with one of them. Pick according to your taste and what is freshest (or what you already have on hand)


You might notice there is no onion in the photo below of the ingredients. I totally forgot about it until I had cut up all the other veggies and checked my notes. Sorry for any confusion that might cause.


The first step is to mix up an herb oil mixture. This is super simple and gives so much flavor. Just mix the oil with some dry rosemary (you can use another dry herb if you wish), salt and pepper. I do prefer to use olive oil for this because it just tastes so much better.


The veggies need to roast until they are soft and just beginning to turn brown around the edges. Watch the mushrooms carefully they tend to get done the fastest and you don't want to burn them.


After the veggies are roasted it is simply a matter of combining them with the components that will make up the broth and heating it through.


Be sure to taste the broth once it is heated through, depending on the chicken broth you use you might need some salt and/or pepper at this point.


Youcan find a downloadable/printable version of this recipe here.


Roasted Veggie Soup


2 Tablespoons olive oil

1 teaspoon dry rosemary, crushed

½ teaspoon kosher salt

¼ teaspoon pepper

2 cups sliced zucchini

1 onion sliced

1 medium green pepper (or 1 poblano pepper) diced

8 oz button mushrooms, cut in halves

3 cloves garlic, minced

1 (14 ½ oz) can chicken broth

¼ cup half and half

2 Tablespoons chopped fresh parsley


Heat oven to 475°F.


In a large bowl combine the olive oil, rosemary, salt and pepper.


Add the sliced zucchini, sliced onion, diced pepper, halved mushrooms and minced garlic to the oil mixture.


 Stir carefully to coat all the veggies in the oil.


Place veggies and oil on a large sheet pan (15” x 10”) in a single layer.


Roast at 475°F for about 30 minutes or until the veggies are softened and just starting to brown. Stir after 15 minutes to aid in cooking evenly.


Add the veggies (along with any juices on the baking pan) to a large sauce pan along with the chicken broth, half and half, and fresh parsley.


Cook, stirring often over medium heat until heated through, (about 10 to 15 minutes)


Taste for seasoning and serve.


Makes 2 very nice sized bowls,

Wednesday, September 15, 2021

Coconut Curry Chicken


Coconut Curry Chicken


This week I dusted off my slow cooker and made a wonderful pot of coconut curry chicken. I have to say I love pretty much all curries so I was excited to share this one with you all.


If you haven't eaten much curry this is a good one to start with because it is a really mild curry and all the ingredients are easy to get. If you are looking for a really pronounced curry flavor add more of the curry powder to the dish, that is what I plan to do next time. I liked this a lot but I do love curry and more curry in here will only make it better. When working out this recipe I was thinking of my friends that maybe aren't used to the flavors in curry but want to try it. This one is perfect for that.


While this is cooked in the slow cooker it is cooked on high for only 4 hours so it is perfect if you have a busy afternoon and still want to get a filling warming dinner on the table. The only things that need to be done last minute are cooking some rice (I used jasmine but any white rice will work great) and squeeze a bit of fresh lime juice into the curry and stir it in. This little pop of acid at the end just rounds everything out and gives a freshness that makes the dish its very best.

This recipe is designed to go into a 2 quart slow cooker. I love this size for small family dishes. And a bonus you can pick one up for around $10 most places. I will be posting a lot more recipes for this particular size slow cooker coming up.


The protein in this dish is some chicken thighs, you want bone-in thighs but pull off all the skin and cut off as much of the fat as possible. The bone adds so much flavor and while you can make this with chicken breast I feel the thighs just turn out more flavorful and more tender.


When you are ready to serve put rice in the bottom of 2 bowls and divide the curry evenly between the two bowls. Use as much of the wonderful broth as you wish.


So yummy and so comforting especially as the days start to get a bit chilly.


You can find a downloadable/printable version of this recipe here.


Coconut Curry Chicken


4 bone-in chicken thighs, skin and all visible fat removed

salt and pepper

oil

1 small onion diced

2 carrots, cut diagonally into ½” slices

1 teaspoon minced garlic

2 teaspoons grater fresh ginger (I use the stuff in the tube)

zest of 1 lime

1 Tablespoon curry powder (or more to taste)

2 cups cut up broccoli

1 can (about 13 oz) coconut milk

1 teaspoon Sriracha sauce


1 teaspoon lime juice

2 Tablespoons fresh chopped cilantro


Rice to serve (I cooked about ½ cup Jasmine rice for the 2 servings)


Season the chicken thighs on both sides with salt and pepper and brown in hot oil in a skillet. About 3 or 4 minutes per side.


 Transfer to 2 quart slow cooker.


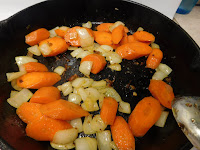
In same pan cook the diced onion and sliced carrots until onion softens. 


Add the garlic, ginger, lime zest, and curry powder and cook until fragrant.


 Add the broccoli and stir to combine.


 Transfer this mixture to the slow cooker with the chicken.


In a container combine the can of coconut milk and the sriracha sauce then pour over the mixture in the slow cooker.


Cook on high for 4 hours.

 Just before serving stir in the lime juice and stir well.


Serve in bowls over a bed of rice, sprinkling the cilantro over the top.


Serves 2


Wednesday, September 8, 2021

Almond Roca Cupcakes


For the cupcake for the month of September I decided to make one based on the candy Almond Roca. You might be asking why did I choose this flavor this month, well the reason is simple. This post is planned to go up on my blog on September 8th which would have been my mom's birthday and Almond Roca was her favorite candy. So it only seemed fitting to make her favorite candy into a cupcake to celebrate her birthday. 


Since this is part of my monthly series of small batch cupcakes using a partial box of cake mix I had to come up with a way of making a yellow cake mix into a caramel cake. I knew immediately how I would do this if I was making the cake base from scratch but working with the mix took a bit of thinking. In the end I added two things to the mix to achieve the result I was looking for. This recipe took a bit more playing around and testing than a lot of the recipes in this series so I hope you all love it as much as I do and as much as I am sure mom would have also.


If you haven't read my blog post on dividing the cake mix click here to go there first. You will need to divide a box of yellow cake mix to make this recipe.


I did substitute milk for part of the water this month like have been doing recently in a few of the recipes. I like how much more like a scratch made cake it turns out with this simple switch. This time however I cut the milk back from ⅓ cup down to ¼ cup and I added in a Tablespoon of Caramel sauce (the kind you would put on ice cream) I also stirred some Heath bits into the batter at the end. Between the two I think the cupcake has a nice toffee like flavor. Please note that the cooked cup cake will be a bit darker that normal and this is normal. Also because of the addition of the chips I got one extra cupcake than I normally do. I normally get 6 and this recipe gives me 7.


To top the cupcakes I made a ganache with some chocolate chips and half & half cream. I let this cool and then dipped the tops of the cooled cupcakes into the chocolate and then immediately into some chopped slightly toasted almonds.


Allow the chocolate some time to set up in the fridge before serving.


While not an exact replica of the iconic candy I think it definitely is easy to see that it is inspired by the candy.

Click this link for a downloadable/printable copy of today's recipe.


Almond Roca Cupcakes


of a box of yellow cake mix

¼ cup milk

1 Tablespoon caramel sauce

1 egg

3 ½ Tablespoons vegetable oil

¼ teaspoon vanilla extract

½ cup Heath bits


For the topping:

½ cup chocolate chips

2 Tablespoons half & half

½ slivered almonds, coarsely chopped and lightly toasted


Start by preheating your oven to the temperature your box of cake mix calls for, mine was 350°F. Line your cupcake pan with paper liners or grease really well.


Combine the milk, caramel sauce, egg, oil and vanilla in a mixing bowl and combine well.


Add the cake mix and beat for up to 90 seconds.


Carefully stir in the Heath bits by hand.


Portion into cupcake pan and bake according to instructions on your cake mix. Mine was baked at 350°F for about 20 minutes.


Cool in pan for 10 minutes then move to a cooling rack and cool completely.


While the cupcakes cool make your topping. Place the chocolate chips in small bowl. Heat the half & half and pour over the chocolate chips until melted and smooth.


 If they don't melt try microwaving on high for 10 second intervals until you can stir the mixture smooth. Allow to cool.


When everything has cooled to room temperature. Place the chopped, toasted almonds in a small bowl.


Dip the tops of the cupcakes into the chocolate mixture to coat then immediately into the chopped almonds.


Repeat with all the cupcakes.


Chill in the fridge for a couple of hours before serving.


Wednesday, September 1, 2021

English Muffin Bread


My recipe this week is for a lovely loaf of English Muffin bread. I have bee playing around with this one for a while making little adjustments here and there and I am very pleased with the result. 


Since this has become my favorite bread for toasting I make it often, about every other week or so. It just makes wonderful toast and if you are in the mood for a breakfast sandwich that same toast works better than any other option I have tried.


You will need a small (8” by 4”) loaf pan for this. It makes the perfect size loaf for this recipe. We will grease this pan (I just use non-stick spray) and then sprinkle it with some cornmeal. This makes for a wonderful crunchy crust on the bottom and sides and really brings the English muffin part of the experience.


I like to do the initial mixing/beating with my hand mixer than finish up with a wooden spoon. I feel the bread turns out much better with this combination. I do knead this dough for just a couple of minutes just long enough to bring the dough together and make it smooth dough.


Then a quick rise and it will be ready for the oven. My sure-fire way to make sure any bread is cooked through is to take it's temperature with an instant read thermometer, it should be around 190°F when baked through.


Allow to cool out of the pan on a wire rack until room temperature before cutting. I like to cover my bread with a damp cloth when I set it to cool. This helps the crust become just a touch more tender.


Click this link for a downloadable/printable copy of today's recipe


English Muffin Bread


1 cup milk

¼ cup water

1 Tablespoon butter

3 cups all purpose flour

1 Tablespoon sugar

1 Tablespoon active dry yeast

1 teaspoon salt

¼ teaspoon baking soda


cornmeal for the pan


Grease the bottom and sides of an 8” by 4” loaf pan (I use non-stick spray) then sprinkle with cornmeal. Set aside.


Combine the milk, water, and butter in a microwave save container and heat to between 120° F and 130°F.


In a large bowl combine half the flour *1 ½ cups), the sugar, yeast, salt and baking soda. Stir to combine.


Add the heated milk mixture and using a hand mixer mix for 1 minute then beat an additional minute on medium speed.


Slowly add the rest of the flour (about ½ cup at a time) mixing with a wooden spoon. This will form a very shaggy dough.


Turn this shaggy dough out onto a floured surface and knead just until it comes together and becomes smooth. This usually takes just a couple of minutes.


Place the dough into the prepared loaf pan.


 Cover with plastic wrap and set in a warm place away from drafts to rise for 45 to 60 minutes. You will know it is ready to bake when you can touch the bread and the indentation remains.


Preheat oven to 400°F and bake the bread until golden brown about 20 to 30 minutes. The bread's internal temperature should be around 190°F when taken with an instant read thermometer. 


Cool on a wire rack to room temperature before cutting. If you wrap the hot loaf with a damp cloth while it cools you will get a slightly softer crust.


Once cool brush off some of the excess cornmeal from the sides and bottom leaving most of it.


This bread makes wonderful toast and/or breakfast sandwiches.