Have you checked out all my blogs?


Dollhouse Minis: http://joannesminis.blogspot.com/


18” Dolls: http://joannes18dolls.blogspot.com/


General Crafts: http://joannes-place.blogspot.com/


Wednesday, March 31, 2021

Carrot Cake Cupcakes


This week's recipe is actually the cupcake of the month for April which starts the day after this posts. I would normally have posted it next week but I wanted to have this one out in time for Easter and that is this coming Sunday. So the April cupcake is going to post the last day of March, hope everyone is okay with that.


I had been planning to do a carrot cake cupcake for April all along but I was kind of torn about just how I was going to do it. Since these cupcake recipes are based on my divided cake mix method I really wanted to use a cake mix. The problem being normally you would use a spice cake mix for carrot cake and I really don't like spice cake. So I had thought about trying work out the kinks on my small batch carrot cake recipe from scratch but it just isn't ready yet.


Then I had to stop at Walmart the other day to pick up some stuff that only they seem to have. As I was walking from one area of the store to another I walked past the display of spring/Easter themed baking supplies. I knew I wanted to grab some cute cupcake paper liners so I stopped to look. I found a really adorable set that has not only the liners but themed sprinkles and cute paper toppers.


One of the other things I noticed was a box of Carrot Cake mix. Hmmmmm, that might be the answer to my dilemma.


I took a quick look at the ingredient label and while not great and there doesn't appear to be any actual carrot in there it wasn't bad. I figured I could work with it and make some pretty good cupcakes with a few additions.


So when I got home I divided the box into 3 portions (if you haven't read my blog post on how to do this it is here)


The next step was to gather my additions to the mix. The first and easiest change was to use some apple juice in place of the water. That along with the vanilla that I almost always add to cake mix took this mix to the next level. After mixing the batter like normal I added in some fun additions- chopped nuts, golden raisins,and some grated carrot. These are the things I usually add to my regular carrot cake. With all these additions I did get 8 cupcakes this time instead of my normal 6.


I am very happy the result of these changes,


I then make my favorite cream cheese frosting for them. Now they aren't the same as my from scratch cake but they are wonderful.


Click here to find the printable PDF of the recipe.


Carrot Cake Cupcakes


of a box of carrot cake mix

cup apple juice

1 egg

3 ½ Tablespoons vegetable oil

¼ teaspoon vanilla extract

3 Tablespoons chopped nuts

3 Tablespoons golden raisins

3 Tablespoons shredded carrot


Start by preheating your oven to the temperature your box of cake mix calls for, mine was 350°F. Line your cupcake pan with paper liners or grease really well.


Combine the apple juice, egg, oil and vanilla in a mixing bowl and combine well.


Add the cake mix and beat for up to 90 seconds.


Gently stir in the nuts, golden raisins, and grated carrot.


Portion into cupcake pan and bake according to instructions on your cake mix. Mine was baked at 350°F for about 20 minutes.


Cool in pan for 10 minutes then move to a cooling rack and cool completely.


Small Batch Cream Cheese Frosting

¼ cup butter, softened

4 oz cream cheese, softened

1 teaspoon vanilla extract

2 cups powdered sugar


Beat the softened butter, cream cheese, and vanilla extract until combined and starting to get fluffy.


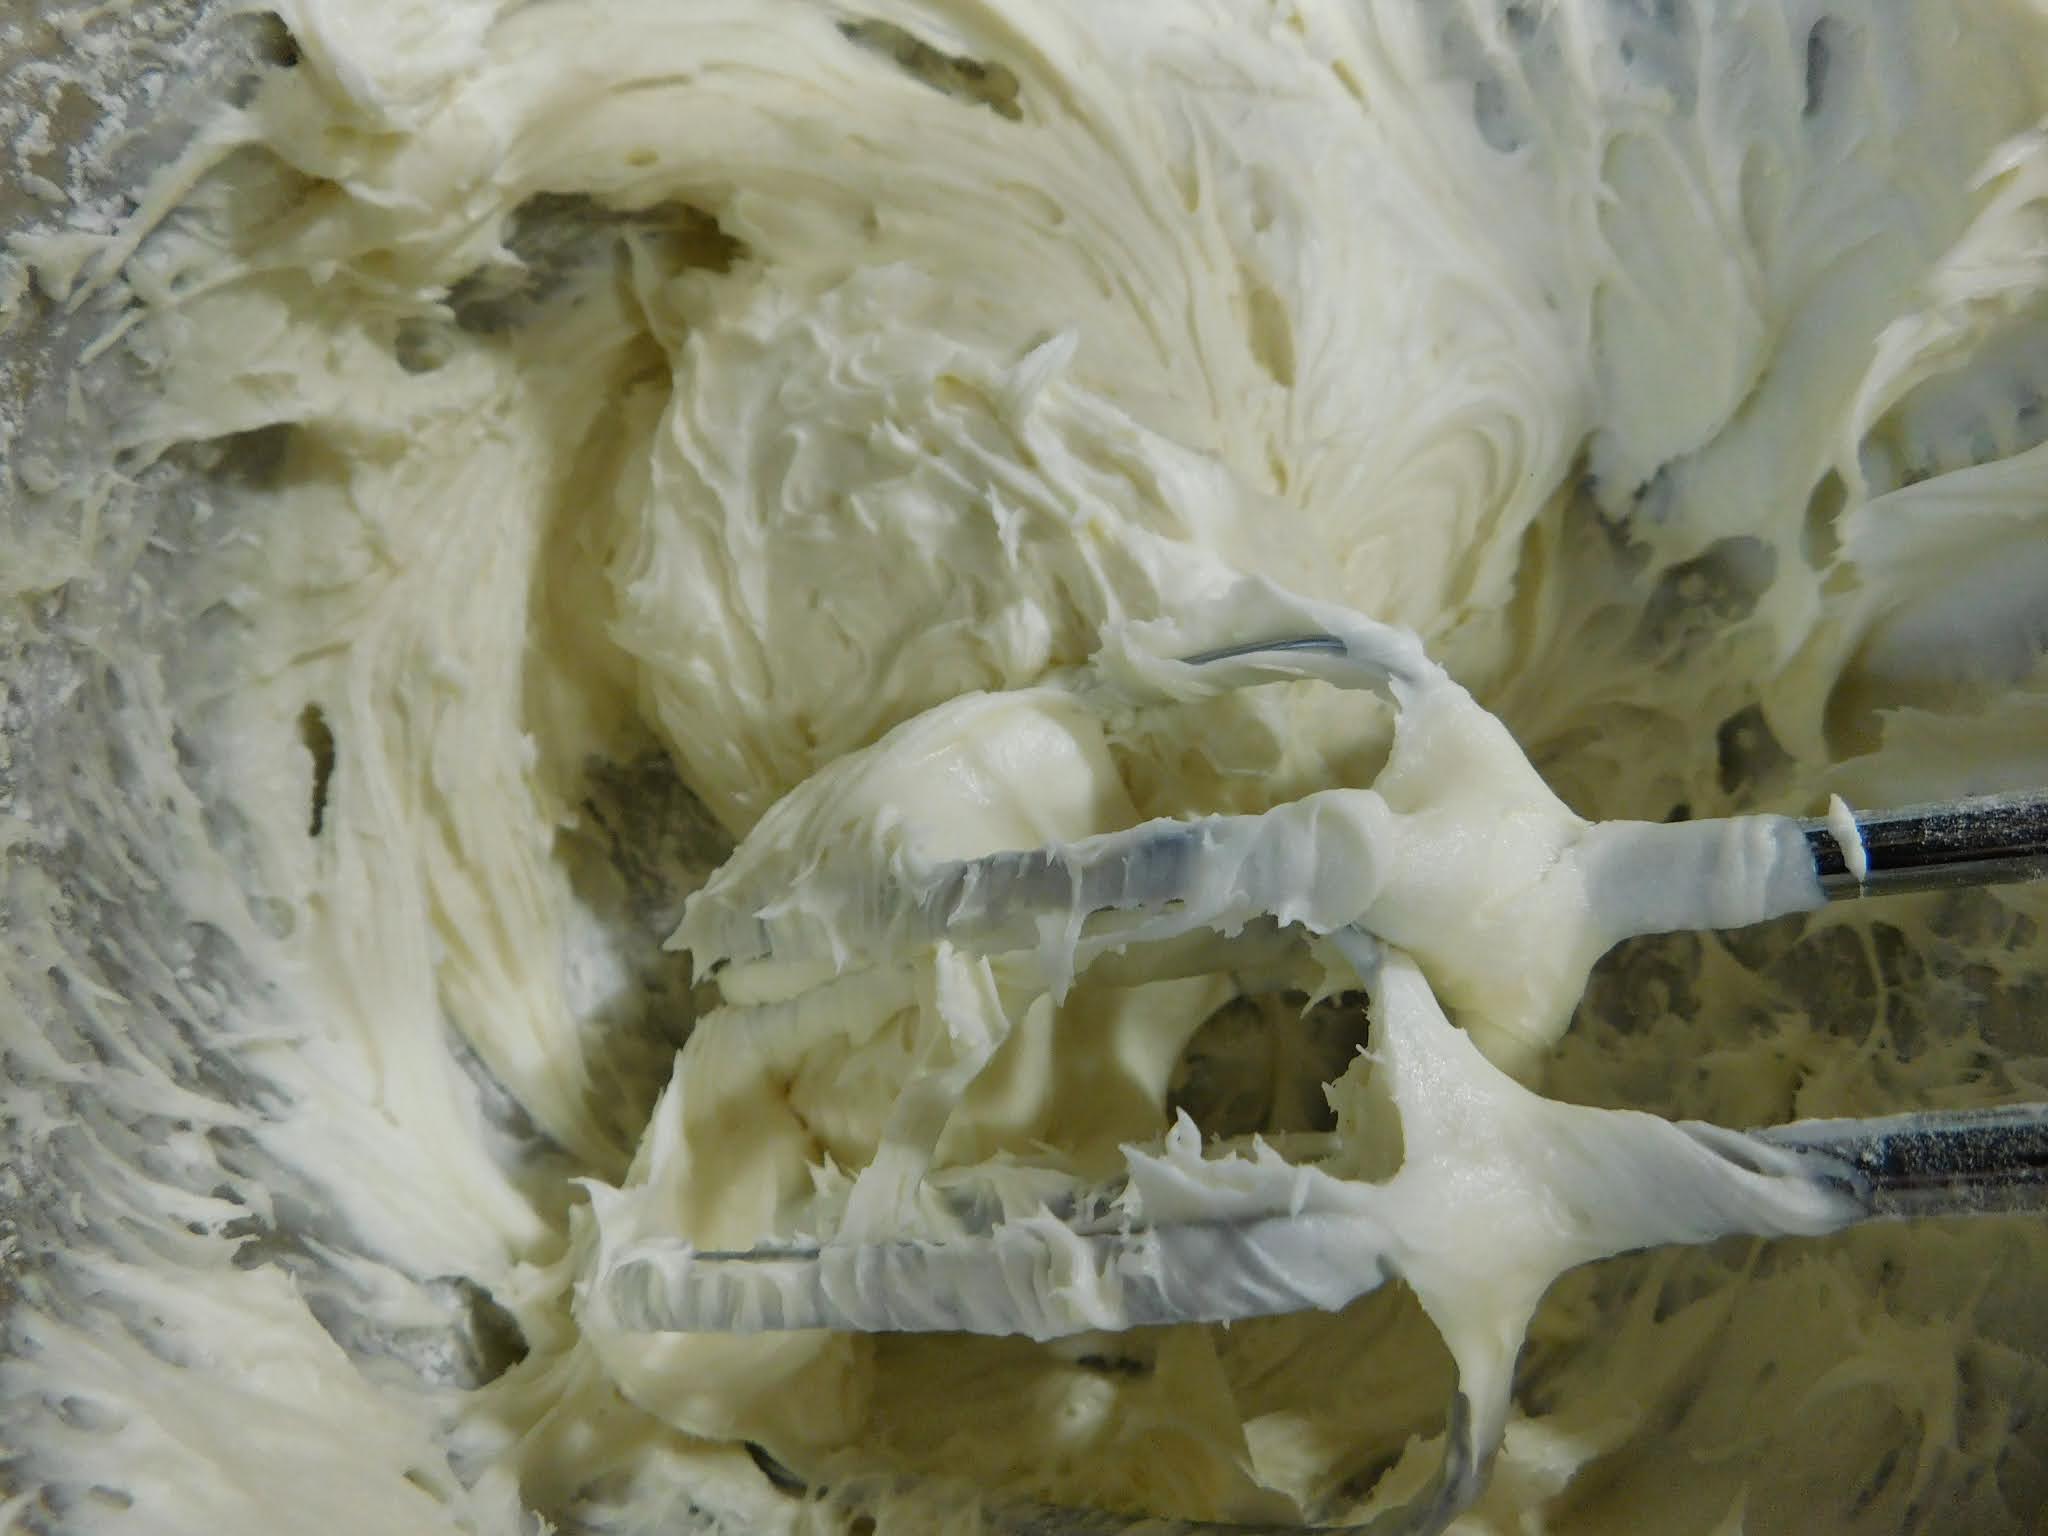
Slowly add the powdered sugar beating until well combined and creamy.


Move frosting to a decorating bag equipped with a large decorating tip. Decorate your cupcakes as desired.


Wednesday, March 24, 2021

Vegetarian Split Pea Soup


This week I have recipe to go into our slow cookers. I love to use my slow cooker all year round but especially when I can make a wonderful soup to enjoy on a cold day. The slow cooker I am using today is my 1 ½ quart Crock-pot. This size is my go to as far as slow cookers go right now and it's a handy size no matter what your family size. For the small household they are perfect for making soups, stews and many other things without the huge amount of leftovers that you would get with the larger size. For the larger household they are great for side dishes and desserts. I consider this one to be the best $10 I ever spent for my kitchen. 


When you are using a slow cooker it is important to use the correct size for the recipe since either being too full or not full enough effects the cooking time and quality.


So this recipe I was looking through some of the older recipes I had saved and never tried when I came across this one. I did have to make several adjustments to make it for a small batch cooking but I think it was well worth it. I love split pea soup and while I am not vegetarian I do enjoy having vegetarian meals often. I think this recipe would be really easy to make vegan too since the only ingredient that is not vegan friendly is the cream. I know there are many vegan friendly cream substitutions out there.


The mix of ingredients in this recipe really drew me in, I love sweet potatoes so that was a real win. More importantly I love soups that have spinach in them. I have to admit I was a bit nervous about the apple juice, I was afraid it might make the soup too sweet however I found this not be the case. The blend of flavors is so fantastic. I will say that I did add a couple of healthy splashes of my favorite hot sauce and I found the soup to then be perfect. Truth be told though I think that hot sauce improves pretty much all soups.


You might have to get up a bit early depending on what time you like to eat dinner. This soup needs about 10 to 11 hours in the slow cooker then another 30 minutes at the end to cook that spinach. Believe me when I say it is well worth the time and effort. You could probably prep your veggies the night before if you know you will be rushed in the morning but since there are so few ingredients there isn't much chopping involved.


Click here to access the printable PDF of the recipe.


Vegetarian Split Pea Soup


1 cup dried green split peas, rinsed, picked over and drained

1 cup cubed sweet potato

½ chopped onion

2 cloves chopped garlic

1 teaspoon salt

3 cups water

¼ cup apple juice


1 ½ cups firmly packed cut up fresh spinach

½ cup heavy cream

1 teaspoon dry dill weed

freshly ground pepper to taste


In your 1 ½ quart slow cooker mix the split peas, sweet potato, onion, garlic, and salt. Add the water and apple juice and stir again to combine. 


Set slow cooker on high for 30 minutes then turn to low and cook for another 9 ½ to 10 ½ hours. (If you can't do the 30 minutes on high that's okay but the the soup might take a bit longer to get cooked through)


Stir the soup. 


Stir in the spinach, cream, dill weed and pepper cover and cook for another 30 minutes at low. Taste and adjust the seasoning, I found I needed more salt at this point.


Serve in large soup bowls.


A good splash of your favorite hot sauce is optional but really tasty.


Makes 3 good sized bowls of soup.


Wednesday, March 17, 2021

Lemon Chicken


I haven't posted an Investment cooking recipe on here in a long time so I decided it was time. If you aren't familiar with my term “investment cooking: you probably know it by another term. This is simply a recipe that I make a larger quantity of and then freeze to enjoy later. This time we are making one of my absolute favorites- Lemon Chicken. Or at least what I call Lemon Chicken, not to be confused with Asian style lemon chicken. This is chicken pieces that are marinated in a lemon mixture then baked (or grilled) I love it both ways but the advantage of baking is you end up with a wonderfully delicious sauce that can be poured over rice or couscous as a side dish. 


You can use whatever your favorite chicken pieces are, I almost always used either thighs or leg-quarters. I have used breasts before but I just prefer the darker meat. Whatever chicken parts you choose to use be sure they are skin on and bone in for this recipe. A little note here I know some people think that the amount of time I cook this for is a bit long but I am kind of paranoid of having chicken under-cooked, I would rather err on the side of over than under cooked when it comes to chicken. I also always check the internal temperature of chicken when it comes out of the oven to make sure it is cooked through.


The following recipe is for per bag and your total amounts will depend on how much chicken you are preparing. This time the package I got had 10 fairly large thighs so I opted to do 3 per bag with one bag with the extra one. For me I find 3 is about right for dinner and lunch the next day. When my son still lived at home I would do 4 thighs and we would have the perfect amount for dinner. The amounts of the marinade will work for up to 4 thighs or 2 leg-quarters or 2 breasts.


Although I usually save a batch out of the freezer to eat the night I prep this I really like the flavor much more after it has frozen and thawed. I am not sure of the science of it but the flavor of the marinade goes deeper into the chicken after that freezing cycle.


So lets get down to the basics of how this goes together.


My first step is to open up the chicken and see exactly how many pieces I am working with. This will determine how many bags of chicken I am going to make. I also decide what size freezer bag will work best. This time I used quart size but if my pieces were any bigger or I was going to put in more I would have gotten out gallon size freezer bags. 


Next I line my bags up on the counter with the tops open so I can easily add my ingredients. Then I just go through and add the thyme to each bag, then I follow with the salt, and the garlic. Lastly I add the lemon juice. I then carefully mix the contents of each bag a bit just pick them up and gently swirl it a little (don't spill)


Last I add the chicken, label the bags and freeze.

I did use just a storage bag for tonight's dinner, no sense wasting a freezer bag when I don't need to.


When you are ready to enjoy your Lemon Chicken cooking is really easy. If you are going to use one of the bags that you have frozen thaw it in the fridge overnight then proceed as follows.


Preheat the oven and place the chicken skin side down in a baking dish then pour the marinade over the chicken.


Bake it for 20 minutes turn the chicken over,


Bake another 20 or so minutes and dinner is ready.


I hope you all enjoy this as much as I do.


Click here for the printable PDF version of the recipe.


Lemon Chicken


These ingredients are per bag- how much you need will depend on how many bags of chicken you are preparing.


Chicken parts of your choice (to serve 2 -3 people)

1 teaspoon dried thyme

1 teaspoon salt

½ teaspoon pepper

Grated or crushed garlic about a large clove (to taste)

1/3 cup lemon juice


Figure out how many bags of chicken you will be making and line the freezer bags up on the counter. Add the chicken parts to the individual bags. Now add the rest of the ingredients given to each bag. I work mine like an assembly line, adding the chicken to all the bags then the thyme goes in all the bags, then the salt on down the list.


When all the ingredients are added seal each bag getting out as much of the air as you possibly can. Then kind of massage the bags to thoroughly mix the ingredients and make sure the chicken is coated well. Label and freeze the bags.


When you want to serve the chicken thaw in the fridge overnight. Place the contents of the bag into a glass baking dish (2-3 serving fit nicely in an 8x8) arranging the chicken pieces skin side down. Bake at 450 degrees (Fahrenheit) for 20 minutes, turn chicken over and cook an additional 15 to 20 minutes until done.


Wednesday, March 10, 2021

Chocolate Stout Cupcakes


For the month of March I decided to go with a chocolate stout cupcake. These are really a simple change up for our small batch cupcakes. All I really did was switch some stout for the water in the cupcake base and leave out the vanilla extract I usually add.


This is a small batch cupcake made from ⅓ of a standard box of cake mix. If you haven't read my blog detailing my process for dividing the box of cake mix you can find it here.


This time I am using a box of a dark chocolate fudge mix. As always I mixed my liquid ingredients first.


Then I added the cake mix and only beat it for about 1 ½ minutes. This prevents the batter from getting over mixed and loosing it's rise when baked.


Next I divided it as evenly as possible in my cupcake/muffin pan. I almost always get 6 cupcakes from these batches.


Then just bake according to the directions on your box of mix. Allow to cool in the pan got 10 minutes then transfer to a wire rack to cool to room temperature. 

\


Once the cupcakes are cool we can decorate them. I absolutely love this frosting no matter what flavor I make it. This time I used some unsweetened baking cocoa to make it chocolate. The only real warning I have with the frosting recipe is be sure your cream cheese is room temperature before you start making the frosting. I find if I skip this the frosting turns out tasting really strongly of cream cheese and looses the wonderful delicate texture and flavor.


I used a decorating tip to make a swirl on my cupcakes and then sprinkled them with some St Patrick's Day sprinkles and some chocolate chunks I had in my cabinet. I think they turned out really cute and very yummy.


You can find the printable PDF here.


Chocolate Stout Cupcakes


of a box of dark chocolate cake mix

cup stout

1 egg

3 ½ Tablespoons vegetable oil


Start by preheating your oven to the temperature your box of cake mix calls for, mine was 350°F. Line your cupcake pan with paper liners or grease really well.


Combine the stout, egg, and oil in a mixing bowl and combine well.


Add the cake mix and beat for up to 90 seconds.


Portion into cupcake pan and bake according to instructions on your cake mix. Mine was baked at 350°F for about 20 minutes.


Cool in pan for 10 minutes then move to a cooling rack and cool completely.


Chocolate Whipped Cream Frosting


3 oz cream cheese (the kind in the block not the tub) softened at room temperature

cup powdered sugar

2 Tablespoons unsweetened baking cocoa

¾ cup heavy whipping cream

¼ to ½ teaspoon vanilla extract


Begin by beating the cream cheese with a mixer on medium speed until smooth. Add the powdered sugar and cocoa powder and beat on medium again until smooth, scrapping the bowl and beaters often with a spatula.


Add the vanilla to the heavy cream. With the mixer on low very slowly add the cream/vanilla mixture until all is incorporated. Scrape the bowl and the beaters often during this process so it is all combined evenly.


Turn the mixer up to high and beat until stiff peaks form.


Be sure to store the frosting in the refrigerator.


Pipe of spread the frosting onto your cupcakes as desired.


Decorate however you want to fit the occasion you will be serving the cupcakes.


Wednesday, March 3, 2021

Bacon Cheeseburger Rice Bowl


This recipe! Oh man it was something. LOL I first got the idea while innocently scrolling through Facebook the other day. I came across a link to a food delivery company that delivers pre-made meals to your house. Kind of like Freshly but on a much smaller scale. Anyway I was curious so I took a look at the website. I got as far as looking at the menu, there I saw a dish they were offering for a cheeseburger bowl. It looked really yummy, I have no idea what was in it because the description didn't tell much. So I decided the logical thing to do was to Google cheeseburger bowl and find a recipe. It should have been easy. I got a bunch of hits but all of them were basically just a salad with ground beef and burger toppings. None of them had the rice base that I was looking for. Most of them looked really good but they just not what I was looking for. In the summer when it is hot and I don't want to cook or eat a hot meal those would be fantastic and I will probably try that version then. But currently is cold out, there is a bunch of snow on the ground. I want a hot dinner, I want comfort food.


I decided to think about the situation for a while, I had a fairly good idea of what I wanted to do but no definite idea. In the middle of the night I came up with the recipe I am posting today.


I ended up loving this dish and I know I will be making it often.


So let me go over what I did then the recipe will follow.


I cooked some jasmine rice for the base, this is my favorite rice for most of my rice bowls. It has a wonderful flavor and cooks up really nicely.


I browned the ground beef with just some salt and pepper.


For the very top of the bowl I cut some potatoes really small, think shoestring fries that have been chopped up. These are put on kind of like you add croutons to the top of a salad to mimic the french fries on the side of the burger.


For the sauce I used mayo, ketchup and mustard with a bit of chipotle hot sauce, since this is fairly close to what would go on the top of a burger. This a spot you can change it up. Do you love barbecue sauce on your burger? Use it instead of the ketchup. This is just a guide.


For the toppings you can use whatever you want. My toppings are here as a suggestion not a set of rules. What makes your favorite burger? Do you love an onion ring on yours? Add it! Another type of cheese? Add it! Whatever you like or don't like you can make this to fit what you love.


So the message here is you can add or subtract to make this your own.


You can find the printable PDF here.


Bacon Cheeseburger Rice Bowl


½ pound potatoes

vegetable oil

salt


½ cup Jasmine rice

¾ cup water

pepper


½ pound ground beef


¼ cup mayonnaise

2 Tablespoons ketchup

1 teaspoon yellow mustard

Chipotle Tabasco sauce to taste


Toppings of your choice:

(I used)

shredded lettuce

thin sliced onion

sliced pickle

halved grape tomatoes

cooked, chopped bacon

shredded cheese (I used a Mexican blend because that was what I had)


Preheat the oven to 450° F,


Dice the potatoes and toss with enough vegetable oil to coat. Sprinkle with salt. Spread on a baking sheet and bake about 20 minutes, stirring around half way through. You want them to brown up and cook through.


Add the rice and water to a saucepan, season to taste with salt and pepper. Bring to a boil, cover and simmer for 18 or so minutes.


Season the ground beef with salt and pepper and cook through.


Combine all the sauce ingredients, taste and adjust.


Prep your topping ingredients.


In two bowls layer 

the rice, 


the lettuce,


 ground beef


 and other toppings.


Drizzle with the sauce


and top with the potatoes. 


Enjoy!

Serves 2