Have you checked out all my blogs?


Dollhouse Minis: http://joannesminis.blogspot.com/


18” Dolls: http://joannes18dolls.blogspot.com/


General Crafts: http://joannes-place.blogspot.com/


Wednesday, February 24, 2021

Hot Fudge Pudding Cake


This week I am sharing a recipe that has been a favorite of my family for many years. When my kids were growing up I made this so often I had the recipe memorized. My sons, especially would request it on a regular basis.


A couple of weeks ago I realized I hadn't had it a couple of years. I had tried a couple of similar desserts but they just weren't the same. So I did the logical thing. I dug out my old family sized recipe and began the process of making it suitable for a smaller household. Since it is a recipe I am so familiar with I had a head-start, I kind of “just knew” what was going to work. I am very pleased with the results and I know I will be making this on a regular basis.


This version makes about 3 or 4 really nice sized servings so perfect for the small household.


The batter in the beginning is very thick, almost a paste like consistency. I find that if you use lower fat milk in it it sometimes is thinner. I use full fat milk so mine is very thick.


The desert is really simple but magical at the same time. You spread the thick batter in the pan (the cut down version uses an 8” bu 4” loaf pan) then sprinkle the top with a layer of brown sugar and then with a layer of cocoa powder. Top this all with some very hot water it needs to be steaming like if you were going to make tea. Then bake for 45 minutes. During the baking process the cake part raises to the top and the bottom becomes a rich pudding.


When I took it from the oven the pudding was bubbling up around the edges. Even after as many times as I have made this I am always mesmerized by that sight.


This keeps well covered in the fridge for a few days, just be sure to cover it up. Then I like to re-heat the individual servings in the microwave so they are warmed up.


I hope you enjoy this as much as my family does.


You can find the PDF of this recipe here. 


Hot Fudge Pudding Cake


½ cup flour

1/3 cup sugar

1 Tablespoon cocoa, unsweetened

1 teaspoon baking powder

1/8 teaspoon salt


¼ cup milk

1 Tablespoon butter, melted


½ cup brown sugar

2 Tablespoons cocoa, unsweetened


1 1/3 cup very hot water


Preheat oven to 350°F.


In a bowl combine the flour, sugar, 1 Tablespoon cocoa, baking powder, and salt.


 Add the milk and melted butter and combine well. 


Spread this mixture into the bottom of an 8” by 4” loaf pan.


Sprinkle the top of the batter with the brown sugar 


and the remaining 2 Tablespoons of cocoa powder.


Carefully pour the hot water over the top and carefully move to the preheated oven.


Bake for 45 minutes.


Allow to cool a bit before serving.


Wednesday, February 17, 2021

Meaty Spaghetti Sauce


It seemed like the universe decided I was going to be eating spaghetti this last week. It seemed like everywhere I looked I was seeing pictures of yummy pasta covered in luscious red sauce. It started innocently with the cover of the latest Food Network Magazine with a big old plate of Spaghetti that was perfectly plated with meatballs placed in the perfect location. Then two of my favorite YouTube creators made their versions of spaghetti on their weekly vlogs. Then there was the flip through of my favorite cookbook that landed on a picture of, you guessed it Spaghetti sauce! I decided to just go with the massive number of hints being sent my way and made up a batch of one of my favorite sauces. This is the recipe I dig out when I want to do a little extra and make it a little bit special.


This sauce is one that cooks on the stove-top for a couple of hours so allow some time. It needs at least 90 minutes but 2 hours is way better. More time is also good for this one. I have cooked mine for up to 4 hours before, just be sure to check it often and add water as needed. You don't want it to scorch after all the love you put into it. Now just because it takes a while it is not a hard recipe, in fact it is pretty easy to make and since it does cook for a while you can get it started then clean up and all you really need to do at dinner time is cook some pasta and plate it up. Oh, and take all the compliments if you serve this to someone special.


A little background on this recipe since I was asked recently where I find my recipes. This is one I've been making for many years. I combined a basic recipe with things I loved from a couple of other really good recipes and this is the result. I really can't tell you how many times I've made this but it is a lot. I used to make a much larger version when my kids were growing up. Then as they moved out on their own I scaled the recipe down. Now it makes about 3 good size servings. I love how meaty it is and if you have any leftover it freezes really well. One of my favorite uses for the leftovers is to freeze them in about 1 cup portions. Then when I need a fast dinner I pull out that along with a pre-cooked pizza crust and all you need to add is cheese to get a really yummy pizza. If you have other toppings all the better but a great quick meal when you are running late.


Over the years I've tried many meats in this sauce. Italian sausage is really good but kind of a waste in opinion. The sauce is so flavorful that the sausage can get lost. I do use it sometimes though. I tried ground turkey (and ground chicken) and found it to be too bland and I didn't really enjoy the texture. For me good old ground beef has the best flavor and texture in this. But feel free to use whatever you love.


I added the mushrooms in to the sauce a long time ago, first to stretch the meat a bit but also to give a good rich flavor and even my mushroom hating sons would eat them if there weren't too many.


You can find the printable PDF of this recipe here.


Meaty Spaghetti Sauce


½ lb ground beef

½ to ¾ cup chopped mushrooms

¾ cup chopped onion

1 teaspoon chopped garlic


1 teaspoon Italian herbs

1 (8 oz) can tomato sauce

1 (6 oz) can tomato paste

1 cup water (you might need more later)


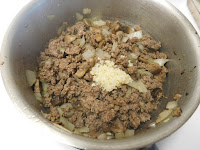
In a medium saucepan cook the ground beef until it starts to release some fat.


At this point add the mushrooms and onions. Cook until the meat is cooked through and the veggies are soft.


Drain any excess fat from the pan, then add the garlic and cook until it is fragrant.


Add the Italian herbs and give them a minute or so to become fragrant. (I find this releases a lot more of their flavor)


Add the tomato sauce, tomato paste, water and a bit of salt and pepper. Stir to combine well.


Bring to a boil, reduce to a simmer and allow to simmer, covered for at least 90 minutes. 2 hours is better and more time is good too.


Check the pan from time to time and stir it to prevent your sauce from scorching. After about an hour start tasting for seasoning. If it needs more salt and/or pepper add small amounts and allow to cook for a while before tasting again.


When ready to eat cook about 2 oz of pasta per person and serve.

To serve this I like to toss my cooked spaghetti with some of the sauce in a bowl to coat then transfer to the plate and add more sauce on top.


Don't forget the Parmesan cheese.

Wednesday, February 10, 2021

Pulled Pork Taco Bowls


This week I am sharing a recipe that I found a while back. I have been playing around with the recipe for a while and it is to the point where I love it and wanted to share it. 


First I want say that I love rice bowls they have become one of my favorite things to make for dinner. They are especially nice when the leftover bowl will be for lunch the next day because they reheat so well. They are filling and can be changed up to be whatever you want.


This pulled pork taco bowl is one I love to make. I almost always have some pulled pork in my freezer because it is a very versatile ingredient that is super easy and cheap to make. The last time I made up a batch I found pork bone-in roasts at 88¢ a pound!! I couldn't resist that price so I grabbed a few and made up a nice batch of pulled pork in my slow cooker to put in the freezer. Since most of the recipes I make with pulled pork call for about 10 oz that is the amount I bag mine up in to freeze it. If I need more I can pull out more than 1 bag.


You will need enough rice for each bowl, I start out with about ½ cup of raw jasmine rice for 2 servings. You might want more or less depending on how hungry you are. I prefer jasmine rice for most bowls because it has a much better flavor than the standard (cheap) long grain white rice. Use whatever your favorite rice is for this. You could even use instant rice if that is what you prefer.


For this dish I like to stir together a quick fresh salsa, don't worry if you don't like spicy this salsa actually has no heat at all. You could definitely use your favorite jarred salsa in its place. I also like to top my taco bowl with shredded Mexi cheese and sour cream just like I do when I have tacos. I would have added either avocado or guacamole if I had it on hand. So use your favorite toppings on this.


Sometimes I add a jalapeno along with the green pepper, I forgot to pick one up at the store this week. It is good either way. Use you favorite taco seasoning either from a packet or from a larger container like I do. I prefer to buy the larger container just so I always have it on hand.

Follow this link for a printable PDF of this recipe.


Pulled Pork Taco Bowls


1 small onion

1 green bell pepper

½ cup chopped tomato

¼ cup chopped cilantro

1 lime

1 Tablespoon vegetable oil

10 oz pulled pork (no sauce)

1 Tablespoon taco seasoning

½ cup water


cooked rice (enough for 2 servings)

toppings of your choice


Halve, peel and thinly slice the onion, then finely chop about 2 Tablespoons of the onion.


Core, de-seed and cut the green pepper into strips.


Cut the lime into quarters.


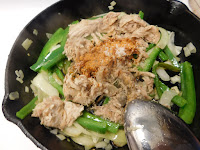
Heat a large skillet over medium high heat and add the oil. When the oil gets hot (not smoking just hot) add the sliced onion and the green pepper. Cook just until the softened.


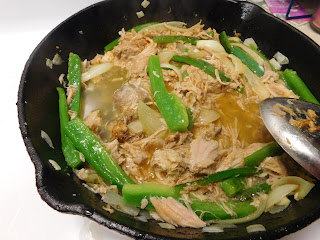
Add the pulled pork to the pan with the veggies and mix together. Season the meat veggie mixture with the taco seasoning and salt and pepper to taste. Add the water and bring to a boil then reduce to a simmer and let simmer until the liquid is mostly gone. Taste and adjust the seasonings.


Meanwhile in a small bowl combine the chopped tomato, the chopped onion, half the cilantro and the juice from half the lime. Season with salt and pepper and taste. Add more lime juice and/or salt and pepper as needed.


When the meat mixture is ready serve in a bowl over the rice top with the fresh salsa and your choice of toppings. Sprinkle the remaining cilantro over the top.


Serve the rest of the lime on the side to squeeze over as desired.


Wednesday, February 3, 2021

Black Forest Inspired Cupcakes

Black Forest Inspired Cupcakes


For the first recipe of the new year (yeah, it's a month late) I decided to post another small batch cupcake recipe. This week I have created a printable PDF of the recipe which you can find here. I plan to do this with all future recipes so you can easily print out the recipes to use.


This time I was inspired by Black Forest Cake which is just so yummy and perfect for anytime. I say inspired because I took my own path on these so they aren't a true Black Forest cake just close and I think as good or better. And a plus this is as always a small batch recipe so you will have just enough for the small household. I got 8 cupcakes in my batch.


We are starting with ⅓ of a box of a dark chocolate cake mix. If you haven't read my post on dividing boxed cake mix you can find it here. In this post I not only tell you how to successfully divide a standard box of cake mix but explain why I love to do this.


Since I wanted a nice rich chocolate flavor in my cupcakes I used coffee in place of the water in my batch. I love how this simple substitution makes the chocolate just taste more chocolaty and richer. Since one of the trademarks of Black Forest cake is the hint of almond I added some almond extract along with the vanilla extract. In a previous batch I had added just the almond in place of the vanilla and wasn't nearly as happy with the flavor. I still feel the vanilla is the secret to getting rid of the “box mix” taste. For the cherries in this recipe I simply used thawed frozen ones. Again in a previous batch I had tried other options but the simplicity of the frozen cherries tastes so much fresher and less 'chemically” in them.


Once again this month I am using my cream cheese/ whipped cream frosting recipe I found a few months ago. I love this but I have found the secret is to make sure that your cream cheese is completely warmed to room temperature before you start making the frosting. I have found that if it is at all cold it will 1) not mix in as well (I ended up with lumps of cream cheese one time) and 2) the cream cheese flavor is more more pronounced if it is still cold (I think because it doesn't mix in thoroughly)


To decorate the top of the cupcakes I first sprinkled them with some Valentine's Day sprinkles then with some grated chocolate (grated or shaved chocolate is another of the must haves for Black Forest Cake) On the very top I placed a well drained thawed cherry. Just be sure to let the juice drain really well before placing. I thawed the ones I was going to use for the top on top of several layers of paper towel and they were fine. In fact they didn't stain the frosting at all even on the ones that were eaten last (about a week later)


Black Forest Inspired Cupcakes


⅓ of a box of dark chocolate cake mix

⅓ cup brewed coffee (room temperature)

1 egg

3 Tablespoons vegetable oil

¼ teaspoon almond extract

¼ teaspoon vanilla extract

12 frozen cherries, thawed and chopped


Start by preheating your oven to the temperature your box of cake mix calls for, mine was 350°F. Line your cupcake pan with paper liners or grease really well.


Combine the coffee, egg, oil, almond extract, and vanilla in a mixing bowl and combine well.


Add the cake mix and beat for up to 90 seconds. Add the chopped cherries and any juice that drained from them and gently fold into the batter.


Portion into cupcake pan and bake according to instructions on your cake mix. Mine was baked at 350°F for about 20 minutes.


Cool in pan for 10 minutes then move to a cooling rack and cool completely.


Basic Whipped Cream Frosting


3 oz cream cheese (the kind in the block not the tub) softened at room temperature

⅓ cup powdered sugar

¾ cup heavy whipping cream

¼ to ½ teaspoon vanilla extract

Sprinkles to decorate if desired

Grated or shaved chocolate

8 frozen cherries, thawed and well drained (1 per cupcake)


Begin by beating the cream cheese with a mixer on medium speed until smooth. Add the powdered sugar and beat on medium again until smooth, scrapping the bowl and beaters often with a spatula.


Add the vanilla to the heavy cream. With the mixer on low very slowly add the cream/vanilla mixture until all is incorporated. Scrape the bowl and the beaters often during this process so it is all combined evenly.


Turn the mixer up to high and beat until stiff peaks form.


I used a Wilton 1M decorating tip and a disposable decorating bag to apply my frosting. I just did a simple swirl. Then sprinkle with your desired sprinkles (I used Valentine's Day ones) and some grated chocolate.


 Top with a single cherry and enjoy.