Have you checked out all my blogs?


Dollhouse Minis: http://joannesminis.blogspot.com/


18” Dolls: http://joannes18dolls.blogspot.com/


General Crafts: http://joannes-place.blogspot.com/


Monday, November 6, 2023

Slow Cooker Chili


Since the weather is definitely getting colder here I am personally focusing more on comfort foods like soups, chili, stews, casseroles a lot of the time. One of the first to come to mind was chili so I thought I would share this recipe with all of you. This takes a lot of inspiration from the chili I made all the time when my kids were growing up. The main difference is this feeds two people not an army. I did some tweaking to the recipe to make it work in the smaller amount easily.


When we get to the ingredients you might be surprised by one of them, just take a breath and try it. You see I add just a tiny bit of baking cocoa to my basic chili. Not enough that anyone will taste even a hint of chocolate but just enough to get a rich deep flavor that will bring you back for another serving.


Now I have dozens of recipes for chili, some with meat some without. Some with beans some without. This one has both ground beef and beans so it makes a hearty meal.


A few things you should know about this particular chili, first it is middle of the road chili as far as spice level, not really hot but not too mild at the same time. You can always add some hot sauce when you to each portion to taste. Also it is a soupy chili since I always serve it over rice. That is my favorite way to serve chili and it makes for a filling meal that really sticks to your ribs. If you want a thicker chili cut down or leave out the beef broth from the recipe.


This recipe is sized to fit my 2 quart slow cooker. I do love to make chili in the slow cooker for several reasons on being it is a food that really benefits from the low slow cooking method, it just comes together so nicely. Also not having to do much to serve dinner at the end of a busy day is so nice.


Now since this needs at least 7 hours of cooking time at the low setting you will need to start in the morning. We start by cooking the ground beef and onion in a small skillet until the meat is cooked through and the onion is softened. Drain off any excess fat from the pan.


Then add the garlic, chili powder and cumin and cook just until they all become fragrant. By cooking the spices particularly the cumin you release more of the flavor and I find it infuses with the rest of the dish much better.


Then move the meat mixture into the slow cooker followed by the rest of the chili ingredients. Give it a stir, cover and cook it all day long.


At the end of the day put some rice in the bottom of your bowl


followed by about half of the chili.


Then top as desired,

You can find a downloadable/printable version of this recipe here.


Slow Cooker Chili


Chili ingredients:


½ pound ground beef

½ cup chopped onion

2 cloves garlic, finely chopped or grated

2 tsp chili powder

½ tsp cumin powder

1 ½ cups beef broth (you can cut this down or leave it out for a thicker chili)

1 can (15 oz) kidney beans, drained and rinsed

1 can (10 oz) diced tomatoes with green chili (like Rotel) with the liquid

½ tsp unsweetened cocoa powder

red pepper flakes, to taste (I put in just a bit less that ¼ tsp)


Ingredients to serve the chili


2 cups of cooked rice

shredded cheese

chopped avocado

sour cream

chopped cilantro


In the morning cook the ground beef and chopped onion over medium heat until the meat is cooked through and the onion is tender. Drain off any excess fat from the pan.


 Add the garlic, chili powder and cumin and cook just long enough that they become fragrant.


Pour the meat mixture into the bottom of a 2 quart slow cooker. Add the remaining chili ingredients and give the mixture a stir. Set on low and cook for at least 7 hours. 8 or 9 hours is even better.


When ready to serve place the rice in the bottom of bowls, top with the chili and top as desired.


Serves 2

Sunday, November 5, 2023

The Cook the Cookbook Project- Week 1


Since this is the first menu from the first chapter let’s talk about chapter 1 first. The title of the first chapter is “American Favorites” and they say that thousands of people were polled about what their favorite dish was. The top 12 were used to create the 9 menus in this chapter.


For the first menu the items from the list are the broiled steak and the apple pie.


To fill out the menu we have a salad, “French Potatoes” (French fries) dinner rolls, and apple pie with cheese.


My first thought when I read the menu was that I remember years ago I used to always cook steaks (and other meats) under the broiler but I haven’t done that in decades. It might be interesting to visit that technique again. And I stand by that idea, except the broiler in my oven has to the worst broiler on the planet. While the steak cooked alright in the given time it didn’t develop a nice sear at all. The outside of it was really disappointing and I’m pretty sure their idea of rare was not as rare as it came out in the given time but it was cooked the way I like it on the inside. The seasoning was only some salt and pepper so very simple but overall does a steak need a lot more than that?


For the most part I am trying to make the recipes as close to what they would have been done by a homemaker back when the book was new. That lead to my first quandary, what kind of potato to use. The recipe doesn’t specify so I thought back and I am pretty sure when my mom bought potatoes in the grocery store she would buy russets. So that was what I went with. For the most part we grew most of the potatoes we ate so she didn’t buy very often. The potatoes were excellent in the end and I am going to be playing with the method from this menu in the future. They were crispy on the outside and fluffy on the inside. Just like fries from a sit-down restaurant.


Next thing that I thought way too long about was what vinegar to use in the salad dressing? I think there would probably have only been two choices back in the day but I might be wrong about that. I only remember my mom having white distilled vinegar and cider vinegar on hand when I was a kid. I really can’t stand either of them and I know I said I wasn’t going to let my tastes get in the way of making these recipes as written. But to be fair the type of vinegar was not specified so I decided to use some white wine vinegar this time. I should probably do some research and find out what the options were back in the day. The recipe did call for MSG so I grabbed a container of it, I don’t normally have it on hand but I have been wanting to experiment with it a bit. I know it has gotten a lot of bad press in years past but a lot of the chefs I watch online use it so I decided to give it a try. I have to say I love the dressing from the recipe and it made a wonderful salad to go with the rest of the meal.


I did opt to use some bagged salad for the salad, mostly because the heads of lettuce were not looking very good when I went to the store this week. The bagged salad was much fresher looking for sure.


They actually specified Crusty rolls but I decided to make the executive decision to just make some rolls using some frozen roll dough I had on hand. (today was already a heavy baking day along with a bunch of other things I needed to get done) Since the implication in the book was that the rolls would have been purchased I felt it was a fair change.


The first item that needed to be made for the menu was the apple pie. So that got started early in the morning. I do like to chill the pie crust dough before I roll it out. I did grab a package of lard at the store for the crust recipe. That was the fat of choice in the recipe and I remember both my mom and grandma used to use it for pie crust. I have used it in the past also but haven’t for probably 30 or more years. The crust did go together beautifully. I have been struggling with some of my pie crusts lately and this slight change might be the answer. This is one of the best pie crusts I have made in a long time. It is perfectly flaky and tastes wonderful.


The menu specified adding cheese to the pie which is something I have never done in my whole life. I have to say I just don’t “get it” I mean it was okay, it tasted fine, but it just wasn’t something I will probably do again. At least I can say I tried it though.

Thursday, November 2, 2023

The Cook the Cookbook Project- Project Introduction


I have a kind of long term project that I am going to start in the month of November and since I want to document it I am going to be blogging about it as I go.


Today I thought I would steal a few minutes of your time and tell you not only about the project but also the history behind me wanting to do this.


So first you are probably asking what I am up to, so in a nutshell I have picked a cookbook and I want to cook my way through the book from beginning to end. I know this has been done before, heck there is even a movie about someone doing this. But it has been on my list of things I want to do for many years. So a bit of background first.


I remember I first brought up the idea when my daughter was just a baby. (she turned 30 in May of this year so it’s been a while) I actually shared the idea with someone in my life who by the nature of our relationship should have been supportive of my dreams. Instead this person told me that cooking through a cook book was the dumbest thing they had ever heard of and that I had to be stupid to even think of doing it. So instead of following my dream I did what I normally did at the time and just let it go. It really wasn’t worth fighting about and there would have been many fights it I had continued with the idea.


So why did I want to do this, I think it is because first of all I love books and reading. But most of all I love cookbooks. Some of my earliest memories surrounding books are of me curled up somewhere with one of my mom’s cookbooks flipping through the pages and looking at the pictures. This was way before I started to go to school and learned to read. But I loved those cookbooks so much. Then I learned to read and a whole new world in those books opened up. I started reading them. Yes, you read that right and I still do it, I will sit down with a cook book and read it from cover to cover just like you might read a novel.


My love of cookbooks grew and I started collecting them, mostly older cookbooks. I have weeded my collection down a lot but I still have a many old cookbooks that I have found over the years. I also love new cook books too by the way.


A few months ago I was looking for something to watch on Netflix and saw that they had the movie Julie and Julia available. I watched it and loved it. That sparked the desire to go back and follow that old dream of cooking through a cookbook. But which one? I was originally going to start the project in January of 2024.. I figured that would give me time to find the perfect cook book and time to prepare to do this. Then one day a week or so ago I had to fix one of my favorite books in my collection. You see I had left it on the table and during the night my cat had knocked the book on the floor. This was just enough to make the front cover finally let go of the rest of the book. It was already just barely holding on but now I had a front cover and book as 2 definitely separate pieces. So grabbed the book and some tape and started the repair job. As I was fixing the book I was also enjoying the art work in it. I realized I haven’t cooked much out of it although I since I love the artwork I look at it often. Then I started to wonder how old this book is, I had a pretty good idea but decided to check to be sure. To my surprise, I found the book holds a copy-write date of the same year I was born. Since my birthday is this month I decided this is the perfect book for this project. And that starting in November just made the most sense, kind of a birthday present to me. I finally am doing something I have wanted to do for so long and I am very excited about it.


So a bit about this book, it is not set up like a lot of normal cookbooks where there are chapters that have different types of foods in each chapter. Instead it is set up with chapters that are themed (American Favorites, Quick & Easy, etc) and each chapter has menus that reflect that theme. Each menu is a full dinner menu fitting the rough theme of the chapter. Hopefully that makes sense. If you follow the blog posts as I post them it will make a lot more sense if you are currently confused.


I know there are a couple of recipes that I might not be able to find key ingredients for. I am going to do my absolute best to either find the needed ingredients (within reason) or find substitutions for ones I can’t find. I really want to experience everything in book if possible.


There are a few foods that I don’t normally make because they are foods I don’t really like. Those I have decided I am going to make anyway and eat. I think part of this journey to eat things I might not normally eat and there are really very few foods I don’t like.


I am planning to make 1 menu a week or so for however long it takes to get to the end. I figure it will take about a year and a half to two years to get through it all at that pace.


So I hope you all enjoy the journey with me. If this is as much fun as I think it will be I might even do it again


with a different cookbook in the future.

Monday, February 6, 2023

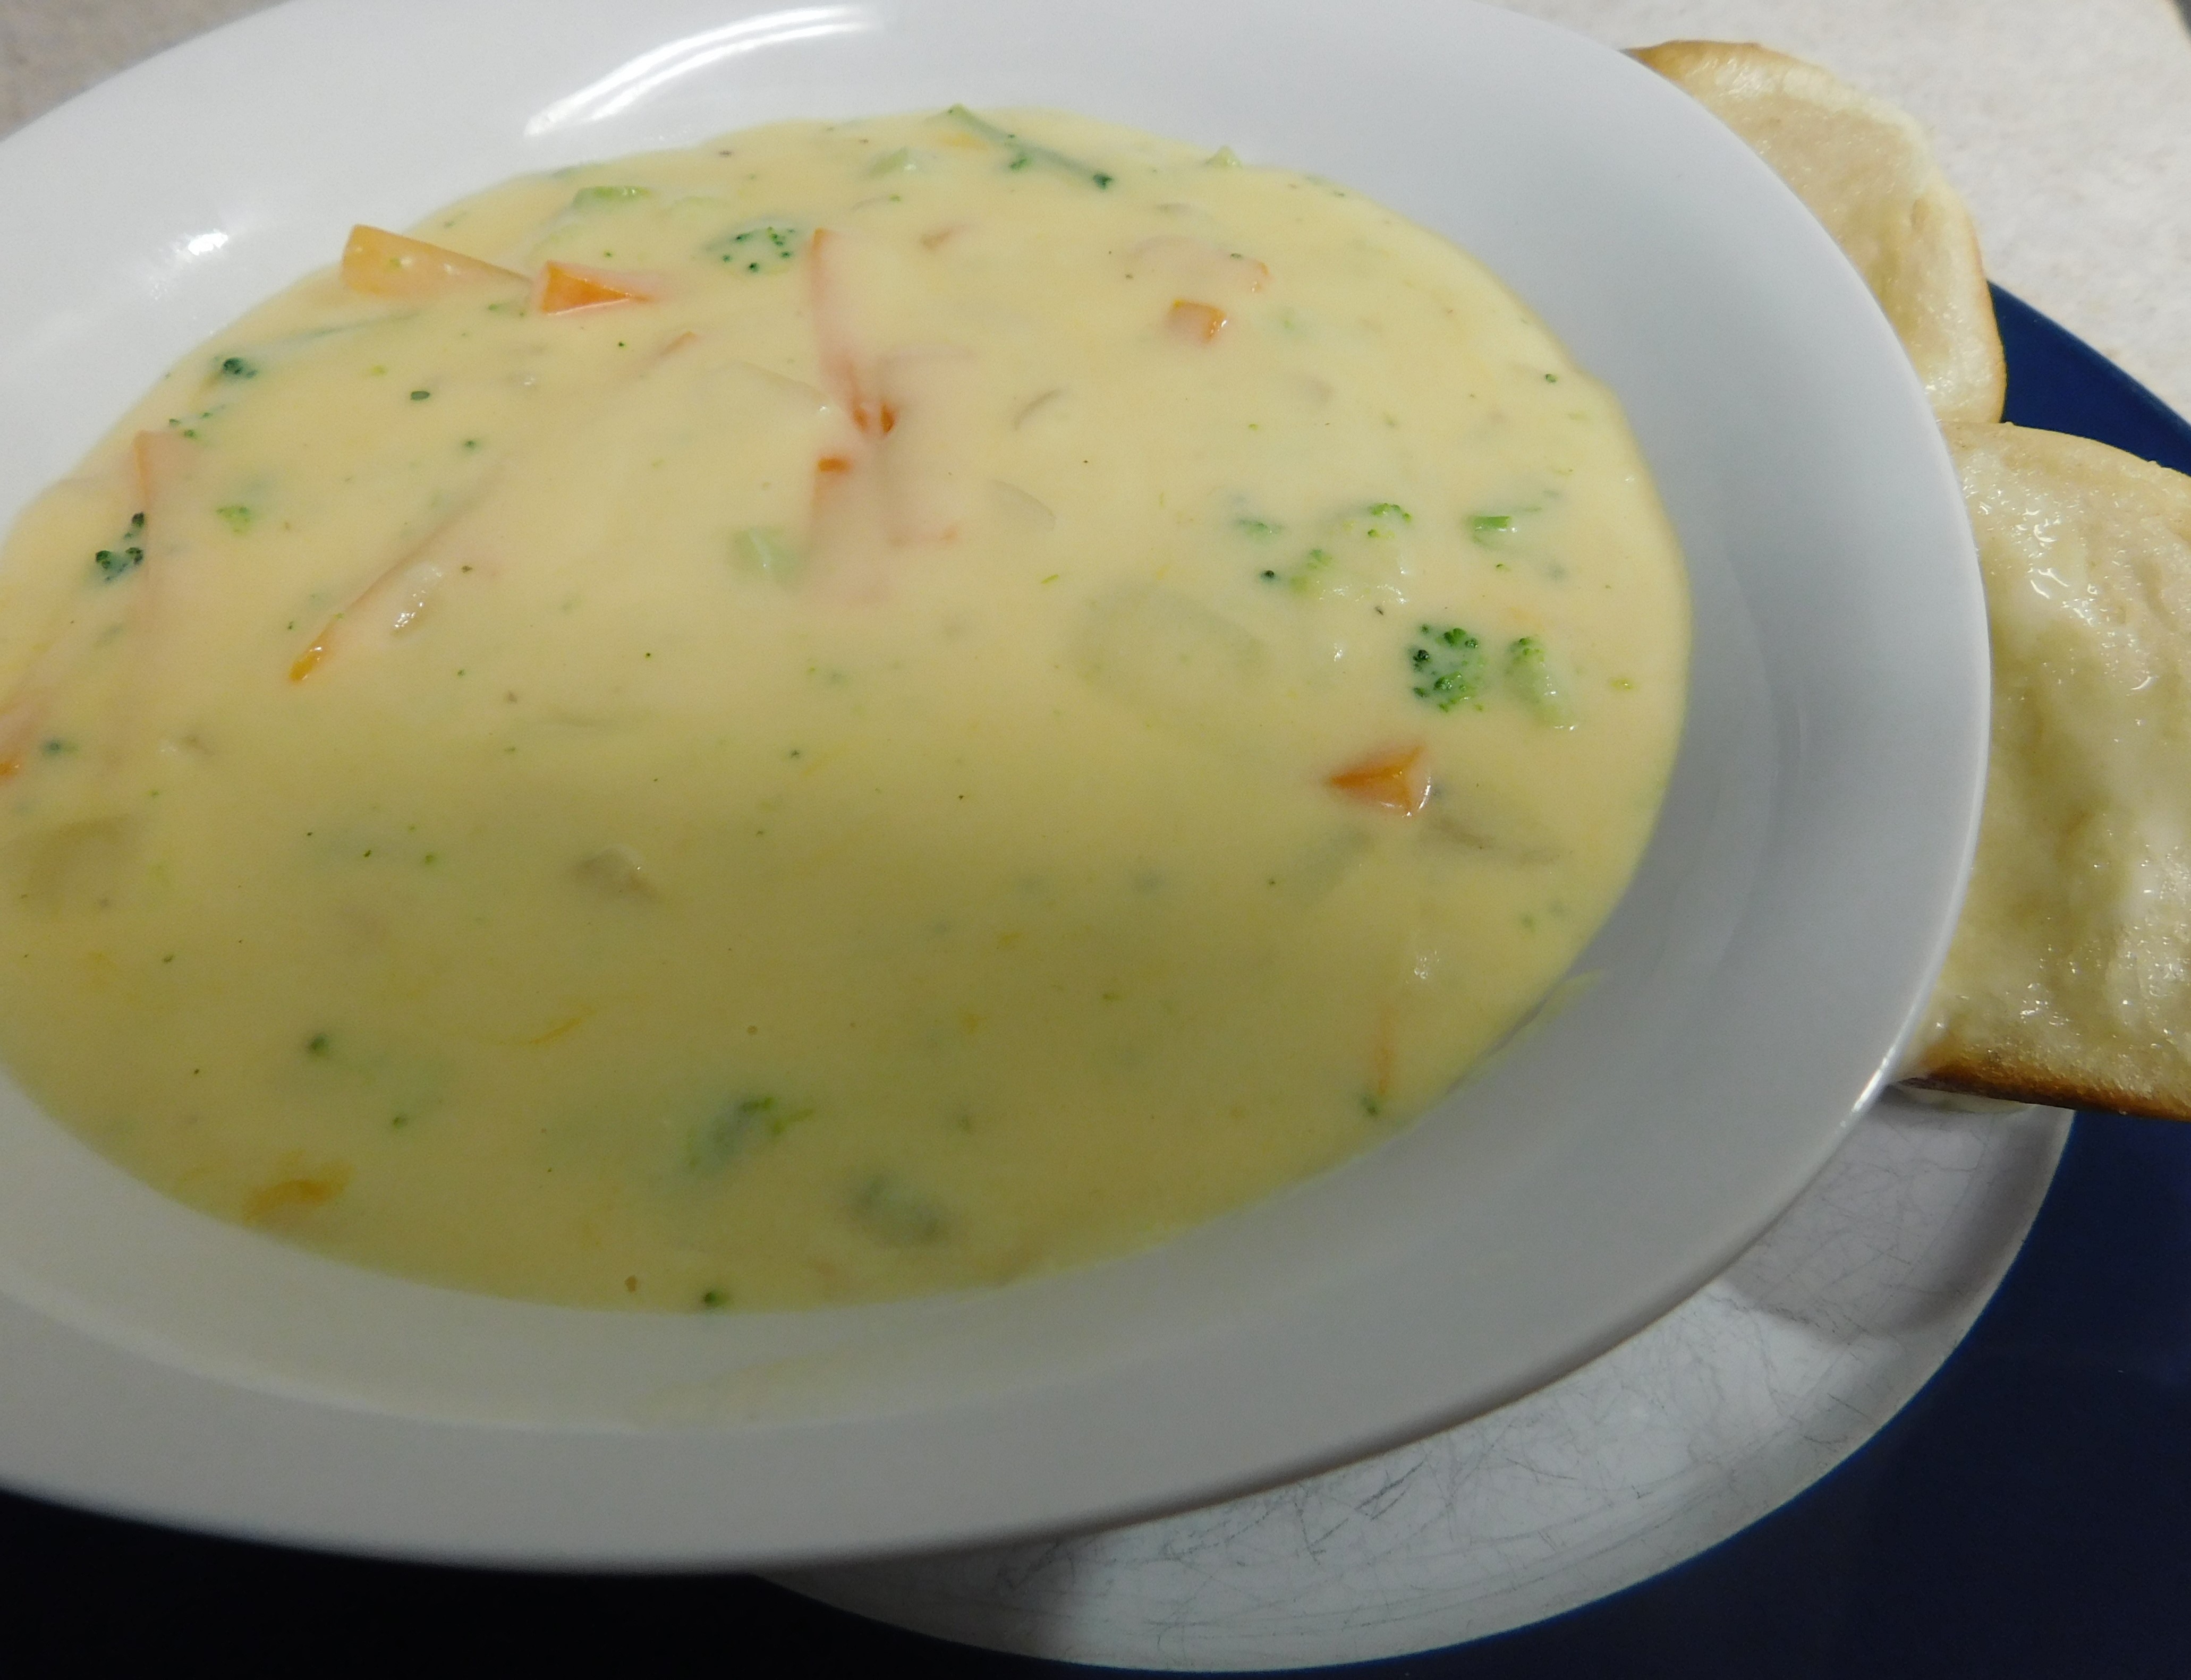
Broccoli Cheddar Soup


A while back a friend asked me if I had a recipe for Broccoli Cheddar Soup and I promised to work on it. I did have several that I have made over the years but no one that I loved. There were points about each on that I loved/liked but not an overall favorite. So I did what I do in that case and pulled out all of them, read over my notes on each and took the things I liked the best and combined them to make one that I hope is superior.


I did use frozen cut broccoli for this because it is more convenient for me and almost always in my kitchen. You could use an equal amount of lightly cooked fresh broccoli if you wish.


I made this a very thick soup, I mean very thick because that is how I like most this soup the best. If you want it to not be so thick either cut both the butter and four down to 2 Tablespoons or add an extra cup of chicken broth. Either of those steps will give a thinner soup and still taste just as good.


This is a pretty basic soup and can be dressed up in many ways. If you love celery or peppers in your soup add them along with the onions and carrots.


So without any further chatting let’s make some soup.


You can find a downloadable/printable version of this recipe here.


Broccoli Cheddar Soup


¼ cup butter, cubed*

½ cup chopped onion

½ cup matchstick cut (or coarsely grated) carrots

1 clove garlic, minced or grated

¼ cup flour*

salt and pepper to taste

1 ½ cups milk

1 cup chicken broth*

1 cup frozen chopped broccoli

1 cup shredded sharp cheddar cheese


In a medium saucepan melt the butter over medium heat and then add the onion and carrots. Cook stirring occasionally until the onion is tender and translucent. Stir in the garlic and cook just until fragrant.


Add the flour, salt, and pepper cook stirring for about 1 minute being sure all the veggies are well coated with the flour.


Add the liquid ingredients and stir until the mixture bubbles. Turn the heat down to barely a simmer and cook for 5 to 10 minutes until the carrots are almost cooked.


Add the broccoli cook and stir until heated through.


Remove the pan from the heat and stir in the shredded cheese until melted.


Taste for seasoning, adjust if needed and serve.


I got 2 large bowls of soup from this recipe.


*Note: this is written as a very thick soup, if you prefer a thinner soup you can do either/both of the following.


1- cut both the butter and flour amounts to 2 Tablespoons and proceed as directed.

2- add an additional cup of chicken stock


Monday, January 30, 2023

Air Fryer Spicy Fried Chicken


I recently purchased an air fryer, I know a lot of you already have one and I am really late to the partly. I had a lot of trouble convincing myself that the space it was going take up in my kitchen was going to be worth it. Boy am I glad I purchased it and really wish I had done so sooner.


I do admit that I really didn’t research the brand/model that I purchased. I had done enough research to know what size I wanted (around 4 quart) and I knew what the prices should be. One recent Sunday afternoon I was looking around on the internet and came across one that was the size I wanted and the best price I had seen, it was also sold by Best Buy so I knew it was a reputable sale. So I bit the bullet and purchased. It only took a few days to be delivered right to my door (no need to go out into the frozen temperatures or stand in any lines) and I was off and running.


I knew one of the first recipes I wanted to try in it was for fried chicken. I love nice crispy fried chicken but I don’t love the mess of frying it. I wanted a less oil, less mess really crispy fried chicken. I tried a couple of different recipes and then decided what I really wanted flavor wise was a spicy fried chicken. Something like you might get at a certain fast food place that shares its name with an old cartoon character…..


I found a lot of copycat recipes for said chicken and I looked over several picked the ingredients that I felt would give me the end result I was after and that is what we have today.


Like a lot of really good fried chicken recipes this one starts by soaking the chicken for a period of time. In this case we are using buttermilk (or soured milk if you forget to pick up the buttermilk like did) mixed with some hot sauce. I recommend doing this for at least 2 hours but longer is better if you have the time. I find that 6 to 8 hours seems to be ideal. This soak does a couple of things, if helps to flavor the chicken and it helps to give the chicken a fantastic texture (tender but not tough or chewy) It also helps the coating to have a really nice texture when it gets cooked.

One the chicken has soaked drain it and dry it off with paper towels.


Now we get to dredge the chicken first in seasoned flour, then an egg mixture and back in the seasoned flour.


Then it is a simple matter of cooking the chicken in the pre-heated air fryer until cooked and crispy.


You can find a downloadable/printable version of this recipe here.


Air Fryer Spicy Fried Chicken


1 cup buttermilk (see notes at end of recipe for substitution)

1 Tablespoon Tabasco sauce (or hot sauce of choice)

2 chicken drumsticks, bone in and skin on

2 chicken thighs, bone in and skin on


1 egg

2 Tablespoons water

1 ½ teaspoons Tabasco sauce


1 cup flour

1 teaspoon smoked paprika

½ teaspoon cayenne pepper

½ teaspoon garlic powder

½ teaspoon kosher salt

½ teaspoon pepper


Combine the buttermilk and 1 Tablespoon of Tabasco sauce in a large bowl. Add the chicken pieces making sure they are submerged as much as possible. Cover and refrigerate for at least 2 hours, 6 to 8 is perfect. If possible rearrange the chicken in the mixture a few times.


At the end of the soaking time remove the chicken from the soaking mixture and pat dry with paper towels. Discard the soaking mixture.


Pre-heat your air fryer to 390°F as directed for your model.


Whisk the egg, water and 1 ½ teaspoons of Tabasco sauce in a shallow dish until combined and set aside.


In another shallow dish combine the flour and seasonings.


Dredge the chicken first in the flour mixture, coating the surface completely. Press the flour onto the surface of the meat then shake off any excess.


Immediately move to the egg mixture again coating completely again shaking off any excess.


Now back in the flour mixture to coat completely again. Shake off excess.


Spray the basket of your air fryer with cooking spray add the chicken pieces and spray them generously with cooking spray.


Cook the chicken pieces in the pre-heated air fryer at 390°F for 15 minutes.


At this point in time check the internal temperature of the largest piece of chicken. You want it to reach 165°F, if it is not there yet cook in 5 minute intervals until it reaches the correct temperature.


As a note mine took a total of 20 minutes this time. Your air fryer might cook slower or faster than mine and the pieces of chicken you are using might vary also.


Note: if you don’t have buttermilk on hand you can simply sour some fresh milk. Add a Tablespoon of vinegar to a measuring cup and add enough milk to make 1 cup. Let is sit on the counter a couple of minutes to sour a bit. Then proceed with the recipe.


Monday, January 23, 2023

Poblano & Corn Chowder


I often refer to this time of year as Soup Season and the recipe I have for you today is another of my favorites. I’m not really sure where I found it originally since it was scribbled on a piece of notebook paper stuck into my recipe binder.


I love the rich creaminess of this and it is really filling and so comforting on a cold day. It also has just the right amount of spice not too much and certainly not bland.


This recipe is vegetarian but I think even my fellow meat eaters will enjoy it as much as I do.


Poblano peppers find their way into a lot of my recipes I love the flavor and they are easy to find in most grocery stores. They have a bit of heat but not too much, although like a lot of “hot” peppers they do vary from one to the next. If you really want the chowder mild you could use a green bell pepper and I am sure the chowder will still be good. But to really taste it as designed go for the poblano.


We start by sauteing the pepper and the white portion of the green onions in some butter. Add just a pinch of salt and pepper to this so that the flavor can cook into the veggies and also the salt helps the veggies to cook more evenly (at least in my opinion it does) The fact that the peppers cook for as long as they do is one of the reasons the spice level is not too high.


Once the pepper and onions are softened add the flour to coat the veggies and cook for about 1 minute. This allows the flour to loose the “raw” flour taste and also helps it to stick to the veggies so that you are less apt to get lumps when you add the liquid.


Now add the liquid ingredients slowly while stirring. Adding them slowly, constantly stirring as the liquids are added in addition to the last step of letting the flour adhere to the veggies is what is going help you to not get lumps in the liquid.


Add the cubed potatoes and the Old Bay seasoning, bring to a boil then simmer for about 1 hour. This not only gets everything cooked but allows the flavors to really come together. Be sure to stir from time to time as it simmers.


Once your chowder has simmered for the hour use a potato masher or a fork to mash the potatoes as much as you would like. I like to get mine about half mashed. The consistency of your final bowl of soup is up to you. I prefer to have a few lumps of potato and I definitely don’t want to loose the chinks of pepper.


Now add the corn, cheese and cream cheese and stir to combine. Allow to cook until the corn is heated and the cheeses melt. The combination of the cheeses really makes this a creamy, comforting soup.


Taste and season as needed with more salt and pepper. Depending on the veggie broth you used you may need more salt or not.


This makes two really nice sized bowls of chowder. Sprinkle the green parts of the green onions on top, add a dollop of sour cream, and give the bowls a final sprinkle of Old Bay Seasoning and serve.


You can find a downloadable/printable version of this recipe here.


Poblano & Corn Chowder


1 poblano pepper, seeded and diced

2 green onions, sliced (keep the white part and green part separate)

2 Tablespoons butter

Salt and pepper

1 Tablespoon flour

¾ cup milk

2 cups vegetable broth

2 ½ cups diced, peeled potatoes

1 teaspoon Old Bay seasoning

1 ½ cups frozen corn

¼ cup shredded cheddar or Monterey Jack cheese (or Mexican blend)

2 Tablespoons cream cheese, softened

2 Tablespoons sour cream


In a medium saucepan melt butter then add the diced poblano pepper and the sliced white portion of the green onions season with salt and pepper. Cook stirring for about 5 minutes until softened.


Add the flour and stir for about 1 minute.


Slowly add the milk and stock stirring to avoid lumps.


Add the potatoes and the Old Bay seasoning. Bring to a boil and simmer partially covered for 20 minutes or until the potatoes cook through, stirring occasionally.


Remove from heat and use a potato masher or a fork and mash the potatoes to desired consistency.


Return pan to the stove and on low heat add corn, cheese and cream cheese. Stir to combine and melt the cheeses and heat through.


Taste and season with more salt and pepper if needed.


Divide between 2 bowls and garnish with the sour cream and the green parts of the green onions. (I like to sprinkle on a bit more of the Old Bay seasoning too)


Makes 2 generous sized bowls of soup.