Have you checked out all my blogs?


Dollhouse Minis: http://joannesminis.blogspot.com/


18” Dolls: http://joannes18dolls.blogspot.com/


General Crafts: http://joannes-place.blogspot.com/


Showing posts with label cheap meal. Show all posts

Monday, February 12, 2024

Lazy Lasagna


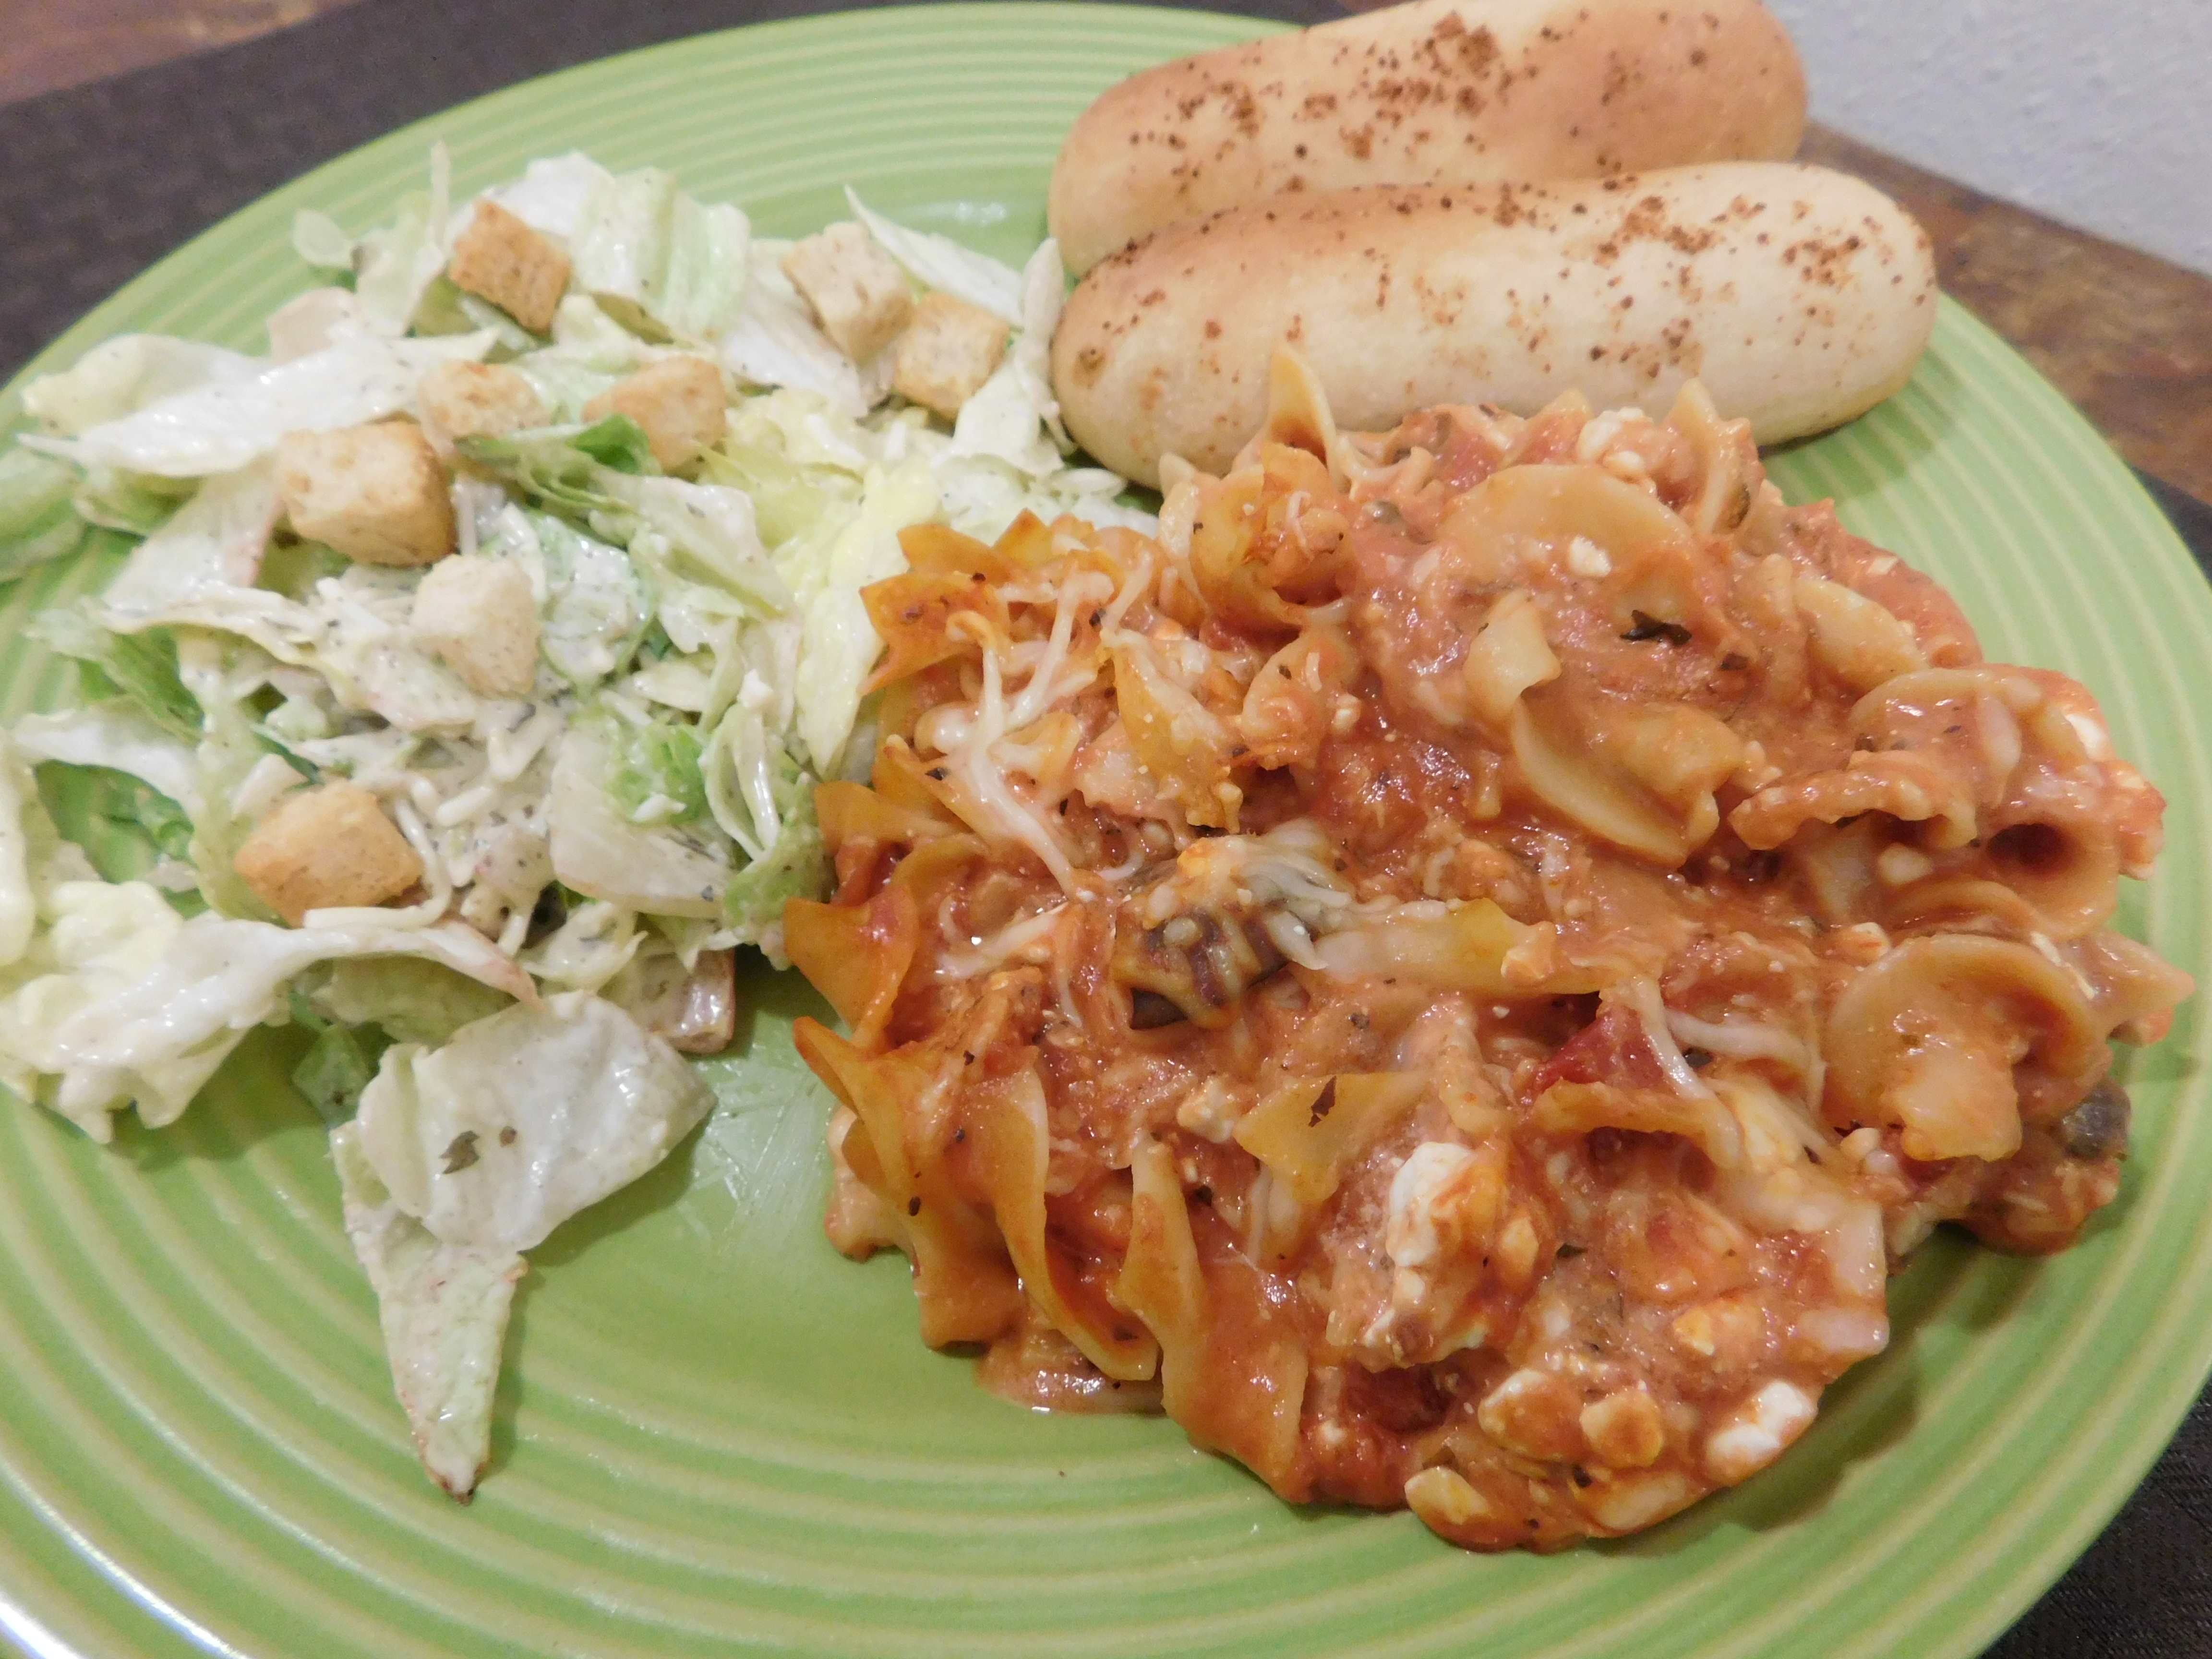
Today I wanted to share a really easy and quick casserole recipe that I’ve been playing with for a while now. It’s called Lazy Lasagna and with this recipe you can get dinner on the table in about 30 minutes. It has all the main parts of lasagna without all the fussy layering. Perfect for a busy day.


To start just boil some egg noodles then mix them with your favorite tomato based pasta sauce and some cheese. Put it all in a greased casserole dish top with more cheese and bake. It doesn’t get simpler than that.


You can find a downloadable/printable version of this recipe here.


Lazy Lasagna


2 cups dry egg noodles

1 cup tomato based pasta sauce

¾ cup shredded Mozzarella cheese

½ cup cottage cheese

2 Tablespoons shredded Parmesan cheese


Preheat oven to 375°F.


Cook the noodles according to directions on package.


Meanwhile put the pasta sauce to a microwave safe bowl and heat just until warmed a bit.

Add the shredded Mozzarella cheese and the cottage cheese to the sauce.

When noodles are cooked drain well and add to the sauce mixture. Stir to combine.


Transfer noodle mixture to a well greased 4 cup casserole dish.


Top with the shredded Parmesan cheese.


Bake in preheated oven for 20 minutes or until hot and beginning to bubble.

Monday, November 20, 2023

Breakfast Quesadillas Two Ways


A quesadilla might just be the perfect hand held food. It is like a sandwich without being weighed down with too much bread. They are fun to eat, easy to make and can be eaten on the go.


I have two versions of Breakfast Quesadillas for you today and in my opinion they are kind of the extremes in each direction. I have a small very plain one and a larger loaded one. You can make either, both or more likely something that is in between and perfectly suited to whoever has the pleasure of eating it.


For the small plain one we will only need a 6” flour tortilla, an egg and some shredded cheese.


For the loaded version I step up to an 8” flour tortilla, 2 eggs., and the cheese along with the fillings that sound good on the day I am making it.

Today those items were: bacon, a couple of green onions, and salsa.


In addition we need some cooking spray (like Pam) to coat the tortilla. You will also need some butter to cook the eggs in if you don’t use something like bacon or sausage.


Of course these are just suggestions, you could add other veggies, peppers are wonderful as are sliced avocado. Use you imagination and look through the fridge to see what’s there.


No matter which size you are making it is important to use a skillet that is close to the size of your tortilla. This will make the process of cooking and assembly so much easier.


To make the small simple quesadilla pre-heat your skillet over medium heat, add some butter to melt.


Meanwhile beat the egg with salt and pepper to taste. Once the butter melts add the egg to the pan. Swirl the pan a bit to cover the bottom evenly.


Allow the egg to cook on the bottom then add some shredded cheese. You want the egg to still be runny on the top.


Add the tortilla over the cheese and press it lightly into the cheese/egg. Immediately spray the top of the tortilla with some cooking spray.


Flip the entire tortilla, egg, cheese stack over so the tortilla is on the bottom. This will be fairly easy once the egg cooks and releases from the pan.


Now add a bit more cheese.


Fold the quesadilla in half and cook, flipping occasionally until the outside of the tortilla is crispy.


Remove from the skillet to a cutting board and cut in half.


Enjoy!


For the loaded version heat your skillet and if you are using bacon or sausage add that to the pan to cook. Be sure to cut up the bacon first.


Once the meat is cooked through and crispy in the case of the bacon. Remove to a paper towel lined plate and add any cut up veggies to the grease left in the pan. Cook until tender.


Add the meat back into the pan and spread the fillings around the pan evenly.


Beat the eggs with seasonings of your choice and pour over the meat and/or veggies in the pan. Swirl to cover most of the bottom of the pan and cook until the bottom surface of the eggs are beginning to set. 


Add a layer of shredded cheese.


Immediately add the tortilla to the top and gently press it down onto the cheese and egg base in the pan.


Spray the top of the tortilla with pan spray.


When the eggs have cooked enough to loosen from the pan flip the quesadilla over so the tortilla is on the bottom.


Add a bit more cheese and salsa.


Fold in half.


Cook, flipping occasionally until the tortilla is crispy.


Remove to a cutting board and cut in half.


Serve and enjoy.


Either of these are great on their own or with salsa or sour cream to dip them into.


You can find a downloadable/printable version of this recipe here.


Breakfast Quesadillas


Small quesadilla:


Butter

1 egg

salt and pepper to taste

shredded cheese

6” tortilla

pan spray (like Pam)


Melt butter in a small skillet over medium heat.


Beat the egg with some salt and pepper to taste and add to the pan with the melted butter.


Swirl the pan to spread the egg over the bottom of the pan.


As soon as the egg starts to set on the bottom add a layer of shredded cheese.


Top with the tortilla, press the tortilla down into the cheese and egg. Spray the top of the tortilla with the cooking spray.


As soon as the egg is cooked enough to let go of the pan flip the quesadilla over and add a bit more cheese to the top.


Fold and cook until crispy on both sides.


Serves one.


Loaded Quesadilla


2 strips of bacon, cut up

2 green onions, sliced

2 eggs

salt and pepper to taste

shredded cheese

8” tortilla

pan spray (like Pam)

salsa


(these are just suggestions feel free to use what you have on hand to fill yours)


Start by heating a skillet over medium heat, add the bacon and cook until crispy. Remove to a paper towel lined plate.


Add the onion and any other veggies you wish to the pan and cook until tender.


Meanwhile beat the egg with salt and pepper to taste.


Add the cooked bacon back into the pan spread the mixture over the bottom of the pan. Add the eggs to the pan and swirl the pan to cover the bottom of the pan.


Cook just until the bottom side of the eggs start to set then add the shredded cheese.


Immediately add the tortilla on top of the cheese. Lightly press down onto the cheese/egg mixture. Then spray the top side of the tortilla with pan spray.


Once the eggs have cooked enough to loosen from the pan flip the quesadilla over so the tortilla is on the bottom.


Add a small layer of cheese and as much salsa as you wish.


Fold the quesadilla in half.


Cook, flipping occasionally until the tortilla is crispy.


Remove to a cutting board and cut in half.


Enjoy!
Monday, November 6, 2023

Slow Cooker Chili


Since the weather is definitely getting colder here I am personally focusing more on comfort foods like soups, chili, stews, casseroles a lot of the time. One of the first to come to mind was chili so I thought I would share this recipe with all of you. This takes a lot of inspiration from the chili I made all the time when my kids were growing up. The main difference is this feeds two people not an army. I did some tweaking to the recipe to make it work in the smaller amount easily.


When we get to the ingredients you might be surprised by one of them, just take a breath and try it. You see I add just a tiny bit of baking cocoa to my basic chili. Not enough that anyone will taste even a hint of chocolate but just enough to get a rich deep flavor that will bring you back for another serving.


Now I have dozens of recipes for chili, some with meat some without. Some with beans some without. This one has both ground beef and beans so it makes a hearty meal.


A few things you should know about this particular chili, first it is middle of the road chili as far as spice level, not really hot but not too mild at the same time. You can always add some hot sauce when you to each portion to taste. Also it is a soupy chili since I always serve it over rice. That is my favorite way to serve chili and it makes for a filling meal that really sticks to your ribs. If you want a thicker chili cut down or leave out the beef broth from the recipe.


This recipe is sized to fit my 2 quart slow cooker. I do love to make chili in the slow cooker for several reasons on being it is a food that really benefits from the low slow cooking method, it just comes together so nicely. Also not having to do much to serve dinner at the end of a busy day is so nice.


Now since this needs at least 7 hours of cooking time at the low setting you will need to start in the morning. We start by cooking the ground beef and onion in a small skillet until the meat is cooked through and the onion is softened. Drain off any excess fat from the pan.


Then add the garlic, chili powder and cumin and cook just until they all become fragrant. By cooking the spices particularly the cumin you release more of the flavor and I find it infuses with the rest of the dish much better.


Then move the meat mixture into the slow cooker followed by the rest of the chili ingredients. Give it a stir, cover and cook it all day long.


At the end of the day put some rice in the bottom of your bowl


followed by about half of the chili.


Then top as desired,

You can find a downloadable/printable version of this recipe here.


Slow Cooker Chili


Chili ingredients:


½ pound ground beef

½ cup chopped onion

2 cloves garlic, finely chopped or grated

2 tsp chili powder

½ tsp cumin powder

1 ½ cups beef broth (you can cut this down or leave it out for a thicker chili)

1 can (15 oz) kidney beans, drained and rinsed

1 can (10 oz) diced tomatoes with green chili (like Rotel) with the liquid

½ tsp unsweetened cocoa powder

red pepper flakes, to taste (I put in just a bit less that ¼ tsp)


Ingredients to serve the chili


2 cups of cooked rice

shredded cheese

chopped avocado

sour cream

chopped cilantro


In the morning cook the ground beef and chopped onion over medium heat until the meat is cooked through and the onion is tender. Drain off any excess fat from the pan.


 Add the garlic, chili powder and cumin and cook just long enough that they become fragrant.


Pour the meat mixture into the bottom of a 2 quart slow cooker. Add the remaining chili ingredients and give the mixture a stir. Set on low and cook for at least 7 hours. 8 or 9 hours is even better.


When ready to serve place the rice in the bottom of bowls, top with the chili and top as desired.


Serves 2

Monday, January 23, 2023

Poblano & Corn Chowder


I often refer to this time of year as Soup Season and the recipe I have for you today is another of my favorites. I’m not really sure where I found it originally since it was scribbled on a piece of notebook paper stuck into my recipe binder.


I love the rich creaminess of this and it is really filling and so comforting on a cold day. It also has just the right amount of spice not too much and certainly not bland.


This recipe is vegetarian but I think even my fellow meat eaters will enjoy it as much as I do.


Poblano peppers find their way into a lot of my recipes I love the flavor and they are easy to find in most grocery stores. They have a bit of heat but not too much, although like a lot of “hot” peppers they do vary from one to the next. If you really want the chowder mild you could use a green bell pepper and I am sure the chowder will still be good. But to really taste it as designed go for the poblano.


We start by sauteing the pepper and the white portion of the green onions in some butter. Add just a pinch of salt and pepper to this so that the flavor can cook into the veggies and also the salt helps the veggies to cook more evenly (at least in my opinion it does) The fact that the peppers cook for as long as they do is one of the reasons the spice level is not too high.


Once the pepper and onions are softened add the flour to coat the veggies and cook for about 1 minute. This allows the flour to loose the “raw” flour taste and also helps it to stick to the veggies so that you are less apt to get lumps when you add the liquid.


Now add the liquid ingredients slowly while stirring. Adding them slowly, constantly stirring as the liquids are added in addition to the last step of letting the flour adhere to the veggies is what is going help you to not get lumps in the liquid.


Add the cubed potatoes and the Old Bay seasoning, bring to a boil then simmer for about 1 hour. This not only gets everything cooked but allows the flavors to really come together. Be sure to stir from time to time as it simmers.


Once your chowder has simmered for the hour use a potato masher or a fork to mash the potatoes as much as you would like. I like to get mine about half mashed. The consistency of your final bowl of soup is up to you. I prefer to have a few lumps of potato and I definitely don’t want to loose the chinks of pepper.


Now add the corn, cheese and cream cheese and stir to combine. Allow to cook until the corn is heated and the cheeses melt. The combination of the cheeses really makes this a creamy, comforting soup.


Taste and season as needed with more salt and pepper. Depending on the veggie broth you used you may need more salt or not.


This makes two really nice sized bowls of chowder. Sprinkle the green parts of the green onions on top, add a dollop of sour cream, and give the bowls a final sprinkle of Old Bay Seasoning and serve.


You can find a downloadable/printable version of this recipe here.


Poblano & Corn Chowder


1 poblano pepper, seeded and diced

2 green onions, sliced (keep the white part and green part separate)

2 Tablespoons butter

Salt and pepper

1 Tablespoon flour

¾ cup milk

2 cups vegetable broth

2 ½ cups diced, peeled potatoes

1 teaspoon Old Bay seasoning

1 ½ cups frozen corn

¼ cup shredded cheddar or Monterey Jack cheese (or Mexican blend)

2 Tablespoons cream cheese, softened

2 Tablespoons sour cream


In a medium saucepan melt butter then add the diced poblano pepper and the sliced white portion of the green onions season with salt and pepper. Cook stirring for about 5 minutes until softened.


Add the flour and stir for about 1 minute.


Slowly add the milk and stock stirring to avoid lumps.


Add the potatoes and the Old Bay seasoning. Bring to a boil and simmer partially covered for 20 minutes or until the potatoes cook through, stirring occasionally.


Remove from heat and use a potato masher or a fork and mash the potatoes to desired consistency.


Return pan to the stove and on low heat add corn, cheese and cream cheese. Stir to combine and melt the cheeses and heat through.


Taste and season with more salt and pepper if needed.


Divide between 2 bowls and garnish with the sour cream and the green parts of the green onions. (I like to sprinkle on a bit more of the Old Bay seasoning too)


Makes 2 generous sized bowls of soup.

Wednesday, October 20, 2021

French Onion Grilled Cheese


Okay first things first I love grilled cheese sandwiches. They are among my favorite sandwiches especially when they have extra stuff in them. I also love caramelized onions so putting them into a grilled cheese was the logical step to take here.


One of the things I don't like about grilled cheese sandwiches is when the cheese and other fillings don't get hot/melted through in the time it takes the bread to get perfectly grilled. I found this oven method of cooking a grilled cheese a while back and it is a game changer, the sandwiches come out perfectly browned and melty all the way through. I don't think I'll ever go back to cooking them in a pan this just so much easier and better.


The process is simple (and by the way on the occasions when you have to cook a bunch of sandwiches at one time this is a lifesaver) The most important step is to preheat your baking sheet in the oven while the oven is preheating. I neglected to do this step the first time I tried this and the first side of the sandwich just didn't get brown and crispy.


Most of the time I do like to line my baking sheet with aluminum foil mainly because clean up is even easier that way.


You can find a downloadable/printable version of this recipe here.


French Onion Grilled Cheese


1 medium onion, sliced

butter

4 slices of bread of your choice

4 slices Swiss cheese


Line a baking sheet with aluminum foil. 


 -note I am only making one sandwich in the pictures but the directions are for two-

Preheat your oven to 450° F and place your prepared baking sheet in the oven to preheat with the oven. It needs to be really hot for this sandwich to really work.


Meanwhile melt about 1 Tablespoon butter in a small skillet over med heat. Add the sliced onion and cook slowly until the onions are caramelized, if they start to look crispy turn the heat down. This needs to be a very slow process, it usually takes at least 20 minutes to get my onion the way I like it.


When the onions are cooked butter one side of each slice of bread. 


The add a slice of cheese to the un-buttered sides of the slices.


Divide the onions between two to these slices then top with the other two slices. (just like a normal grilled cheese)


Remove the hot baking sheet from the oven and quickly add the sandwiches to the pan and return to the oven.


Cook 5 minutes.


Remove from oven just long enough to flip both sandwiches over. Return to the oven and cook 5 more minutes.


Remove from oven and allow the sandwiches to sit on a cutting board for a couple of minutes before cutting in half. 


Makes 2 wonderful grilled cheese sandwiches.