Have you checked out all my blogs?


Dollhouse Minis: http://joannesminis.blogspot.com/


18” Dolls: http://joannes18dolls.blogspot.com/


General Crafts: http://joannes-place.blogspot.com/


Monday, January 16, 2023

Hot Cocoa Cupcakes


Winter weather just seems to call for hot cocoa to be on hand and I decided to turn it into a cupcake recipe to share this week.


And since there seems to be a divide between people as to which is more appropriate to top the hot cocoa marshmallows or whipped cream I decided that rather than choose just one why not feature both in these decadent cupcakes.


So here we have a hot cocoa cupcake with a marshmallow filling topped with my favorite whipped cream frosting. These are so perfect for a special dessert at the end of a cold day.


Remember this is a small batch/small family blog so we are only making about 8 cupcakes.


For the cupcake base we are starting out with a third of a standard box of a chocolate cake mix. I give the details on how to divide the box in my blog post you can find with this link. It is really easy and I try to have a variety of flavors of mix divided and ready to work with in my pantry all the time. For today’s cupcakes I used a Devil’s Food but use your favorite chocolate version.


We are making a few changes to the normal mix of ingredients for this batch. In place of the water called for on the box I used some chocolate milk. And if you have read any of my cupcake blog posts before you might already know I always add a bit of vanilla to take away a bit of the “mix” flavor.


This time we also are going to need 2 regular size marshmallows for each cupcake. We’ll talk about that in a moment.


So start combining the wet ingredients for the cupcake (chocolate milk, egg, oil, and vanilla) beat these together to combine them. 


Now add your portioned cake mix and using a mixer combine it beating for no more than one and a half minutes. I usually stop at just over a minute. This is the key to having the best rise in the small batch.


Now line 8 cups in a cupcake/muffin pan with double layered liners. I found out by accident that this small step makes these cupcakes so much easier to get out of the pan after baking. I had a couple of liners that had stuck together and got two by mistake for a couple of my cupcakes. These came out of the pan so much easier. The others came out okay but I was so much happier with the double layered ones.


Fill the liners up a bit less than you normally would. So since I normally get 6 or seven cupcakes from my batches I got 8 this time.


Once you have the batter placed add a single marshmallow to each one. This marshmallow is
going to do two things I is going to melt into the surrounding cupcake batter as it bakes giving a wonderful flavor. It is also going to give us a place to put the second marshmallow once the cupcakes are baked.


Bake the cupcakes for the normal time. You will have to judge the doneness on just the rim of the cupcake since there is no batter in the middle. You should have a gooey marshmallow crater like this in each cupcake.


Once baked remove from the oven and immediately add a new marshmallow to each cupcake. Then put them back in the oven for 2 more minutes to help melt the marshmallows.


Remove from the oven and allow to sit in the pan for 10 minutes then move to a wire cooling rack to cool completely.


Let’s talk about the frosting now, I love this recipe and use it all the time. The secret I have found is that I need to make sure the cream cheese is at room temperature when I make the frosting. So my normal thing to do is remove the cream cheese from the fridge when I put the cupcakes in the oven. Then it can sit at room temperature until I am ready to use it. If I skip this step and don’t let it come all the way to room temperature I find the cream cheese flavor is much stronger. If it is room temperature it is not really noticeable in the finished frosting. Since I want this frosting to taste like whipped cream for these cupcakes that is really an important step.


When you are ready to frost your cup cakes beat the cream cheese until it is fluffy.


Then add the powdered sugar and beat until combined and fluffy again.


Now add the vanilla to the heavy cream and add this slowly to the cream cheese mixture beating on low until you have it all added. Scrap the bowl often during this process and take your time.


Once the cream is all added beat on high until stiff peaks form. This will take a couple of minutes.


Now you are ready to pipe the frosting onto the tops of your cupcakes.


I added a just a sprinkle of baking cocoa to the top.


The cupcakes will need to be stored in the refrigerator but I think they taste better and are much better if allowed to sit at room temperature for about 30 minutes before serving. This way both the frosting and the marshmallows become a bit softer.


You can find a downloadable/printable version of this recipe here.


Hot Cocoa Cupcakes


⅓ of a box of chocolate cake mix

⅓ cup chocolate milk

1 egg

3 ½ Tablespoons vegetable oil

¼ teaspoon vanilla extract

about 16 regular size marshmallows


Start by preheating your oven to the temperature your box of cake mix calls for, mine was 350°F. Line your cupcake pan with 2 paper liners in each spot or grease really well.


Combine the chocolate milk, egg, oil and vanilla in a mixing bowl and combine well.


Add the cake mix and beat for up to 90 seconds.


Portion into cupcake pan adding just a little less than you normally would.


Add 1 marshmallow to each cupcake and bake according to instructions on your cake mix. Mine was baked at 350°F for about 18 minutes.


Remove from the oven and place another marshmallow into each cupcake and return to the oven for 2 minutes to slightly melt the marshmallows.


Cool in pan for 10 minutes then move to a cooling rack and cool completely.


Whipped Cream Frosting


3 oz cream cheese (the kind in the block not the tub) softened at room temperature

⅓ cup powdered sugar

¾ cup heavy whipping cream

¼ to ½ teaspoon vanilla extract


Begin by beating the cream cheese with a mixer on medium speed until smooth. Add the powdered sugar and beat on medium again until smooth, scrapping the bowl and beaters often with a spatula.


Add the vanilla to the heavy cream. With the mixer on low very slowly add the cream/vanilla mixture until all is incorporated. Scrape the bowl and the beaters often during this process so it is all combined evenly.


Turn the mixer up to high and beat until stiff peaks form.


Be sure to store any leftover frosting in the refrigerator.


I dusted the tops of my cupcakes with a bit of baking cocoa as a garnish.


Although these cupcakes need to be refrigerated they are best served after sitting at room temperature for about 30 minutes.


Monday, January 9, 2023

Grilled Broccoli and Cheese Sandwich


Today I decided to share with you all what has become one of my favorite comfort food meals. Now if you are watching your calories, you probably want to just skip this one because it probably has almost enough calories for the your entire day. But I am a firm believer that once in a while we need to indulge ourselves and this sandwich will do just that. All the while also sneaking in a full serving of veggies in the filling.


So let’s start with those veggies since we need to get them roasting for our first step. I have used fresh broccoli in this in the past and that was what was called for in the original recipe that this one descends from. However I have found that frozen broccoli works just as well and is a lot more convenient since I try to keep a bag of it in my freezer all the time. If you have some cut or chopped broccoli you will save yourself a step, my store was out so I am using frozen broccoli florets.


Cut up the larger pieces so they will fit into the sandwich better and toss with the chopped onion some olive oil and seasonings. This needs to be done immediately before putting them in the oven. If frozen veggies go into the oven completely frozen they roast much better and cook evenly. If they start to defrost they tend to burn a lot and not cook evenly. Roast at 425°F for about 15 minutes.


While the broccoli is roasting we can prepare the rest of the filling. For that mix the cream cheese with the shredded cheese. I am using pre-shredded 4 cheese Mexican blend cheese. This is another thing that is almost always in my fridge all the time so it tends to be my go-to. You could also use shredded cheddar for this step. The combination of the cream cheese with the shredded cheese is what makes this sandwich so decadent. It really adds to both the flavor and the texture of the filling.


Spread one side of both pieces of bread with some butter. 


Then coat the other side of one of them with the cheese filling.


Once the broccoli is roasted remove it from the pan and put the pan back in the oven while you finish assembling the sandwich.


To do this place the roasted veggies on top of the cheese filling then top with the second slice of bread butter side up.


Remove the baking pan just long enough to put the sandwich onto it and return it to the oven for 5 minutes.


Remove the pan from the oven for only as much time as it takes to flip the sandwich and then back into the oven for another 5 minutes.


The secret to getting that wonderful brown outside to our sandwiches in the oven is to have the baking sheet as hot as possible. If it cools even for a few seconds your sandwich won’t get as brown as it should. It will still taste wonderful it just won’t be as pretty.


Remove the sandwich to a cutting board to cool for just a couple of minutes then cut as desired and serve.


As for the following recipe I decided to just give you the amounts for one sandwich so you can make as many or as few of them as needed. The only issue I can see with many a bunch of these would be being fast enough to keep the pan hot enough to get them all really browned.


You can find a downloadable/printable version of this recipe here.


Grilled Broccoli and Cheese Sandwich


8 oz frozen broccoli, cut up

1 green onion, cut up

olive oil

¼ teaspoon paprika (smoked paprika is really good in here)

¼ teaspoon onion powder

¼ teaspoon garlic powder

2 Tablespoons cream cheese, softened

½ cup shredded 4 cheese Mexican Blend Cheese (or shredded cheddar)

2 slices sourdough bread

1 Tablespoon butter, softened


Pre-heat the oven to 425°F.


Combine the cut up broccoli and onion in a bowl and toss with the seasonings and just enough olive oil to coat. Spread on a baking sheet and roast for 15 minutes or until brown and tender.


Meanwhile prepare the rest of the sandwich.


Combine the cream cheese and shredded cheese and set aside.


Spread one side of each slice of bread with the butter.


Spread the cheese mixture on the other side of one of the slices.


When the broccoli is finished remove it from the pan and return the pan to the oven immediately.


Spread the broccoli mixture over the cheese mixture and add the other slice of bread butter side out to the top of the sandwich.


Take the baking sheet out of the oven only long enough to transfer the sandwich onto it and put it back in the oven for 5 minutes.


Remove from the oven only long enough to flip the sandwich and return to the oven to bake for 5 more minutes.


Remove to a cutting board for a few minutes then cut as desired.


Makes 1 sandwich.

Monday, January 2, 2023

Black Bean Soup


I like to refer to this time of year as soup season because I absolutely love a big bowl of hearty soup on a cold day. And this one is quickly becoming a favorite.


I was looking through a new to me cookbook a while back and ran into a couple of recipes for different black bean soups. I didn’t have all the ingredients for either of them on hand but as I started reading the recipes this combination kind of came together in my mind. I had to try it that night since I had all the ingredients on hand and it was wonderful. In the end this recipe takes elements from probably 4 or 5 different recipes I have either tried over the years or read through but didn’t get the chance to make them.


Lets talk about the process for this soup.


I do admit there is a lot of vegetable chopping involved in this one but I really love the combination that I came up with.


There is one jalapeno in the pot but don’t let that scare you away, by the time it is cooked with everything else the heat is really mild (at least in my opinion) just be sure to remove the ribs and seeds and cut it up pretty small.


The carrots along with the onion lend a bit of sweetness and make this seem very healthy. I added some sweet pepper also. I had part of a bag of the mini peppers in the fridge so that is what I used but part of a bell pepper would work also.


Do be sure to cook the dry spices a couple of minutes along with the garlic, this will make them so much better than just dumping them into the pot.


As for de-glazing the pan with the Tequila, it is totally optional and you can feel free to skip it. I like the flavor it gives the soup, and no it doesn't taste like tequila it is very subtle but yummy.


I used my black beans that I cook in the Instant Pot and keep in the freezer in place of canned beans. If you use as many black beans as I do I recommend cooking them from dry and keeping a stash in the freezer. It’s an easy process and you are in total control of what is in them and the quality of them. You can find my blog post on how I do them here.


Now let’s talk about Better than Bouillon, I love this stuff and almost always have several flavors in the fridge. They last a pretty long time even opened and they give so much flavor to your cooking. They can usually be found near the soups and bouillons in the grocery store.


So the process of making this soup. First we are going to sweat the veggies in a bit of oil. This starts the cooking process and allows the flavors of them to mix together and start to form the wonderfulness of this bowl of soup.


Once the onions are softened go ahead and add the garlic and the dry seasonings. Give them a couple of minutes to start to cook. You will know it is time to move to the next step when they release their aromas and become fragrant. This does help to open up the flavors so much so don’t skip this step.


Now the optional step of de-glazing the pan with Tequila. You can skip it but I love the subtle flavor it gives the finished soup.


Now add the beans, water and Better than Bouillon and bring everything to a full boil. Then immediately reduce the heat and cover the pan. Allow the soup to simmer with the lid on for 1 hour. This gives time for all the flavors to come together.


Once the hour is up divide between your soup bowls. I found I got 3 pretty perfect size portions of this soup to have as a the main part of the meal.


I like to top mine with some shredded cheese, cubed avocado and some fresh cilantro. If you have a lime on hand serve a wedge alongside the soup to squeezed over just before digging in. 


I served mine with a cheese quesadilla on the side and it was a perfect end to a very cold winter day.


You can download a printable PDF version of the recipe here.


Black Bean Soup


1 jalapeno, chopped

½ cup chopped onion

1 cup chopped carrot

¼ cup chopped sweet pepper

vegetable oil

salt and pepper to taste

1 clove garlic, minced (or grated)

2 tsp chili powder

1 tsp ground cumin

2 Tablespoons tequila (optional)

2 cans black beans, drained and rinsed

3 cups water

1 Tablespoon Better than Bouillon- Seasoned Vegetable


Saute the jalapeno, onion, carrots, and pepper in a small stock pot in the oil until the onions turn translucent. Season with a salt and pepper to taste. Add the garlic, chili powder, and ground cumin and continue to cook until they become fragrant.

Optionally de-glaze the pan with the Tequila.


Add the black beans, water and the Better than Bouillon to the pan and bring to a boil. Reduce heat to a simmer, cover and simmer for about an hour, stirring occasionally.


Taste and season if needed.


Serve in bowls topped with shredded cheese, cubed avocado and cilantro. Add a wedge of lime to squeeze over the bowl just before you eat it.


Makes 3 bowls of wonderful soup.


Wednesday, October 20, 2021

French Onion Grilled Cheese


Okay first things first I love grilled cheese sandwiches. They are among my favorite sandwiches especially when they have extra stuff in them. I also love caramelized onions so putting them into a grilled cheese was the logical step to take here.


One of the things I don't like about grilled cheese sandwiches is when the cheese and other fillings don't get hot/melted through in the time it takes the bread to get perfectly grilled. I found this oven method of cooking a grilled cheese a while back and it is a game changer, the sandwiches come out perfectly browned and melty all the way through. I don't think I'll ever go back to cooking them in a pan this just so much easier and better.


The process is simple (and by the way on the occasions when you have to cook a bunch of sandwiches at one time this is a lifesaver) The most important step is to preheat your baking sheet in the oven while the oven is preheating. I neglected to do this step the first time I tried this and the first side of the sandwich just didn't get brown and crispy.


Most of the time I do like to line my baking sheet with aluminum foil mainly because clean up is even easier that way.


You can find a downloadable/printable version of this recipe here.


French Onion Grilled Cheese


1 medium onion, sliced

butter

4 slices of bread of your choice

4 slices Swiss cheese


Line a baking sheet with aluminum foil. 


 -note I am only making one sandwich in the pictures but the directions are for two-

Preheat your oven to 450° F and place your prepared baking sheet in the oven to preheat with the oven. It needs to be really hot for this sandwich to really work.


Meanwhile melt about 1 Tablespoon butter in a small skillet over med heat. Add the sliced onion and cook slowly until the onions are caramelized, if they start to look crispy turn the heat down. This needs to be a very slow process, it usually takes at least 20 minutes to get my onion the way I like it.


When the onions are cooked butter one side of each slice of bread. 


The add a slice of cheese to the un-buttered sides of the slices.


Divide the onions between two to these slices then top with the other two slices. (just like a normal grilled cheese)


Remove the hot baking sheet from the oven and quickly add the sandwiches to the pan and return to the oven.


Cook 5 minutes.


Remove from oven just long enough to flip both sandwiches over. Return to the oven and cook 5 more minutes.


Remove from oven and allow the sandwiches to sit on a cutting board for a couple of minutes before cutting in half. 


Makes 2 wonderful grilled cheese sandwiches.

Wednesday, October 13, 2021

Loaded Baked Potato Soup


I know I've said before on here that I love soup and as soon as the weather starts to cool down I start making my favorites as well as new soups. This recipe is kind of both, I started with a couple of recipes I've been making for years and added a few things, took out a couple of others and this was the result.


For me potato soup is very nostalgic because it was a soup my mom made often. Hers was very plain and I still love it to this day but sometimes I want to visit those memories but have something a bit more special. This is the bowl I am turning to in that situation. This one is rich and creamy and loaded with the things I love to put on a baked potato (another favorite- let's just be honest I love potatoes and pretty much everything they can be made into)


Since I included the things I love on a baked potato I might have missed your favorite toppings. That is where you can make this soup your own add the things you love. Then curl up with a warm bowl of potato soup on a cool fall evening.


You can find a downloadable/printable version of this recipe here.


Loaded Baked Potato Soup


2 large baking potatoes

2 slices of bacon

2 green onions

1 Tablespoon flour

3 cups milk

¾ cup shredded cheese (I used a 4 cheese Mexican blend)

salt and pepper to taste

½ sour cream


Wash the baking potatoes and pierce the skin with a fork then bake as desired. I did mine in the microwave according to the directions that came with my microwave.


Cut up the bacon and cook in a Dutch oven until crispy.


Meanwhile slice the green onions keeping the white parts and the green parts separate.


Remove the crispy bacon from the pan and drain on paper towels.


Add the white parts of the green onions to the bacon fat in the pan and cook until tender.


Stir in the flour and cook for about 30 seconds.


 Add the milk and stir to combine, bring to a simmer over medium heat stirring often. Cook about 15 to 20 minutes until bubbly and thickened.


Meanwhile cut the baked potatoes in half and scoop out the cooked potato from the skins. Mash the potatoes until smooth. 


Add the potatoes and about ½ cup of the cheese. Stir and cook until heated through and the cheese melts.


Add the sour cream cook and stir until heated through.


Divide between 2 soup bowls and top with the sliced green onions, bacon and remaining cheese.


Wednesday, October 6, 2021

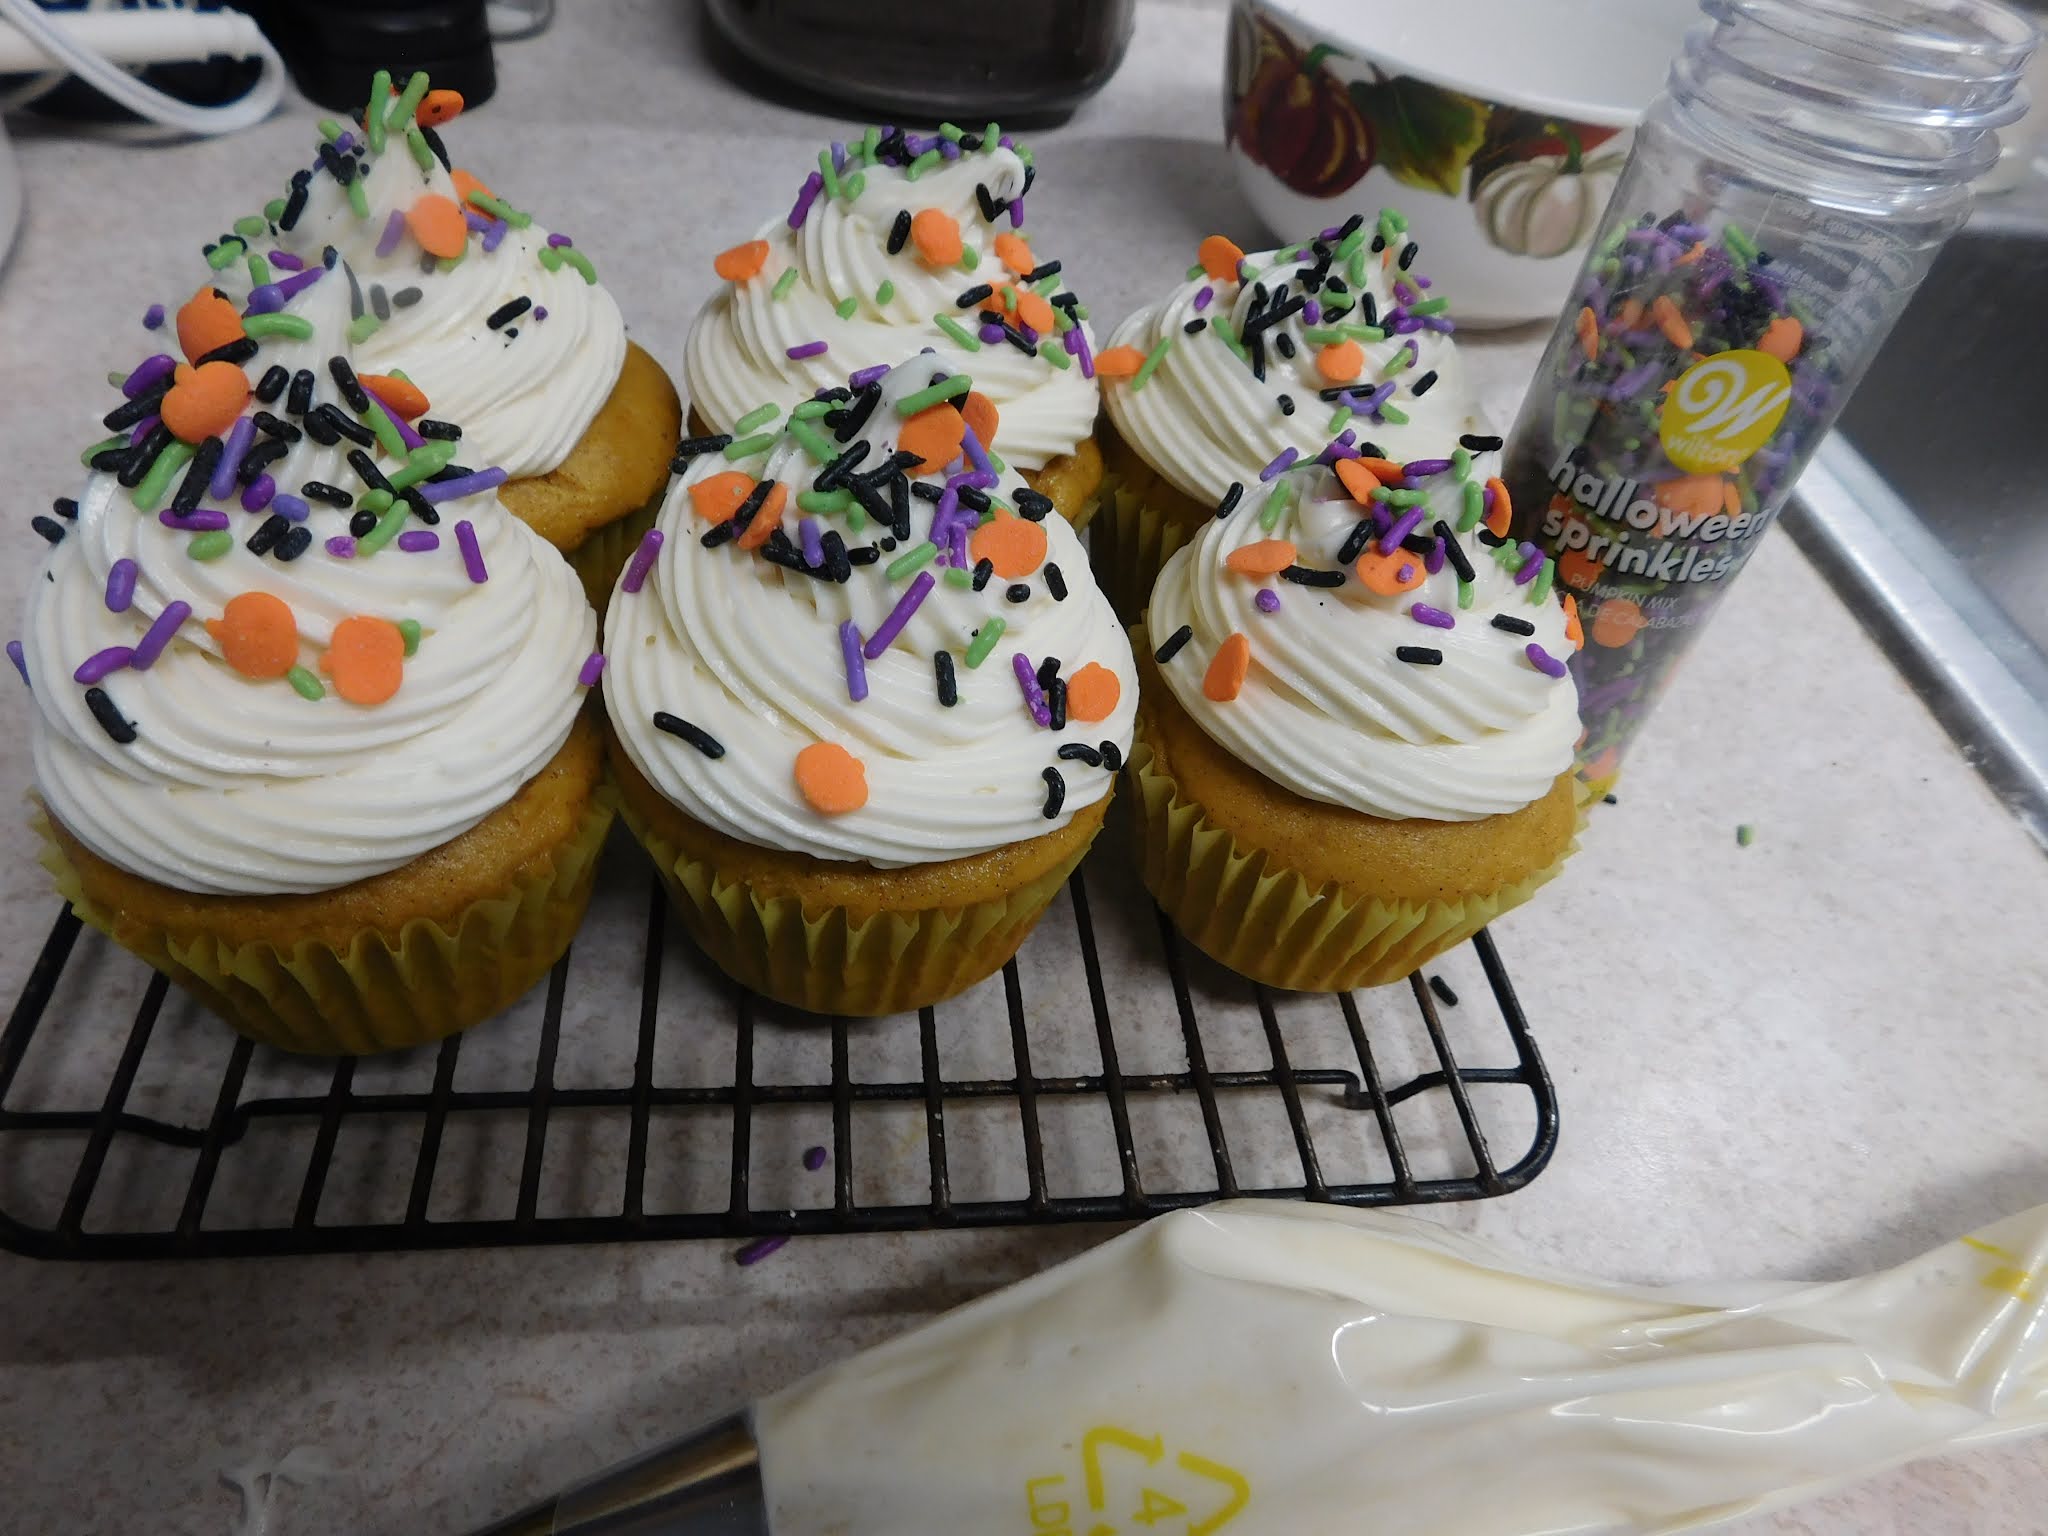
Pumpkin Cupcakes


For the my cupcake of the month for October this year I decided to go with something so simple but absolutely delicious, pumpkin. In my mind you really can't get any more on point for the month of October than pumpkin so they are perfect. I paired them with a divine cream cheese frosting to make the perfect way to finish off dinner time this month. 


As always we are starting with a partial box of cake mix. In the blog post you can find here I gave directions on how I divide a standard box of cake mix from the grocery store to make it perfect for small batch baking. If you haven't read that blog post I recommend you go over and read it first then come back and read this one. It will help you get all set to make this recipe.


I find that I normally get 6 cupcakes from these recipes but I have friends that always get 8. You can expect to get 6 to 8 depending on your pan and how full you fill it.


I love this recipe because while it has a bit of pumpkin spice in it, it is much more pumpkin than pumpkin spice. If you want more of a spice twist to your cupcakes make exactly the same recipe using a spice cake mix and leaving out the pumpkin spice that I use today.


I do have to warn you these smell so yummy while baking they are going to have you ready to dig in immediately when they come out of the oven. Please hold off and wait until they are cooled and you have frosted them to get the complete experience.


Speaking of frosting the recipe makes enough to cover 8 cupcakes but if you have some leftover this is excellent spread between a couple of graham crackers for a wonder treat for the cook.


You can find a downloadable/printable version of this recipe here.


Pumpkin Cupcakes


of a box of yellow cake mix

cup pumpkin puree

1 egg

3 Tablespoons milk

2 Tablespoons vegetable oil

½ teaspoon pumpkin pie spice

¼ teaspoon vanilla extract


Start by preheating your oven to the temperature your box of cake mix calls for, mine was 350°F. Line your cupcake pan with paper liners or grease really well.


Combine the pumpkin, egg, milk, oil, spice, and vanilla in a mixing bowl and combine well.


Add the cake mix and beat for up to 90 seconds.


Portion into cupcake pan and bake according to instructions on your cake mix.


 Mine was baked at 350°F for about 20 minutes.


Cool in pan for 10 minutes then move to a cooling rack and cool completely.


Small Batch Cream Cheese Frosting


¼ cup butter, softened

4 oz cream cheese, softened

1 teaspoon vanilla extract

2 cups powdered sugar

Seasonal sprinkles if desired


Beat the softened butter, cream cheese, and vanilla extract until combined and starting to get fluffy.


Slowly add the powdered sugar beating until well combined and creamy.


Move frosting to a decorating bag equipped with a large decorating tip. Decorate your cupcakes as desired.