Have you checked out all my blogs?


Dollhouse Minis: http://joannesminis.blogspot.com/


18” Dolls: http://joannes18dolls.blogspot.com/


General Crafts: http://joannes-place.blogspot.com/


Showing posts with label investment cooking. Show all posts

Wednesday, May 19, 2021

Instant Pot Black Beans


This week I thought I would share probably the simplest recipe I know of for investment cooking. I am going to share how I do black beans. So first the why of this recipe.


I do use a lot of black beans, they are one of my favorite ingredients and I have a ton of ways to use them. And yes, it is so simple to purchase cans of beans that are ready to use. And yes, they are cheap. So why do I go to this work?


There are really several reasons.


For one a 1 pound bag of beans is a lot lighter to pack home from the store and takes up next to no space in the pantry before I use it. Those cans, if you are stocking up can get heavy to pack in and then you have to find space for all of them. That bag of beans takes up very little space. I then cook a batch up in my Instant Pot, cool them, bag them up and store in the freezer. In the freezer they take up very little space.


And more importantly I am in control of just what is in my beans. When I cook them there are only 2 ingredients- dry black beans and water. I don't use any kind of seasoning at all until I am ready to use them. Those cans of beans can have a lot of salt in them if you aren't careful what brand you are purchasing. I also find some brands have an off taste.


The process for cooking the beans is so much easier in the Instant Pot and really quick too. The traditional method of cooking black beans can take a few hours even if you soak them. And you need to watch the pot so that they simmer and don't run out of water. Basically you need to babysit them for that cooking time. With the Instant Pot you put the beans and water in the pot, push a couple of buttons and you can go about your normal day. The pot will take a few minutes to come up to pressure then it will cook for the amount of time you set it to do, then just let the pot do a natural release for 20 minutes. Your beans should be cooked perfectly at this point.


Transfer the cooked beans to a container and cool enough to handle them. (I usually put mine in the fridge for a couple of hours.)


I like to bag mine in 1 ½ cup portions because this equivalent to a standard can of beans that you get at the store.


To do this simply measure out 1 ½ cups of beans and put into plastic bags. Since I am going to put all the bags into a single gallon size freezer bag I just use sandwich bags for the individual portions. I have been doing this for many years and find the gallon bag provides the protection from freezer burn. I have this cool measuring bowl that holds 1 ½ cups that I like to use but if you don't have one of these just use your regular dry measuring cups. I find that using a canning funnel makes filling the bags really easy and mess free.


Seal the bags, getting as much air out as possible and put on a sheet pan and into the freezer to freeze. Once frozen transfer to a labeled gallon size freezer bag and store in the freezer until ready to use. To use just thaw in the fridge.


From my 1 pound of dry beans I got 4 bags, so they come out to just half price of what they would have cost me to purchase the cans. I paid right around $1 for the bag of beans (sale price) so each can was about 25¢. I can store 4 bags in a single gallon size freezer bag in a lot less space than 4 cans in my pantry. As a bonus I don't have to drain and rinse these, they are ready to use as you I will show you in next week's post.


Click here to get the downloadable/printable PDF of today's recipe.


Instant Pot Black Beans


1 pound dry black beans

3 cups water


Rinse, drain and pick through the dry beans. Some times there are foreign things like rocks mixed in with them.


Add the beans along with the water to the cooking pot of your Instant Pot. Put on the lid and make sure the vent is set to sealing (not venting)


Set the Instant Pot to Pressure cook or Manual (depending on the model you have) and high. Set the time to 35 minutes. At the end of the cooking time allow the Instant Pot to release naturally for 20 minutes. 


Transfer the cooked beans to a container and cool enough to handle them. (I usually put mine in the fridge for a couple of hours.)


Once cool enough to handle, portion out into 1 ½ cup portions. Place each portion into it's own bag. Seal the bag getting out as much air as possible. Tray freeze the beans then transfer to a labeled gallon size freezer bag. Store in the freezer until you are ready to use. Thaw in the fridge and use just like a can of black beans in your favorite recipe.


Wednesday, April 14, 2021

Baked Oatmeal


Today we are doing some more investment cooking. If you aren't familiar with that term you might know it by other names, basically we are going to do some cooking today so that we can eat in days to come. We are going to make a pan of baked oatmeal that we can wrap in individual portions then heat and eat on mornings when we want a quick and yummy start to our day that will fuel us right up to lunch time. 


There is one confession I need to make before we go on, even though I love baked oatmeal I really don't like regular oatmeal. I mean yeah, if it is the only option for breakfast for whatever reason I would probably eat it but I wouldn't enjoy it. However, baked oatmeal I look forward to eating. It is so good and can be changed up depending on the dried fruit you add to it. I find that with this recipe dried fruil works better I have a slightly different recipe that I make with fresh fruit that I will try to remember to post someday.


Today for my dried fruit had some dried cranberries leftover from something else and a few leftover dried apricots that I cut up to be about the same size. I then added some golden raisins to make the full amount needed. It is a wonderful combination but I have to say my very favorite combo is the dried tropical fruit that I used to buy. I haven't looked for it in the stores here but I am sure they have it too. Really any combination of dried fruit you like or have on hand will work really well. If you change it up every time you make it you will have a lot more variety. It's even okay if your dried fruit is a bit more dried than you would normally use. The baking plus the freezing will help soften it a bit. Not sure exactly how hard too hard is but I have definitely used some raisins that were getting to the almost hard as a rock stage and while they were a bit more chewy they were fine.


This time I baked in an 8” by 8” baking pan, I like to use this size because it creates a nice thin baked oatmeal that bakes quickly and also freezes and reheats quickly. Other times I have baked this in a muffin pan and also in a loaf pan. These result in a thicker product that will take longer to get baked through and will take longer to both freeze and reheat. It is really up to you what pan you use.


I do think that lining you baking pan with parchment is important just because you can lift out the baked oatmeal in one piece and easily cut it into the 4 pieces. If I cut it in the pan I find this much more difficult to get evenly size pieces.


You can find the downloadable/printable PDF here.


Baked Oatmeal


1 ½ cups old fashioned rolled oats

½ cup brown sugar

1 teaspoon pumpkin pie spice

½ teaspoon salt


½ cup milk

1 egg

1 teaspoon vanilla extract


½ cup dried fruit of your choice, chopped if needed (about the size of raisins)


Preheat oven to 350°F


Prepare your baking pan by lining it (I used an 8”x8” baking pan and lined it with parchment paper)


In a medium mixing bowl combine your rolled oats, brown sugar, spice, and salt.


In a small bowl combine your milk, egg, and vanilla.


Add your wet ingredients to your dry ingredients and stir to combine.


Add the dried fruit and mix until well combined.


Spread into your prepared pan and bake at 350°F for 25 to 30 minutes, longer if you are using a smaller pan so your mixture is thicker. You want the mixture to be set and a pick inserted in the center should come out clean.


Allow to cool in pan for 10 minutes, then remove (parchment paper and all) to the counter to cool to room temperature. 


When cool cut into 4 equal pieces.


Wrap in plastic wrap and put in a labeled freezer bag. Place in freezer to store.


When you are ready to eat remove your piece of baked oatmeal from freezer, unwrap and place in a microwave safe bowl.


Heat in microwave until heated through, mine takes about 1 minute 30 seconds but your microwave might differ.


Serve as desired, I like a bit of milk or half & half poured over mine.


Makes 4 servings.

Wednesday, March 17, 2021

Lemon Chicken


I haven't posted an Investment cooking recipe on here in a long time so I decided it was time. If you aren't familiar with my term “investment cooking: you probably know it by another term. This is simply a recipe that I make a larger quantity of and then freeze to enjoy later. This time we are making one of my absolute favorites- Lemon Chicken. Or at least what I call Lemon Chicken, not to be confused with Asian style lemon chicken. This is chicken pieces that are marinated in a lemon mixture then baked (or grilled) I love it both ways but the advantage of baking is you end up with a wonderfully delicious sauce that can be poured over rice or couscous as a side dish. 


You can use whatever your favorite chicken pieces are, I almost always used either thighs or leg-quarters. I have used breasts before but I just prefer the darker meat. Whatever chicken parts you choose to use be sure they are skin on and bone in for this recipe. A little note here I know some people think that the amount of time I cook this for is a bit long but I am kind of paranoid of having chicken under-cooked, I would rather err on the side of over than under cooked when it comes to chicken. I also always check the internal temperature of chicken when it comes out of the oven to make sure it is cooked through.


The following recipe is for per bag and your total amounts will depend on how much chicken you are preparing. This time the package I got had 10 fairly large thighs so I opted to do 3 per bag with one bag with the extra one. For me I find 3 is about right for dinner and lunch the next day. When my son still lived at home I would do 4 thighs and we would have the perfect amount for dinner. The amounts of the marinade will work for up to 4 thighs or 2 leg-quarters or 2 breasts.


Although I usually save a batch out of the freezer to eat the night I prep this I really like the flavor much more after it has frozen and thawed. I am not sure of the science of it but the flavor of the marinade goes deeper into the chicken after that freezing cycle.


So lets get down to the basics of how this goes together.


My first step is to open up the chicken and see exactly how many pieces I am working with. This will determine how many bags of chicken I am going to make. I also decide what size freezer bag will work best. This time I used quart size but if my pieces were any bigger or I was going to put in more I would have gotten out gallon size freezer bags. 


Next I line my bags up on the counter with the tops open so I can easily add my ingredients. Then I just go through and add the thyme to each bag, then I follow with the salt, and the garlic. Lastly I add the lemon juice. I then carefully mix the contents of each bag a bit just pick them up and gently swirl it a little (don't spill)


Last I add the chicken, label the bags and freeze.

I did use just a storage bag for tonight's dinner, no sense wasting a freezer bag when I don't need to.


When you are ready to enjoy your Lemon Chicken cooking is really easy. If you are going to use one of the bags that you have frozen thaw it in the fridge overnight then proceed as follows.


Preheat the oven and place the chicken skin side down in a baking dish then pour the marinade over the chicken.


Bake it for 20 minutes turn the chicken over,


Bake another 20 or so minutes and dinner is ready.


I hope you all enjoy this as much as I do.


Click here for the printable PDF version of the recipe.


Lemon Chicken


These ingredients are per bag- how much you need will depend on how many bags of chicken you are preparing.


Chicken parts of your choice (to serve 2 -3 people)

1 teaspoon dried thyme

1 teaspoon salt

½ teaspoon pepper

Grated or crushed garlic about a large clove (to taste)

1/3 cup lemon juice


Figure out how many bags of chicken you will be making and line the freezer bags up on the counter. Add the chicken parts to the individual bags. Now add the rest of the ingredients given to each bag. I work mine like an assembly line, adding the chicken to all the bags then the thyme goes in all the bags, then the salt on down the list.


When all the ingredients are added seal each bag getting out as much of the air as you possibly can. Then kind of massage the bags to thoroughly mix the ingredients and make sure the chicken is coated well. Label and freeze the bags.


When you want to serve the chicken thaw in the fridge overnight. Place the contents of the bag into a glass baking dish (2-3 serving fit nicely in an 8x8) arranging the chicken pieces skin side down. Bake at 450 degrees (Fahrenheit) for 20 minutes, turn chicken over and cook an additional 15 to 20 minutes until done.


Wednesday, August 5, 2020

Zucchini Bread 3 Ways

Once again this month I decided to do a quick bread recipe that I break into three small loaves for the smaller household. I have admit of all the quick breads I make I think zucchini is my favorite so I was excited to get started baking. 


Again this recipe freezes really well, just be sure to wrap the loaves really well and store in a freezer bag or other air tight container.

As for eating right away, as good as these are as soon as they are cool enough to cut I find they are even better if you can store them in the fridge overnight before cutting and eating. Their texture improves a lot that way and they are so good. I like to heat mine up in the oven/ toaster oven in the morning and have them with a cup of coffee for a quick breakfast or snack.

The 3 variations I chose for the zucchini bread are- Pineapple, Double Chocolate and Orange. All three are so yummy and just different enough that you won't get bored before you finish all of them off.

As you read the ingredient list you will notice that in one loaf I use pumpkin pie spice and in another I use apple pie spice. You might be wondering about this. I do find the 2 blends of spices are just different enough from each other to make a difference in the breads. I use the premixed spices simply because in this small of a batch it would be hard to measure each individual spice out accurately. After all we are only using ¼ teaspoon of the blend imagine how small of an amount of each individual spice that would be.

Before we begin with the ingredients we need to start by preheating our oven (in this case to 325°F). This is also a good time to grease the 3 small loaf pans( 5 ¾” by 3” by 2”) we will be using. I just used some no-stick spray on mine and it worked great.


To get started we are going to mix up our base bread mixture. You want about 1 ¼ cup to 1 ¾ cup of shredded zucchini. I used 1 average size zucchini for mine and it was just right.

We are using a combination of both white and brown sugar, I love the richness that the brown sugar gives the bread but it is not overpowering in the this amount.

The addition of applesauce makes the bread stay moist and therefore fresh longer. I use one of those little tubs that you buy to go into lunches. If you are using applesauce from a jar just use ½ cup.


Once the above ingredients are combined add the eggs and vanilla and mix.

Now onto the flour, baking powder, baking soda and salt. Once you have added the dry ingredients be sure work gently. Just mix enough to combine.


Now we are going to divide the batter into three bowls. I find three bowls of about a cup of batter is the correct amount for this recipe. It will depend a bit on how big your zucchini was to begin with.


Now on to the fun part making the 3 varieties.

Zucchini -Pineapple Bread


To the first bowl add:
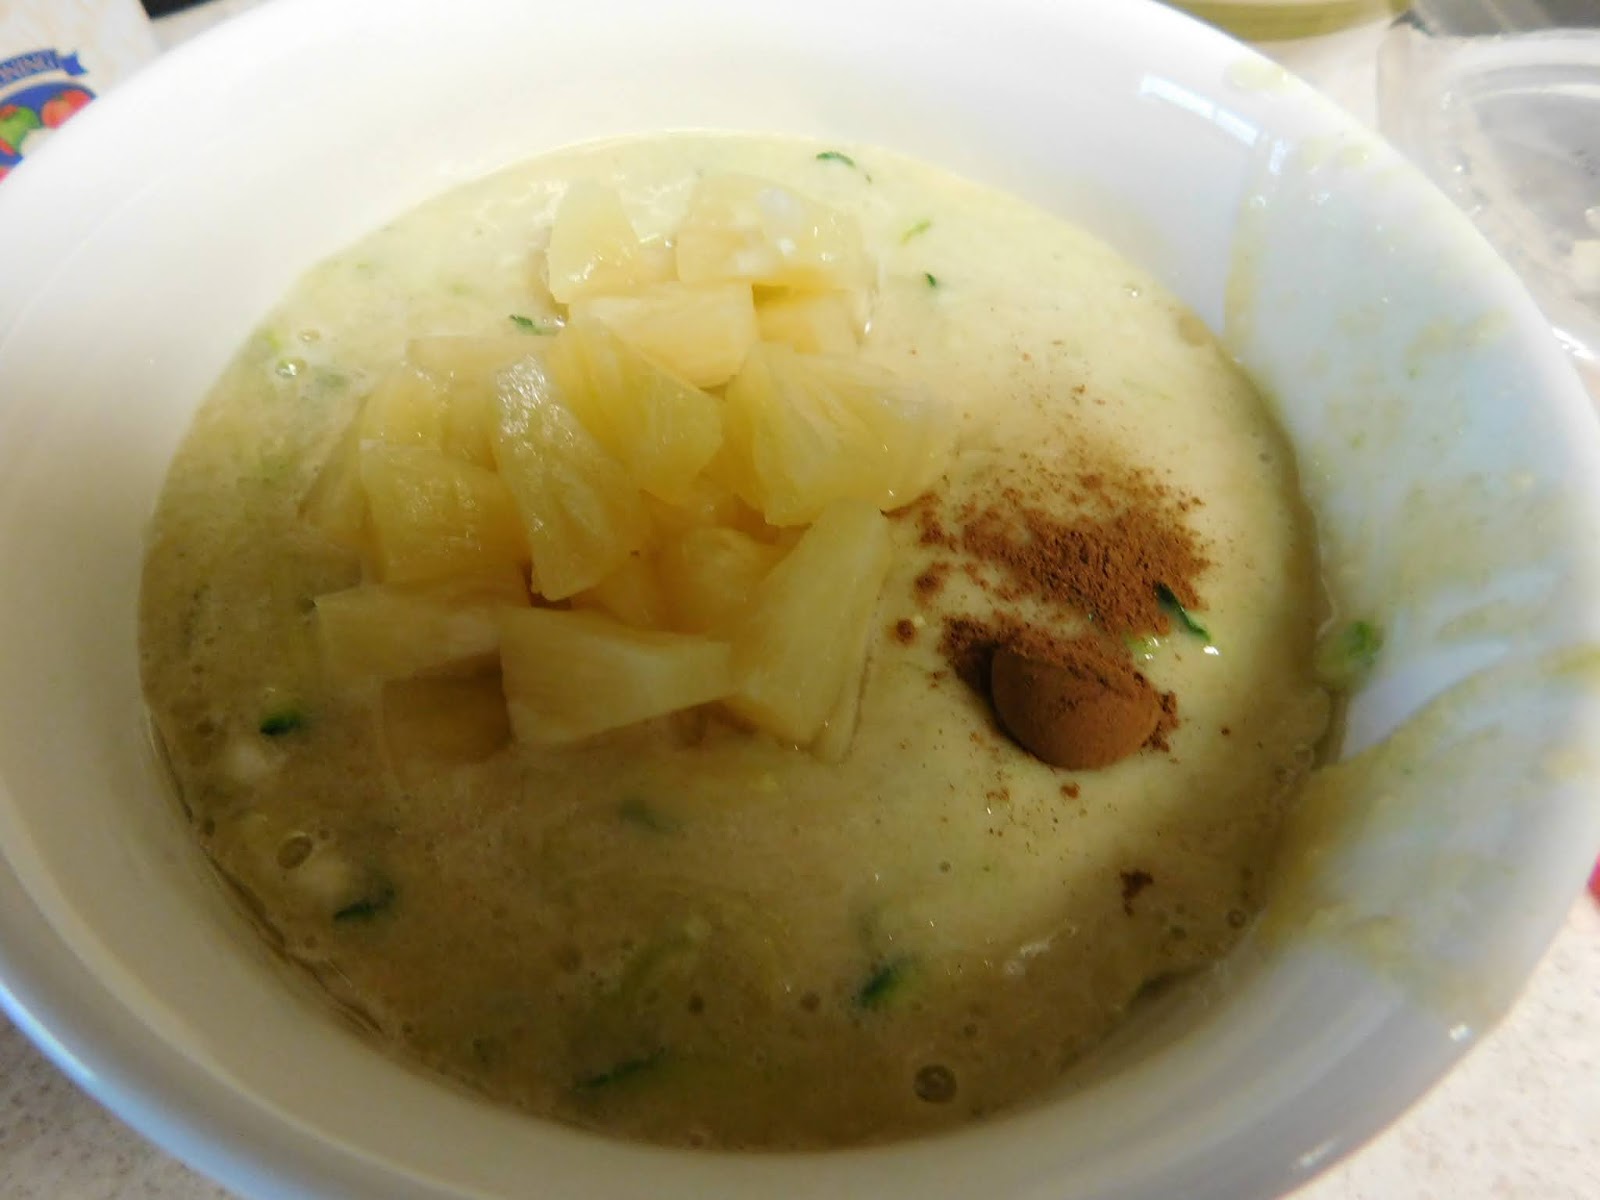
1 (4oz) plastic tub of pineapple tidbits
¼ teaspoon apple pie spice

Combine carefully and move the first prepared pan.


Zucchini Double Chocolate Bread


To the second bowl add:
1 oz unsweetened chocolate, melted and cooled
⅓ cup chocolate chips (I used dark chocolate chips)
Again mix carefully and move to the second prepared pan.


Zucchini Orange Bread


To the last bowl of batter add:
1 teaspoon orange zest
¼ teaspoon pumpkin pie spice

Once again carefully mix the ingredients and move batter to the last prepared pan.


Now time to bake. This is a moist bread so it is going to take a while to bake. Start checking at around 35 minutes by using a toothpick in the center of each loaf. Since the ingredients are different in the three loaves be sure to check all three loaves. I find the pineapple one takes up to 10 minutes longer than either of the other 2. 


Allow the loaves to cool in their pans for 10 minutes before removing them from their pans and putting on a cooling rack to finish cooling.


Once they are completely cooled we are going to add a nice glaze to the Orange loaf only.
For that combine
1 Tablespoon confectioner's (powdered) sugar
½ teaspoon orange juice


Combine and use to glaze the orange loaf. Allow to set up before cutting and serving.


Zucchini Bread 3 Ways

1 grated zucchini (1 ¼ to 1 ¾ cups)
1 cup granulated sugar
¼ cup packed brown sugar
1 (4 oz) plastic tub applesauce
cup vegetable oil
2 large eggs
1 teaspoon vanilla extract
1 ½ cups flour
½ teaspoon baking powder
½ teaspoon baking soda
½ teaspoon salt

Zucchini -Pineapple Bread
1 (4oz) plastic tub of pineapple tidbits
¼ teaspoon apple pie spice

Zucchini Double Chocolate Bread
1 oz unsweetened chocolate, melted and cooled
cup chocolate chips (I used dark chocolate chips)

Zucchini Orange Bread
1 teaspoon orange zest
¼ teaspoon pumpkin pie spice
1 Tablespoon confectioner's (powdered) sugar
½ teaspoon orange juice


Preheat oven to 325°F
Grease 3 small loaf pans ( 5 ¾” by 3” by 2”)

Combine zucchini, sugar, brown sugar, applesauce, oil, eggs and vanilla until well mixed.

Add dry ingredients and carefully combine just until mixed.

Divide batter into 3 bowls (each should have about 1 cup batter)


Zucchini -Pineapple Bread

Add the well drained pineapple and the apple pie spice to the first bowl. Gently combine and move to the first prepared loaf pan.

Zucchini Double Chocolate Bread

To the second bowl add the cooled, melted chocolate and the chocolate chips. Stir gently to just combine and move the batter to the second prepared pan.


Zucchini Orange Bread

To the last bowl of batter add the orange zest and pumpkin pie spice stirring gently to just combine. Move batter to the last prepared pan.

Bake the loaves in the preheated oven for 35 to 55 minutes. Be sure to start checking the loaves with a toothpick at the 33 minute time. They will cook at different times.

Allow to cool in the pans for 10 before moving to a wire cooling rack to completely cool.

When cooled combine the powdered sugar and orange juice to make a glaze and pour over just the Zucchini Orange loaf.


Wednesday, July 1, 2020

Banana Bread 3 Ways

We all know that one of the best uses of over-ripe bananas is a yummy loaf of banana bread. That is great when you have a houseful of people to eat the bread. But in smaller households of 1 or 2 people that isn't always the most practical idea. At least for me I know that even if I freeze most of that big loaf of banana bread I am going to get bored of it before I finish eating it/it goes bad. (yes, even in the freezer things have a shelf life) I need more variety so I came up with this batch of small loaves that is perfect for 1 or 2 people. Since I live alone I usually cut this size loaf in half to freeze. 


First lets talk about the loaf pans I am using, they measure 5 ¾” by 3” by 2”. One of mine is a Wilton brand that I picked up with a coupon at Joann's and the other 2 I found at my regular grocery store. Before I got these I just used the disposable ones from the from the grocery store. Those work okay but the heavier weight of the ones I have now produce a much nicer loaf. Also I like that I am not tossing them in the trash after a single use.

I the three flavors of bread I am showing you today are: Banana-Strawberry, Banana-Chocolate Chip and Banana-Peanut Butter. All three are super yummy. If you have a different addition you like in your banana bread feel free to substitute your favorites for what I used by using the amounts I give you as a guide.

So first I am going to take you step by step through the process with some pictures I took along the way. Then at the end of the post I will have the recipe and the instructions for you to follow.


As with any quick bread recipe I like to start by preheating my oven (in this case to 325°F. This is also a good time to grease the 3 small loaf pans we will be using. I just used some no-stick spray on mine and it worked great. 


In a medium size bowl we are going to combine sugar, oil and eggs with an electric hand mixer until they are well mixed.

Now add the sour milk or buttermilk along with your bananas. I find I really don't have to mash the bananas up at all before I add them since the mixer does a great job of mashing them.


Next in a separate bowl combine your flour, baking powder, baking soda and salt and whisk together to combine.

I like to make sure both of these mixtures are well combined separately before I combine them together. This assures that all the ingredients are well mixed without over mixing our small amount of batter. Especially important since we are going to be adding more to it later.

Now add the flour mixture to the oil/banana mixture. Mix this just until combined, don't over mix now that your dry and wet ingredients are together.

Now for the fun part. Move 1 cup of batter into each of 2 more bowls giving you 3 bowls of batter to work with. There might be a bit more left in the original mixing bowl that 1 cup don't worry about it, that loaf will just be a bit bigger than the other two.


Banana-Strawberry Loaf


Mix your chopped strawberries with the 2 tsp of flour and add to one of your bowls of batter. Gently fold/stir the berries into the batter then pour the batter into one of the prepare loaf pans.


Banana-Chocolate Loaf


 Gently fold/stir the chocolate chips into the second bowl of batter and move the batter to the second prepared loaf pan.


Banana-Peanut Butter Loaf


Stir the chopped peanuts into the remaining batter gently.


Meanwhile in a microwave safe bowl heat the peanut butter in 10 second bursts until it is thin enough to pour. Stirring after each time you heat it. Watch it carefully you don't want to overheat it just get it to the point you can pour it.


Move half the batter with the peanuts added to the last prepared loaf pan, spread the heated peanut butter over the layer and top with remaining batter.


Place all the filled loaf pans on a large baking sheet and move to the preheated oven. Bake at 325° for 35 to 40 minutes or until a pick inserted near the center comes out clean. Alternatively do as I do and check the internal temperature of the loaves with an instant read thermometer it should read 200° when baked through.


Let bread rest in pans for 10 minutes then move to a cooling rack to cool further.


These freeze really well as long as you wrap the loaves well. What I usually do is cut the loaves in half (since there is only one of me that works the best) then I wrap each half in a good sized piece of plastic wrap. I add a label to each loaf so I know which one is which. I then put all the wrapped loaves in the freezer overnight to get frozen. The next day I put all the frozen loaves into a labeled gallon size freezer bag. (yes all three loaves fit into 1 gallon size bag for me) then I store the bag in the freezer. When I want some of the bread I take out the piece I want in the evening and let it thaw on the counter overnight. By morning it is ready to slice and re-heat. Makes a wonderful breakfast with some nice hot coffee.

I hope you enjoy these as much as I do. Let me know what recipes you'd like to see here on the blog in the future.


Banana Bread 3 Ways

ingredients:


cup granulated sugar
cup vegetable oil
2 eggs
3 Tablespoons sour milk or buttermilk
3 very ripe bananas (about 1 cup mashed)

 
2 cups flour
½ teaspoon baking soda
½ teaspoon salt

Strawberry loaf
cup chopped fresh strawberries
2 teaspoons flour

Chocolate chip loaf
cup chocolate chips (I used dark chocolate ones this time)

Peanut butter loaf
cup roughly chopped peanuts
2 Tablespoons smooth peanut butter.


Preheat oven to 325° F,
Grease 3 small loaf pans ( 5 ¾” by 3” by 2”)

Combine sugar, oil and eggs until well mixed. Add the sour milk/buttermilk and bananas and again mix well.

In a separate bowl combine the flour, baking powder, baking soda and salt, mix well.

Add the dry ingredients to the wet ingredients and mix just until combined.

Divide batter into 3 bowls ( 1 into each the 2 extra bowls is close enough)

Strawberry loaf- combine the strawberries and flour and gently add to the first bowl. Move this mixture to a prepared pan.

Chocolate chip loaf- add the chocolate chips to another third of the batter and move to the second pan.

Peanut butter loaf- add chopped peanuts to last third of batter. Heat peanut butter in microwave in 10 increments stirring after each until pourable.

Add half peanut batter to remaining pan, pour on the heated peanut butter and add the remaining batter to top spreading to cover.

Bake in preheated oven for 35 to 40 minutes or until loaves test done.

Allow to rest in pans for 10 minutes.

Move to cooling rack to cool as desired.