Have you checked out all my blogs?


Dollhouse Minis: http://joannesminis.blogspot.com/


18” Dolls: http://joannes18dolls.blogspot.com/


General Crafts: http://joannes-place.blogspot.com/


Wednesday, June 16, 2021

Lemon Filled Cupcakes


I knew I just had to do some kind of Lemon cupcake for June, since June is when Father's Day is and my dad loved anything lemon. I considered several options then I remembered a cake that I used to make that he loved so I went about converting it to cupcake form. I know he would approve of these.


The cake came about by chance one day when I was still in high school. We were going to have company later that day and my mom had some errands to run. She asked me to bake a cake for dessert. I started out by making the same basic cake that both my mom and I made all the time but I wanted to dress it up a bit. As I looked through the very old cookbook that I still love I found a recipe for a lemon filling. It just happened that we had all the ingredients to I decided to give it a try. Now my mom was not especially happy that I decided to experiment on a dessert that was being served to company but by the time she got home it was too late to change it. As it happened the cake was a great success and everyone loved it.


My dad really loved the cake so I made it many times for him over the years. So when I was planning for the June cupcake I knew I had to play around with that recipe.


For the cupcake base I am using a portion of a yellow cake mix since the cake I used to make dad was just a basic yellow cake. If you haven't checked out my blog post on dividing a box of cake mix you can find it here. It is super simple and allows us to make a small batch of cupcakes instead of the huge batch.


I am using my adaptation of my favorite buttercream frosting. I have used it before on this blog and it always turns out wonderfully.


Then I needed to scale down the filling and incorporate it into the cupcake. This is a very basic filling and I scaled down beautifully. I got just a bit more than fit into the 6 cupcakes I baked. To make a spot to put the filling I simply used a sharp paring knife to cut out a small “plug” of cake from the top of each cupcake. Make an area just big enough to fill but not so big your cupcake leaks. Hopefully the photo will give you an idea of the correct amount.


Then it was just a matter of putting the filling into a disposable decorating bag (like the ones you use to pipe frosting) cut off the tip of the bag and fill the cupcakes. 


Carefully spread the frosting over the top of the cupcake covering the top of the filling.


I sprinkled mine with some yellow decorators sugar but that is totally optional.


Now if you have any filling leftover and you happen to have some Vanilla Wafer cookies on hand this is a combination that is so good. Just use the filling as a dip for the Vanilla Wafers, so good and so easy.


Click here for a downloadable/printable copy of the recipe.


Lemon Filled Cupcakes

Cupcake layer-


of a box of yellow cake mix

cup water

1 egg

3 ½ Tablespoons vegetable oil

¼ teaspoon vanilla extract


Start by preheating your oven to the temperature your box of cake mix calls for, mine was 350°F. Line your cupcake pan with paper liners or grease really well.


Combine the water, egg, oil and vanilla in a mixing bowl and combine well.


Add the cake mix and beat for up to 90 seconds.


Portion into cupcake pan and bake according to instructions on your cake mix. Mine was baked at 350°F for about 20 minutes.


Cool in pan for 10 minutes then move to a cooling rack and cool completely.


Use a sharp paring knife to cut a hole in the top of each cupcake and remove enough of the cake to make a small pocket for the filling. Make sure the cupcakes are completely cooled before you start this step.


Lemon Filling


6 Tablespoons sugar

1 ½ Tablespoons Cornstarch

6 Tablespoons water

3 Tablespoons lemon juice (bottled is fine)

1 Tablespoon butter


-optional yellow food coloring


Put all ingredients (except the food coloring) into a small saucepan. Heat over medium to medium high heat to a rolling boil, stirring constantly. Boil 1 minute remove from heat. 


Stir in just a touch of yellow food coloring if desired. 


Place in a small dish and cover with a plastic wrap covering surface (the plastic wrap pushed against the surface prevents a skin from forming). Chill completely before using to fill cupcakes.


Frosting


1 ½ cups powdered (confectioners) sugar

2 ½ Tablespoons shortening or butter

2 Tablespoons half and half

¾ teaspoon vanilla extract


Using a mixer blend together the powdered sugar and shortening until well combined. Add the half and half along with the vanilla extract and mix until smooth.


Spread or pipe frosting on cupcakes.


Wednesday, June 9, 2021

Sushi Bowls


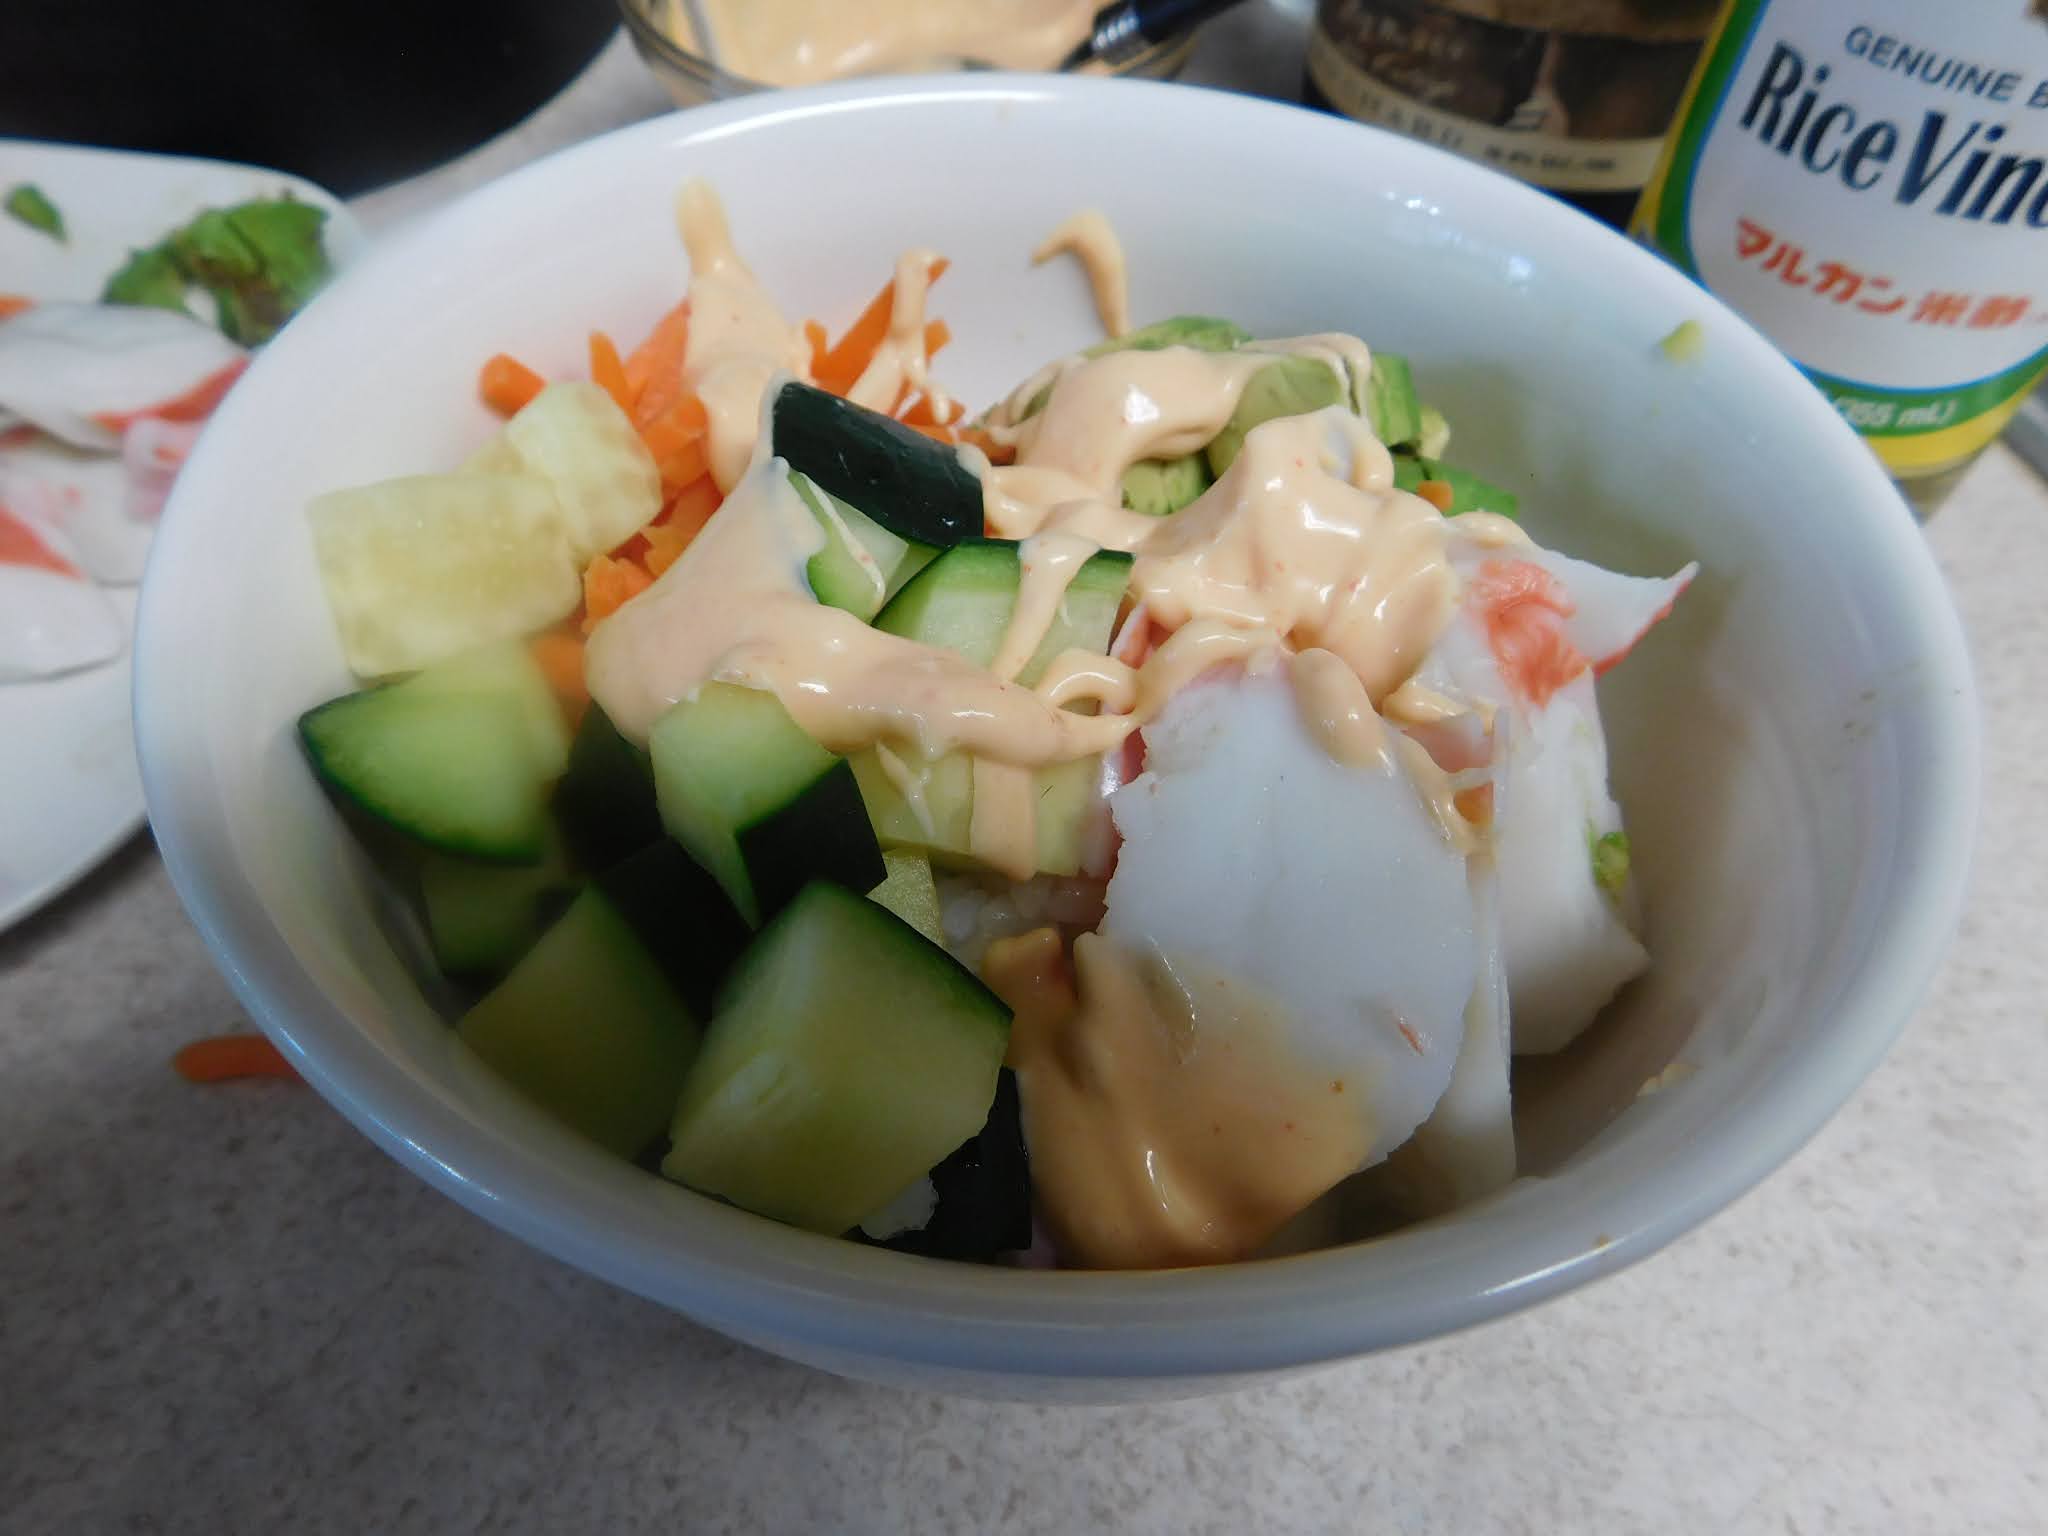
This week I am sharing my favorite recipe for a Sushi Bowl. Now don't say ick before you read on, there is no raw fish in this recipe since it is based on the California Roll. I know there are a lot of people out there that will maintain that the California Roll is not really sushi and they have many points. I consider the California Roll to be a very “Americanized” sushi selection. I also feel it is probably the best introduction to sushi for most Americans. Traditionally we don't consume raw fish here and for many it is a scary/disgusting idea. I have to admit I was apprehensive before I tried it but I found I actually really love sushi of pretty much every variety.


For those of you that do like more traditional sushi I have made this many times with raw fish and it is excellent that way too. Since I moved a year ago from Oregon to North Dakota I haven't yet found a source of sushi grade fish. While I do like sushi with raw fish I am very picky about where that fish comes from.


So if you have a favorite sushi just follow my instructions here for the rice and layer on your favorite sushi ingredients.


For the blog post I did leave off the Wasabi paste that is traditional, sometimes I do add it but not always. I felt a lot of you would not be wanting that many flavors that were unfamiliar to your taste buds. Also there is (or can be) plenty of kick in the Sriracha mayo.


I know a lot of recipes call for crumbling/breaking up nori snack sheets over the bowl. I have tried that and I feel it really doesn't add that much so I don't normally include it. If you aren't familiar with nori snacks they are small sheets of the same stuff that a lot of sushi is rolled up in. (that would be the dark green layer you see on sushi on display or in pictures)


For the fillings here I used the ones that are most common in a California Roll- cucumber, carrot, avocado and imitation crab. I know some people do use real crab in their rolls but I think it is a waste to use real crab when the other flavors and textures are going to overpower it. I prefer to save my real crab for dishes where I can fully enjoy it.


I am going to give just approximate amounts of the topping ingredients since you can really use any amount to suit your appetite and taste preference. I will give the exact amounts for the rice and the mixture that mixes with it.


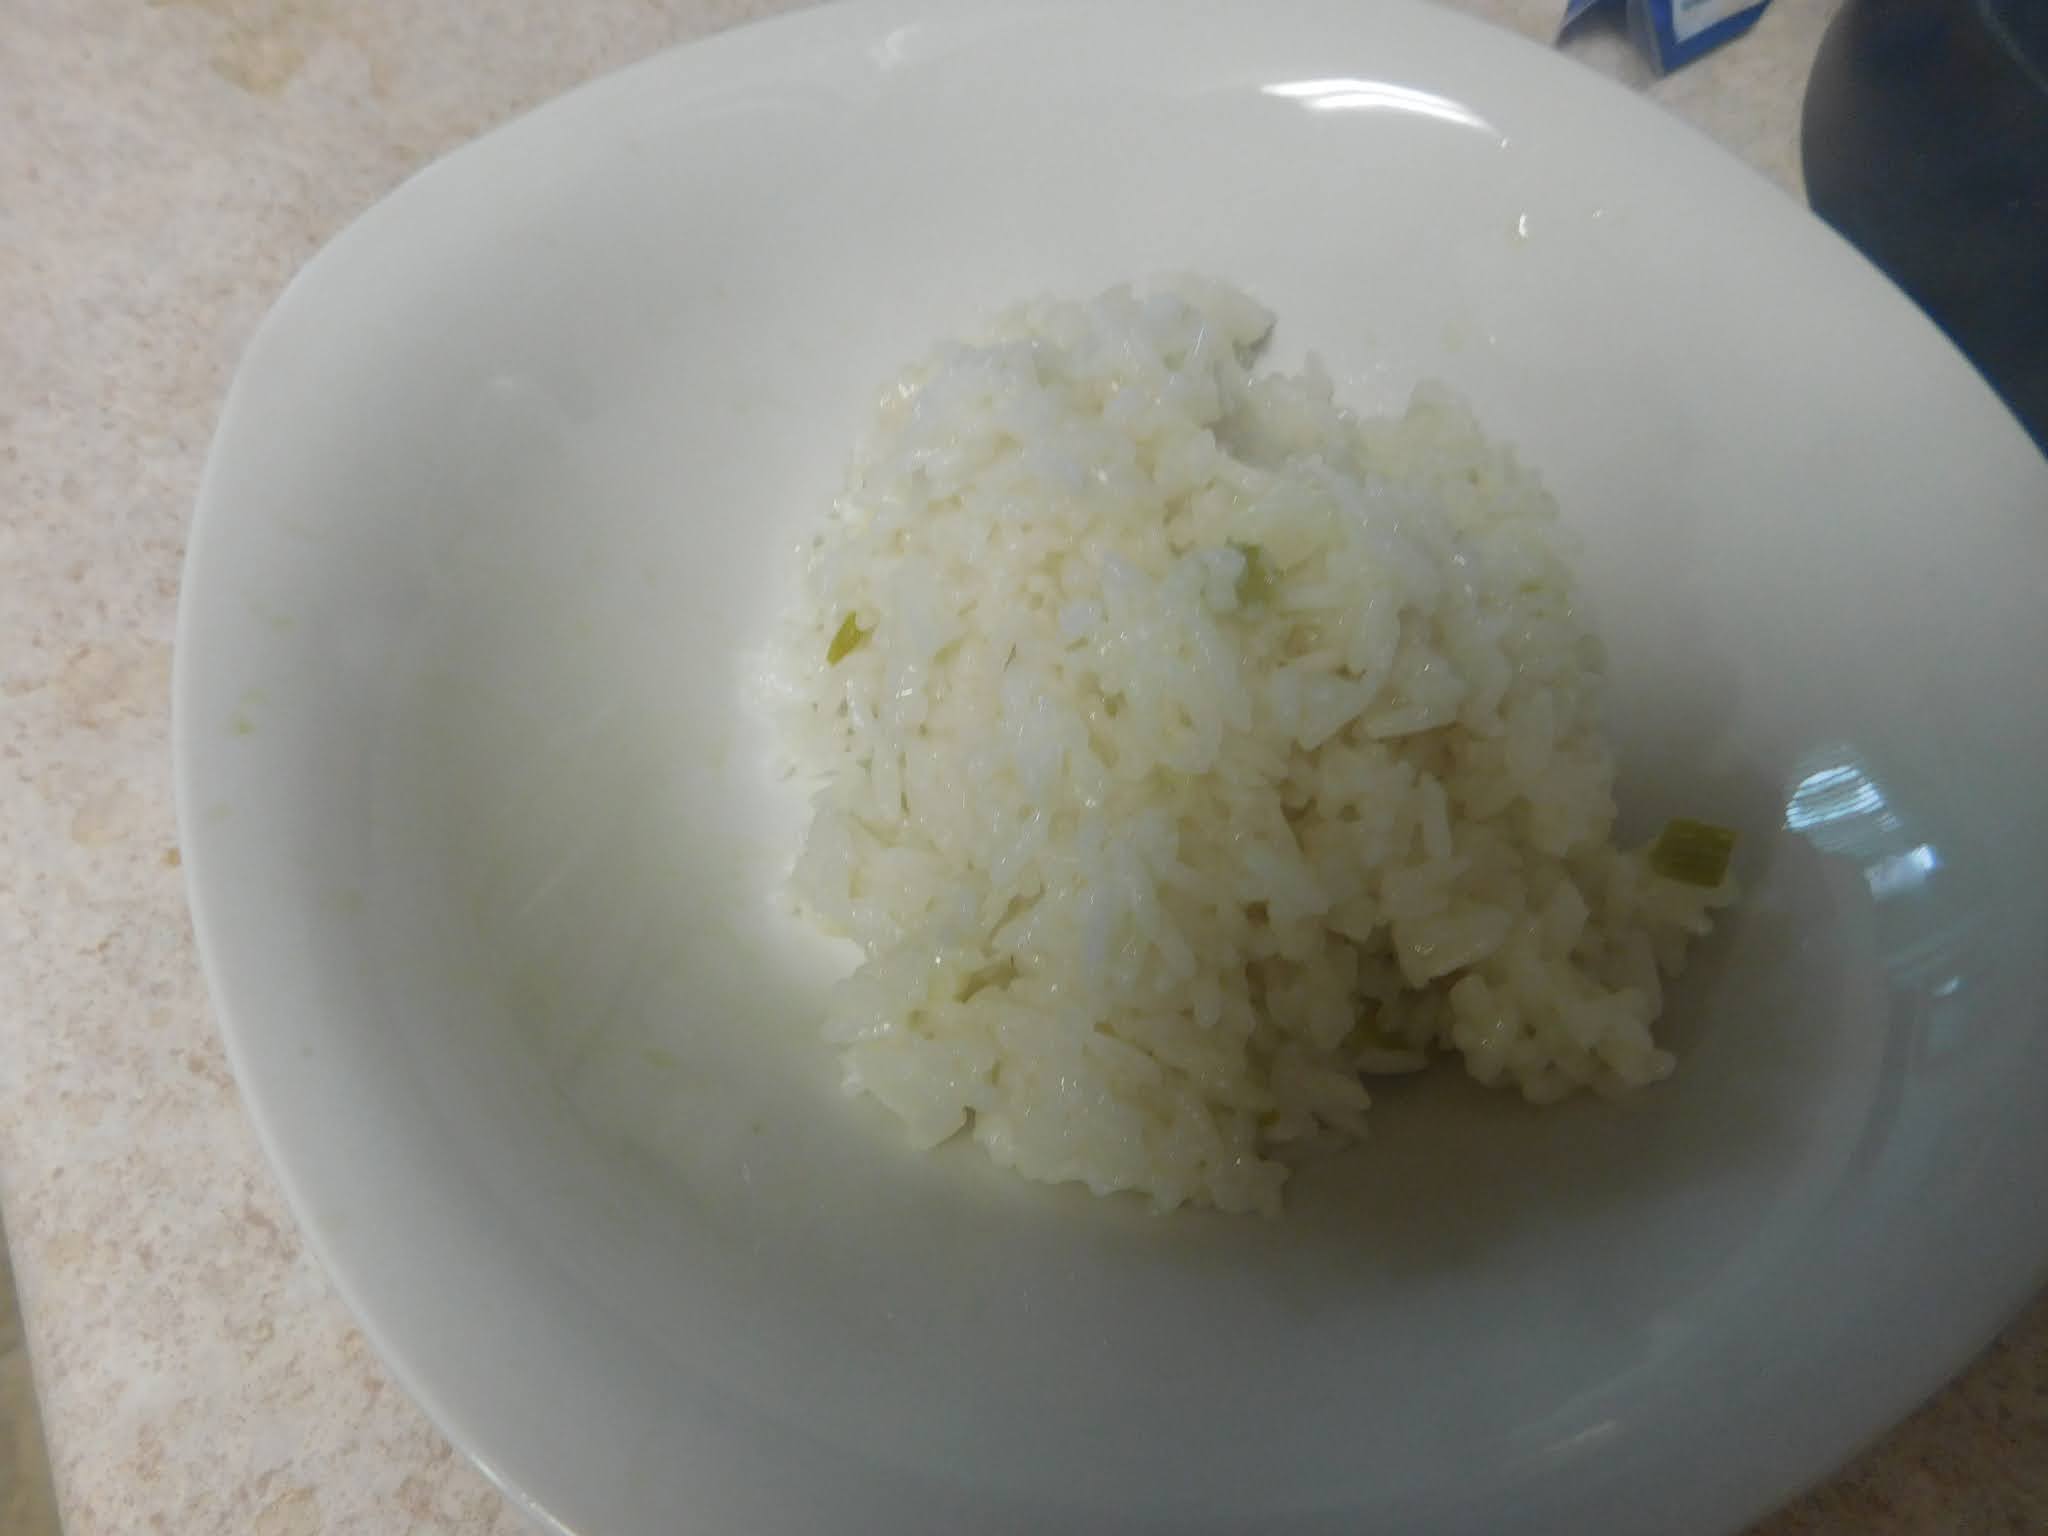
Speaking of the rice, you will need a short grain rice and it cooks a bit differently that other rices you may have used in the past. I really like the Sushi Rice from Rice Select. It has always been really easy to work with and has a wonderful taste and texture. Any short grain rice will work here.


After the rice is cooked (and this is a multi-step process) you will mix the rice with a hot vinegar mixture that will give it that signature sushi flavor. Please don't skip any of the steps on the rice. And also as a note I have found because this rice takes a much different ratio of water to rice that standard long grain rice I really don't like the texture if I try to take the easy way out and use a rice cooker. Just cook it on the stove top following my directions and it will be much better and very easy.


The mixture to add to rice I mentioned contains rice vinegar, sugar, and salt. It is all the seasoning you will add to the rice and it will taste like the rice from your favorite sushi shop.


For the uninitiated Sriracha Mayo may seem a bit daunting but I love the stuff and make it often not only for Asian inspired dishes but for fries to go with a burger. It is simply a mixture of Sriracha sauce and mayonnaise, up to 1 part Sriracha to 2 parts mayo. If you haven't tried this before go easy and taste as you add the sriracha to the mayo until you reach the correct heat level. You will want it just a bit too spicy since the rice and other toppings will mellow it a bit.


Youcan find a downloadable/printable copy of the recipe here.


Sushi Bowls


rice:

1 cup short grain rice

1 cup water

1 Tablespoon rice vinegar

1 Tablespoon sugar

½ teaspoon salt


Toppings (this is just a suggestion if you have a favorite Sushi use those toppings instead)


3 oz imitation crab (or real crab if you prefer)

¾ cup shredded carrot

¾ cup diced cucumber

1 avocado, sliced


Sriracha Mayo


2 Tablespoons Mayonnaise

1 Tablespoon Sriracha (or to taste)


Start by thoroughly rinsing the rice. I like to put into the pan I'm going to cook it in and fill that about ½ way with cold water and swish the rice around. Then drain in a fine strainer. Follow up by rinsing under running water until the water runs clear.


Now place the rice and an equal amount of water in small saucepan. Over high heat bring to a boil, immediately turn the element down to the lowest setting and cover the pan. Allow to cook on low for 15 minutes. At this time turn the heat off and leave the pan still covered on the element for an additional 10 minutes.


While the rice cooks combine the Mayonnaise with Sriracha to taste and set aside.


Now let's get ready to season the rice. In a micowaveable container combine the vinegar, sugar and salt. Heat to melt the sugar, about 20 to 30 seconds.


When the rice is done place the rice in a medium size bowl add the hot vinegar mixture and mix thoroughly.


Divide the rice equally between two bowls and top with the desired toppings. I like to keep the toppings separate for presentation.


Drizzle the Sriracha Mayo over the top to taste.


Wednesday, June 2, 2021

Basic Coleslaw


This week I thought I would share my recipe for just a basic coleslaw. This is a small batch just enough for 2 as either a side dish or on a yummy BBQ sandwich. It is a creamy version since that is my preference.


So a bit of the backstory here. When I was a kid I absolutely hated coleslaw. Couldn't stand the stuff and that continued in adulthood. Then for some strange reason out of nowhere about 10 or 15 years ago I started to no only like but to crave it. It was so strange because it literally happened overnight. Ever since I have really loved coleslaw.


So I have been playing around with different recipes over the years first in family size and more recently in small batch size. The recipe I am sharing today is my most basic one. I love to tailor the slaw to fit different meals and I will certainly share some other recipes in the future.


This starts out with some of that bagged coleslaw mix from the grocery store. You know the one the kind that just has the shredded cabbage and a few other veggies in it. Skip by the one with the packet of dressing. The dressing is the easy part, shredding the cabbage down fine enough to make a good slaw takes time and this is a really quick recipe.


I normally make this in the morning to serve later in the day. I find it tastes so much better if the flavors are allowed to “marry” for a while. Also the time allows the cabbage to soften up a bit making a more pleasant, much creamier salad.


Click here to get the downloadable/printable PDF of this recipe.


Basic Coleslaw


2 Tablespoons sour cream

1 Tablespoon mayonnaise

¼ teaspoon granulated sugar

¼ teaspoon dry mustard powder

pinch of salt

pinch of freshly ground pepper


1 cup coleslaw mix (or finely shredded cabbage)

1 green onion finely chopped


In a medium bowl thoroughly mix the sour cream, mayonnaise, sugar, dry mustard, salt and pepper.


Taste this mixture for seasonings. Add more of whatever you feel is lacking.


Then add the veggies and mix well to coat.


Store in the fridge covered.


Makes 2 servings

Wednesday, May 26, 2021

Black Bean Rice Bowl


This week I am sharing one of my favorite ways to use black beans. When I say it is one of my favorites I am not kidding, ever since I found this recipe I have made it at least once a month or more. I love so many things about this one. 


First off it is super easy and quick (takes around 30 minutes or less) is made from items I usually have on hand, tastes fantastic, and is a complete dinner in a bowl.


The base for this is bowl is a bed of rice, I prefer to use Jasmine rice and I am sharing how I make it too. I know a lot of folks have problems with rice. I actually have a rice cooker but this stove top method is faster and easier than digging out the rice cooker.


For the black bean mixture I am using some of those beans I shared the recipe for last week. As you probably will notice in the photos I used mine right out of the freezer. (I had forgotten to thaw them out, not the first time they work just as well in this recipe either way) If you would rather use canned beans just use a regular can of black beans but rinse them and drain them really well.


We are starting out this bean mixture with a Poblano pepper, this can sometimes be a game of pepper roulette some times I do get a hot one. If you don't like spicy feel free to substitute a green bell pepper for the poblano. I do love the flavor of the poblano though and with the rice and dairy in the toppings the heat is usually balanced pretty well.


The other ingredients in the bean mixture are some taco seasoning, use your favorite one (any heat level you like) and a small can of green salsa. I love this stuff and always have at least one can in my pantry. It is pretty inexpensive and adds a wonderful flavor to a lot of dishes. You might be surprised by the small amount of sugar in the mixture too, this is there to balance out the acids in the other ingredients, it really does a lot to bring the dish together.


For the top of the dish we are going to make a fresh salsa like mixture. I hesitate to call this a salsa because most people have the idea that a salsa is going to be spicy. This one is not, it is almost more a tomato salad, it has only a handful of ingredients but is so worth the time to make it.


We are also going to be making a crema topping to go on the top. You can use just plain sour cream if you like but the addition of the seasoning will make it so much more special, I really encourage you to try it.


So let's talk about the rice, I have come to love Jasmine rice in the last couple of years. It always cooks up nicely and it has a wonderful flavor on its own. It also pairs well with foods from all over the world.


I am starting off by sauteing the white part of the green onions is a bit of oil. Once they soften add the rice and stir it to coat with the oil. Add the water and bring to a boil. As soon as the water starts to boil turn the heat down to low and cover the pan. On my stove 18 minutes is the perfect amount of time. If the rest of dinner isn't ready yet, just move the rice still covered off to the side, it can sit and wait for a while.


While we are waiting for the rice to come to a boil combine the ingredients for the fresh salsa, then let them sit off to the side while you finish up the rest of the meal.


Now is also a good time to combine the sour cream and taco seasoning. Use a tiny bit of water (about a teaspoon or two) to thin it just so it will drizzle. Set this aside as well.


Now for that pepper core, de-seed, and cut up it into about ½” pieces. 


 In a hot skillet cook the pepper pieces in just a bit of oil until them begin to char a bit and are softened. Stir them from time to time so they don't burn but you do want some color on the edges. This will take about 5 or 6 minutes. Season the peppers with a bit of salt and pepper.


Add the black beans, taco seasoning and 1 Tablespoon of butter to the peppers and cook stirring until the butter melts and the beans are heated through. Add the can of green salsa along with the sugar. Cook and stir occasionally until the beans are softened. Taste the bean mixture and season as needed.


Fluff the rice and stir in the remaining tablespoon of butter.


When the rice is finished cooking fluff and stir in the other Tablespoon of butter. 


Divide the rice between two bowls,


Add the bean mixture,


Then top with:


the cheese, (I use a Mexi-blend but shredded cheddar is also a good choice and if you want to up the spice level pepper jack is wonderful)


the fresh tomato salsa,


and the crema.


I hope you enjoy this recipe as much as I do.


Click here to access a downloadable/printable PDF copy of the recipe.


Black Bean Rice Bowl


2 green onions

¾ cup Jasmine rice

1 Poblano pepper

1 Roma tomato

1 Tablespoon Taco Seasoning of your choice (divided)

¼ cup sour cream

1 ½ cups cooked black beans (drained, if using canned be sure to rinse)

2 Tablespoons Butter (divided)

1 (7 oz) can salsa verde

½ teaspoon sugar
½ cup shredded Mexi-blend cheese (or shredded cheddar or pepper jack)

vegetable oil, water, and salt and pepper


Start by washing all the produce.


Slice the green onions keeping the whites and green tops separate.


Dice the tomato


Core, de-seed, and cut up the pepper into about ½” pieces.


In a small pan heat a bit of oil and saute the green onion whites. Once they are tender add the rice and stir to coat in the oil and mix the onions through. Add the 1 ¼ cups of water, lower the temperature to low, and cover. Cook for 18 minutes or so.


Meanwhile, in a small bowl combine the green tops from the green onions, the diced tomato and a drizzle of oil (I don't measure but probably about a ½ Tablespoon or so) stir to combine and season with salt and pepper. Set aside while you prepare the rest of the meal.


In another small bowl combine the sour cream with ½ teaspoon of the taco seasoning. Stir until well combined. Add just enough water to give a drizzling consistency. (about 1 teaspoon) Set aside.


In a large hot skillet cook the pepper pieces in a bit of oil until they start to char and are soft. Season with a little salt and pepper.


Add the black beans, 2 ½ teaspoons taco seasoning and 1 Tablespoon butter to the peppers. Cook and stir until the butter melts and the beans are warmed.


Add the green salsa and ½ teaspoon sugar to the pepper mixture. Cook stirring until the beans are soft. Taste and season with more salt and pepper if needed. Turn off heat.


When the rice is finished cooking fluff and stir in the other Tablespoon of butter.


Divide the rice between two bowls, top with the bean mixture dividing evenly.


And top with the shredded cheese, the fresh tomato salsa, and the sour cream mixture.


Wednesday, May 19, 2021

Instant Pot Black Beans


This week I thought I would share probably the simplest recipe I know of for investment cooking. I am going to share how I do black beans. So first the why of this recipe.


I do use a lot of black beans, they are one of my favorite ingredients and I have a ton of ways to use them. And yes, it is so simple to purchase cans of beans that are ready to use. And yes, they are cheap. So why do I go to this work?


There are really several reasons.


For one a 1 pound bag of beans is a lot lighter to pack home from the store and takes up next to no space in the pantry before I use it. Those cans, if you are stocking up can get heavy to pack in and then you have to find space for all of them. That bag of beans takes up very little space. I then cook a batch up in my Instant Pot, cool them, bag them up and store in the freezer. In the freezer they take up very little space.


And more importantly I am in control of just what is in my beans. When I cook them there are only 2 ingredients- dry black beans and water. I don't use any kind of seasoning at all until I am ready to use them. Those cans of beans can have a lot of salt in them if you aren't careful what brand you are purchasing. I also find some brands have an off taste.


The process for cooking the beans is so much easier in the Instant Pot and really quick too. The traditional method of cooking black beans can take a few hours even if you soak them. And you need to watch the pot so that they simmer and don't run out of water. Basically you need to babysit them for that cooking time. With the Instant Pot you put the beans and water in the pot, push a couple of buttons and you can go about your normal day. The pot will take a few minutes to come up to pressure then it will cook for the amount of time you set it to do, then just let the pot do a natural release for 20 minutes. Your beans should be cooked perfectly at this point.


Transfer the cooked beans to a container and cool enough to handle them. (I usually put mine in the fridge for a couple of hours.)


I like to bag mine in 1 ½ cup portions because this equivalent to a standard can of beans that you get at the store.


To do this simply measure out 1 ½ cups of beans and put into plastic bags. Since I am going to put all the bags into a single gallon size freezer bag I just use sandwich bags for the individual portions. I have been doing this for many years and find the gallon bag provides the protection from freezer burn. I have this cool measuring bowl that holds 1 ½ cups that I like to use but if you don't have one of these just use your regular dry measuring cups. I find that using a canning funnel makes filling the bags really easy and mess free.


Seal the bags, getting as much air out as possible and put on a sheet pan and into the freezer to freeze. Once frozen transfer to a labeled gallon size freezer bag and store in the freezer until ready to use. To use just thaw in the fridge.


From my 1 pound of dry beans I got 4 bags, so they come out to just half price of what they would have cost me to purchase the cans. I paid right around $1 for the bag of beans (sale price) so each can was about 25¢. I can store 4 bags in a single gallon size freezer bag in a lot less space than 4 cans in my pantry. As a bonus I don't have to drain and rinse these, they are ready to use as you I will show you in next week's post.


Click here to get the downloadable/printable PDF of today's recipe.


Instant Pot Black Beans


1 pound dry black beans

3 cups water


Rinse, drain and pick through the dry beans. Some times there are foreign things like rocks mixed in with them.


Add the beans along with the water to the cooking pot of your Instant Pot. Put on the lid and make sure the vent is set to sealing (not venting)


Set the Instant Pot to Pressure cook or Manual (depending on the model you have) and high. Set the time to 35 minutes. At the end of the cooking time allow the Instant Pot to release naturally for 20 minutes. 


Transfer the cooked beans to a container and cool enough to handle them. (I usually put mine in the fridge for a couple of hours.)


Once cool enough to handle, portion out into 1 ½ cup portions. Place each portion into it's own bag. Seal the bag getting out as much air as possible. Tray freeze the beans then transfer to a labeled gallon size freezer bag. Store in the freezer until you are ready to use. Thaw in the fridge and use just like a can of black beans in your favorite recipe.


Wednesday, May 12, 2021

Chocolate Cupcakes with Peanut Butter Frosting


For the cupcake of the month for May I am doing a special request from my daughter. Her birthday is in May as is her son (my grandson) She asked me to make a cupcake version of the cake she always requested for her birthday cake growing up- chocolate cake with peanut butter frosting.


Since when my kids were growing up I always made their birthday cakes (and most other cakes) from scratch and since these cupcakes are supposed to be based on that I did a few changes to my cake mix batter to give it a better texture. It still isn't exactly the same but close enough.


As always with the cupcake of the month these are made with a portion of a cake mix. If you haven't read my blog with the directions on how to successfully divide a box of store cake mix you can find it here. There is also a link to a handy PDF that you can print out to remind you how to use the portions of cake mix.


This month I decided to play around with what liquid I used. This is the easiest way to elevate a cake mix cake and make it a bit more special. For this batch I replaced the water with chocolate milk. This makes the texture of the cake a bit more like homemade and it give the chocolate flavor a bit more depth.


You can use any chocolate milk you have. I simply squirted some chocolate syrup into the bottom of my measuring cup and added enough milk to give me the ⅓ cup of liquid I needed. I didn't use the vanilla extract this time since I didn't feel it was necessary. You can certainly add it if you would like.


For the frosting this month I am sharing a recipe for a fluffy peanut butter frosting. You do need to beat it for a while with a mixer but it is worth it. Start off by beating the butter and peanut butter together until they are well combined. Add the powdered sugar very slowly and beat well. As the mixture thickens add the milk about a teaspoon at a time to keep the frosting workable. Once the all the sugar is mixed in beat with a mixer until very fluffy (about 2 or 4 minutes)


To apply the frosting this time I used my Wilton 1M decorating tip with a disposable piping bag. I'm not sure if I do this exactly correct but I find I get the best result when I pipe a mound of frosting in the center of the each cupcake then pipe more about that mound to form a pretty top.


Click here to get the downloadable/printable PDF of today's recipe.


Chocolate Cupcakes with Peanut Butter Frosting

cupcakes:


of a box of chocolate cake mix

cup chocolate milk

1 egg

3 ½ Tablespoons vegetable oil


Start by preheating your oven to the temperature your box of cake mix calls for, mine was 350°F. Line your cupcake pan with paper liners or grease really well.


Combine the chocolate milk, egg, and oil in a mixing bowl and combine well.


Add the cake mix and beat for up to 90 seconds.


Portion into cupcake pan and bake according to instructions on your cake mix. Mine was baked at 350°F for about 20 minutes.


Cool in pan for 10 minutes then move to a cooling rack and cool completely.


Frosting:


3 Tablespoons butter, softened

cup creamy peanut butter

1 ½ Tablespoons milk

cup powdered sugar


In a medium bowl beat the butter and peanut butter together. Slowly add the powdered sugar beating very well. Add the milk as needed to keep the frosting workable. Once the sugar is all mixed in beat until fluffy (about 2 or 3 minutes)


Frost the cooled cupcakes with the frosting as desired.

Store in the fridge.