Have you checked out all my blogs?


Dollhouse Minis: http://joannesminis.blogspot.com/


18” Dolls: http://joannes18dolls.blogspot.com/


General Crafts: http://joannes-place.blogspot.com/


Monday, January 22, 2024

Jalapeno Popper Grilled Cheese Sandwich


This is another sandwich that you really want to save for a day when you just need to treat yourself, or someone close to you. This one is really rich and over the top, but soooo yummy.


I had some jalapeno peppers on hand and I wanted to do something different with them. I decided to put them into a grilled cheese sandwich. I went online and found a handful of recipes to gather some inspiration from and the result is this sandwich. Since I was pretty much stuck at home because of the weather I used what was in my fridge and cabinets.


So let’s talk about the recipe and how to create it. I do want to point out that the ingredient list is for each sandwich, so just scale it up for however many sandwiches you are making. Or make one and split it (which would probably be the more sane idea…..)


The first step is to char the jalapenos. Coat them in a bit of olive oil and put them on an oven safe pan and then under a broiler set on high. Depending on your oven they will probably need about 5 minutes per side. You want a fairly good char all the way around. Once they are well charred remove from the oven and cover so they can steam and soften. This will take about 5 minutes.


Also to prepare for sandwich making you will need to cook the bacon. Once cooked drain on a paper towel to absorb some of the grease.


Meanwhile slice the green onion and combine it with the cream cheese and garlic powder. Then spread this mixture on both slices of bread.


On one slice of bread top the cream cheese with most of the shredded cheese. Leave about 2 Tablespoons or so for later.
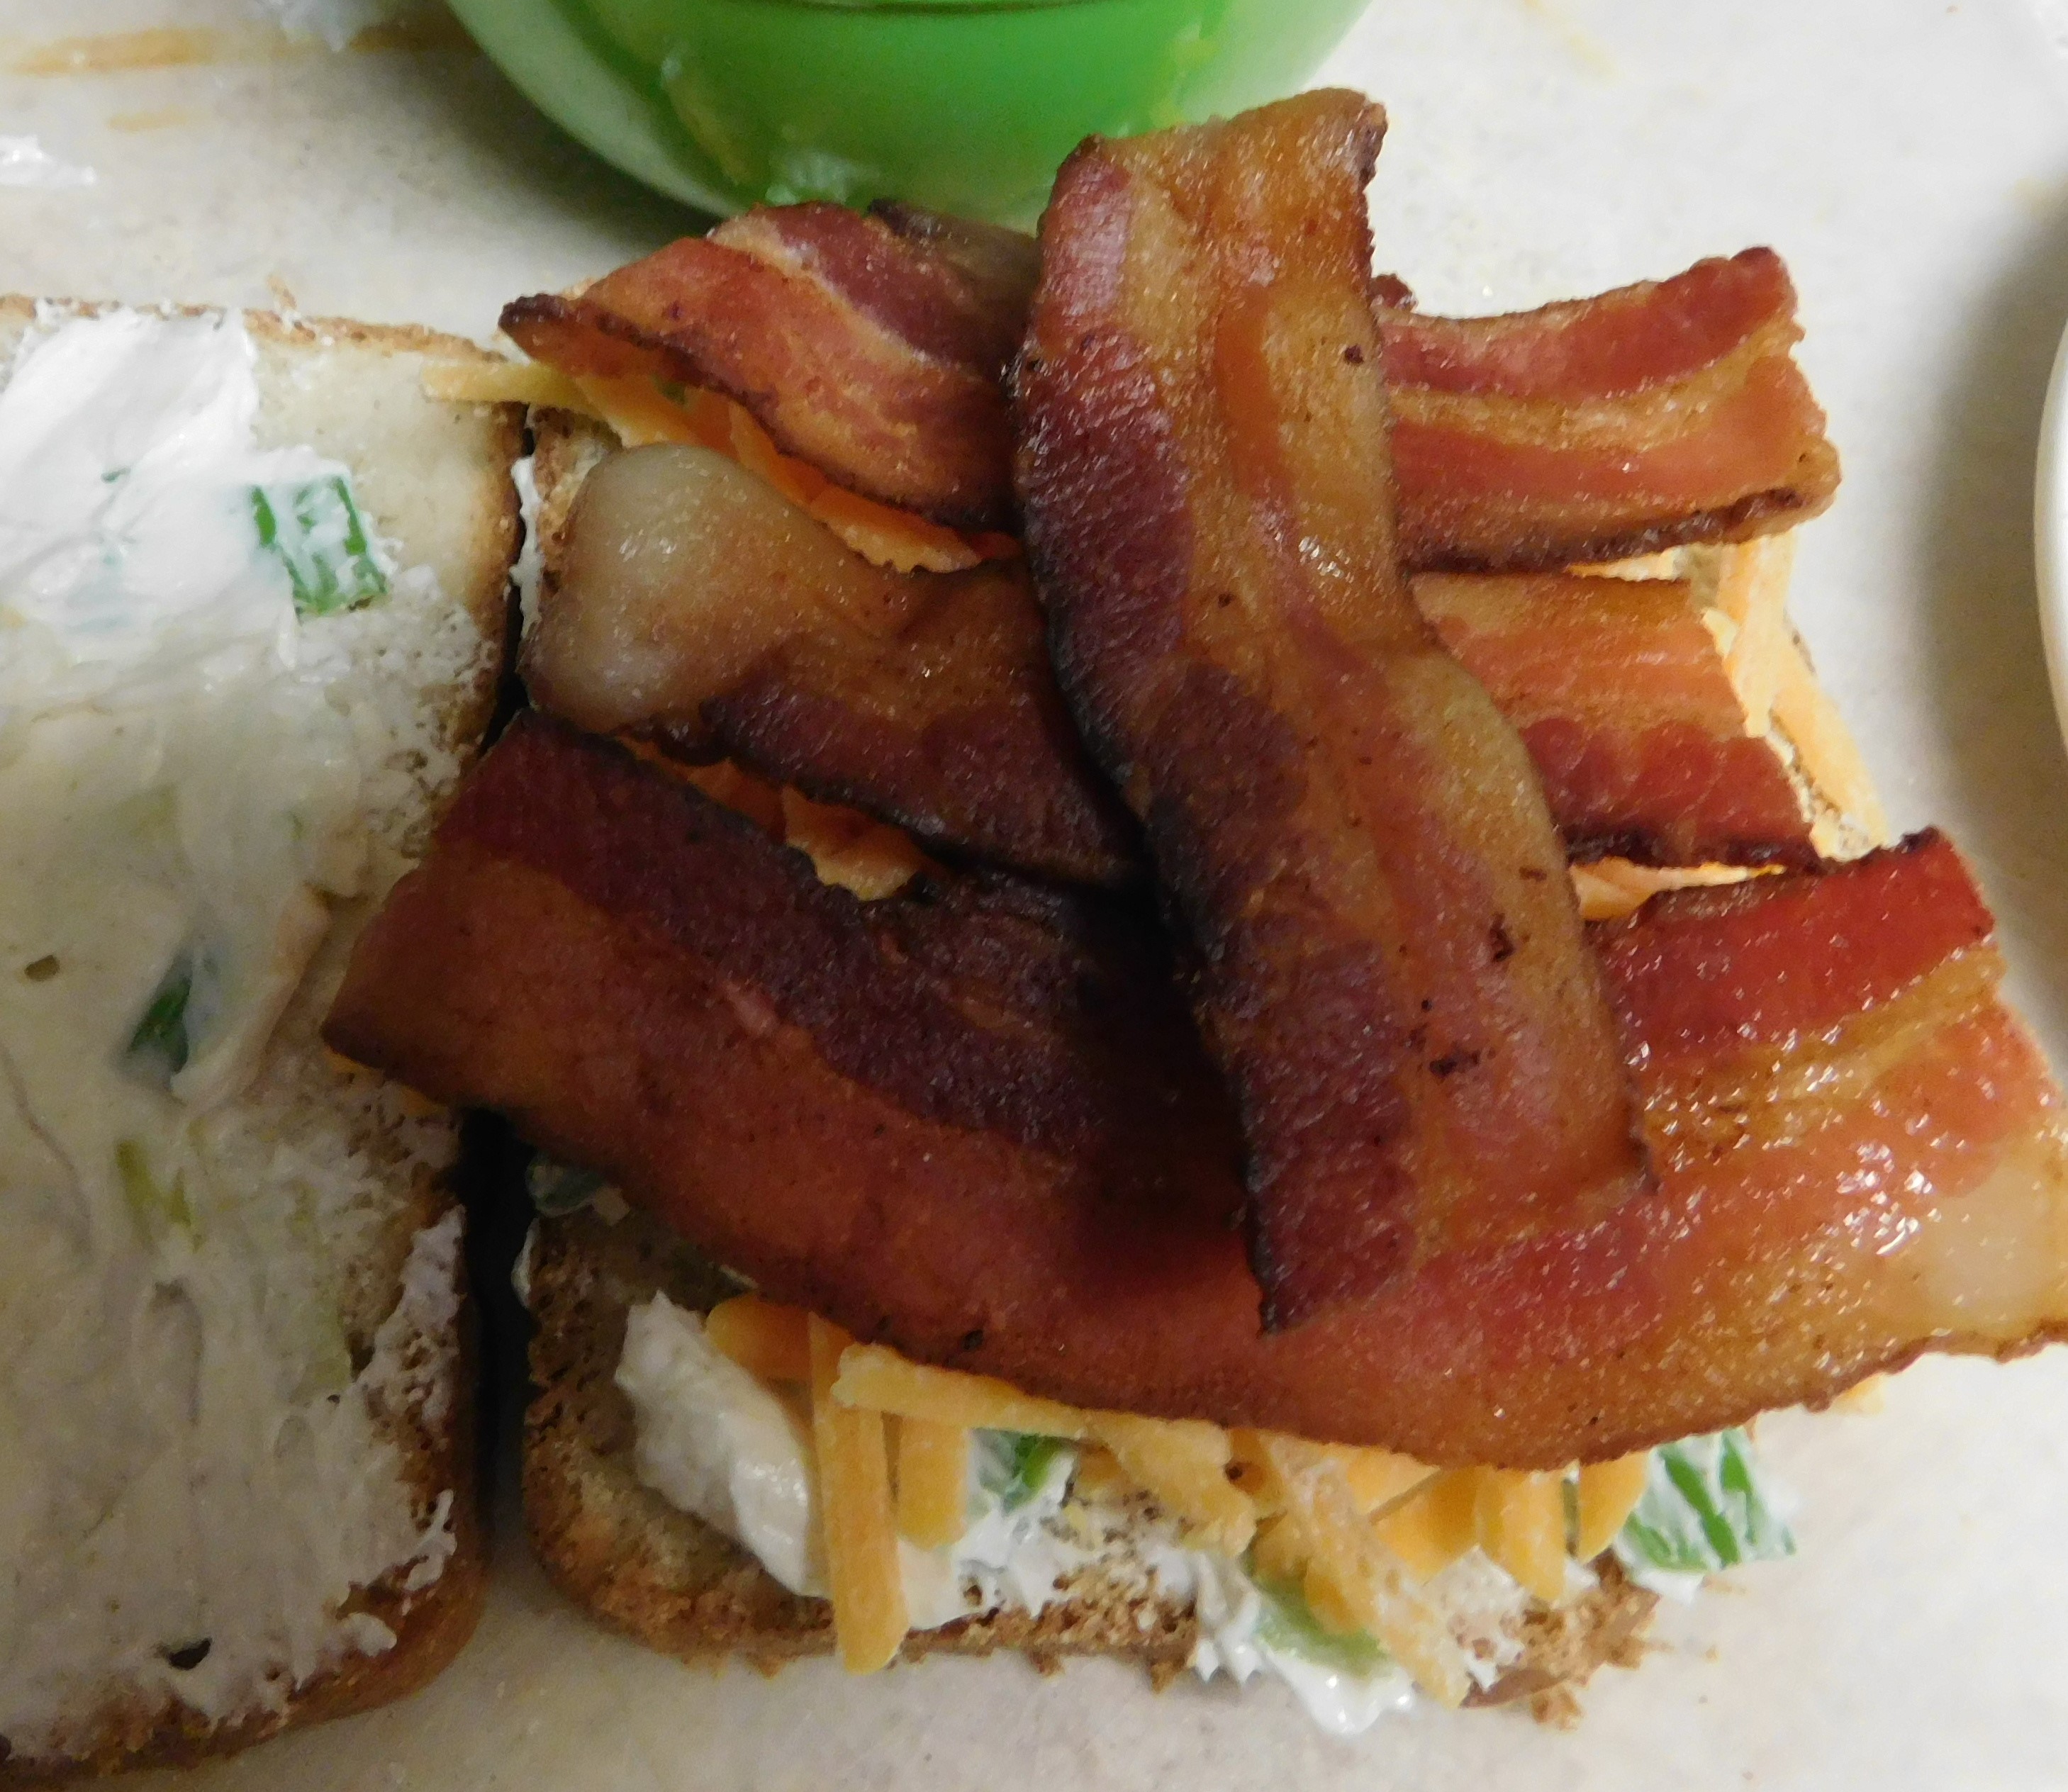


Top the cheese with the bacon.


By now the jalapenos. should be ready to cut in half lengthwise and scrape out the seeds and any ribs from the inside. Add the jalapeno halves on top of the bacon.


Top the peppers with the remaining cheese (this helps to “glue” the sandwich together)


 Melt 1 Tablespoon of butter in a preheated skillet and add the sandwich. Cook on
the first side over medium heat for about 5 minutes until the bread is nicely toasted.


Carefully flip the sandwich and cook on the second side until well toasted. You may need to add some more butter to the skillet when you flip the sandwich depending on how much the bread on the first side absorbed.


Slice and serve with you favorite sides.


Makes 1 (very large) sandwich.


You can find a downloadable/printable version of this recipe here.


Jalapeno Popper Grilled Cheese Sandwich


(per sandwich)


2 jalapeno peppers

1 Tablespoon olive oil

2 slices bacon

2 ounces cream cheese, softened

1 green onion

¼ teaspoon garlic powder

2 slices of bread (mine was sourdough)

¾ cup shredded cheese (I like to use a 4 cheese Mexican blend cheese)

Butter to cook sandwich in


Use the olive oil to coat the jalapeno peppers and char under the broiler for about 5 minutes per side. Cover and allow to sweat until softened, about 5 minutes.


Cook the bacon.


Slice green onion and combine with cream cheese and garlic powder.


Spread cream cheese mixture on one side of each slice of bread.


Top cream cheese with shredded cheese, reserving about 2 Tablespoons of the cheese.


Top shredded cheese with bacon.


Remove charred skins from peppers, cut in half and remove seeds and ribs.


Add peppers to sandwich on top of bacon.


Sprinkle with remaining cheese.


Melt about 1 Tablespoon of butter in skillet, add sandwich and cook over medium heat about 5 minutes until bread is well toasted.


Carefully flip sandwich, adding more butter to skillet if needed.


Cook on second side until well toasted and cheese is melted, about 5 minutes.


Enjoy.


Monday, January 15, 2024

Small Batch Lemon Bars


I love lemon bars and since I had some lemons on hand the other day I decided to bake some and share the recipe here in case any of you are in the mood for a bit of sunshine in your life right about now.


We need to start with the crust layer of the bars and it is super simple. Just a mixture of butter, sugar, and flour that is mixed together and partially baked.


While the crust is in the oven we can make the filling. Again it is really simple sugar, flour, eggs, lemon juice, and a pinch of salt.


This is poured on the crust and all is baked together.


I have sized this recipe to fit a 9” by 5” glass loaf pan so it is perfect for the small household. I do feel it is absolutely necessary to line the loaf pan with some parchment paper to make it easier to get the bars out of the pan. They are very delicate and can be difficult without the parchment to use to lift them out. I also want to say you are going to want to use a glass pan for this not metal. The amount of lemon juice in this recipe can cause damage to some metal pans and also the metal pans can cause an “off” taste to occur in the filling.


When the bars first come out of the oven they is going to look very white and not very attractive. Once it cools a good dusting of powdered sugar will hide all of that.


Allow the baked mixture to cool on a wire rack in the pan until it is cooled to room temperature.


Once it has cooled you can lift it using the ends of the parchment paper. Then use a long knife (or a pizza cutter) to cut off the browned edges. These are known as the cook’s snack. Then cut the bars, I usually cut this size pan into 8 small squares because of how rich they are. If you want them slightly larger go with 6 bars.


Sprinkle with a good dusting of powdered sugar and enjoy a bit of sunshine no matter what the weather is doing outside.


Store the bars in the refrigerator.


You can find a downloadable/printable version of this recipe here.


Small Batch Lemon Bars


Crust:

2/3 cup flour

1/3 cup butter, softened

2 Tablespoons + 1 teaspoon sugar


Filling:

½ cup sugar

1 Tablespoon + 1 teaspoon flour

pinch of salt

1 whole egg

1 egg yolk

3 to 4 Tablespoons freshly squeezed lemon juice


To serve:

Powdered sugar


Preheat oven to 350ยบF


Line 9” by 5” glass loaf pan with parchment paper (to form a sling)


In a medium bowl combine the crust ingredients.


Press the crust into bottom of the lined loaf pan.


Bake at 350ยบF for 15 to 20 minutes until firm and golden.


Meanwhile prepare the filling.


In a clean bowl whisk the sugar, flour, and pinch of salt together.


Whisk in the eggs until combined.


 Whisk in the lemon juice.


Carefully pour the liquid mixture over the partially baked crust. Return to the 350ยบF oven and bake for 20 minutes.


Cool in pan on a wire rack until cooled to room temperature.


Carefully lift from pan using the parchment paper.


Cut off the crispy edges. Then cut into bars. Since these are fairly rich I usually cut mine in 8 squares, but if you want bigger pieces cut it into 6 pieces.


Dust with powdered sugar.


Store any leftover bars in the refrigerator.

Saturday, January 13, 2024

Cook the Cookbook Project- week 9


T
his week marks a couple of things, first off although I posted a picture of the meal on my personal Facebook page and I took a picture of the meal plated to use with this blog post I didn’t actually get to eat this food. So although I will tell you about the menu and some of the trials that I encountered this post is mainly going to be the story of why I didn’t get to eat it. I do want to be clear the menu was not at fault and when I can bring myself to buy the ingredients again I will give it another shot.


T
his is the first week we were going to be checking out a new chapter in the cookbook, Regional Meals, U.S.A. This chapter concentrates on menus featuring foods from different geographical areas of the US, starting with New England.


So the menu this week starred a salmon fillet and I had gotten a nice piece of salmon at my grocery store a while back. So I wasn’t too worried about it. I did almost delay this meal because of the dessert, fresh strawberries with ice cream but decided instead to just skip the dessert and have the rest of the meal. After all it is January and I’m in the Midwest. Fresh strawberries are not really a good option right now. Little did I know that the bigger problem laid elsewhere in the menu.


So the morning I was planning to have this I walked down to the grocery store and picked up my groceries. I got over to the fresh meat/seafood counter and was basically ignored for several minutes. Then finally someone decided to see what I wanted. I asked the nice man behind the counter for a small piece of salmon. He dug through to find me a small piece, weighed it and I was on my way. I grabbed the rest of what I needed and headed home.


When I got home I immediately put the salmon in the fridge and took care of the rest of my groceries.


At this point I realized the menu had called for new potatoes and I had forgotten to see if the store had tiny potatoes on hand. (they usually do) so I decided that I would just cut up a couple of the small potatoes in my pantry and use those. Not a problem really.


I spent some time making the dough for the rolls and getting some other projects done that I needed to do that day.


Since the menu called for me to poach the salmon and that is not really a method I enjoy I had already decided I was going to cut the piece of salmon I had bought into 3 serving size pieces and freeze 2 of them to use later. At this point the fish was extremely cold and other than being a bit slimy I didn’t notice too much off. I wrapped up the two extra portions and pulled the skin off the piece I was planning to use.


I had already started the poaching liquid and tasted it. It was perfect, just the right seasonings and I had let it simmer for a while to let the aromatics release their flavors into the broth. I carefully slipped the salmon fillet into the pan and put the lid on. At this point I had everything else ready to go.


The rolls were baked, the peas were cooked, as were the potatoes. I had the egg sauce ready and waiting. I had decided to skip the salad since I wasn’t super hungry.


Then the fish got warm and even with the lid on pan I knew something was off, way off. I carefully lifted the lid and was hit in the face with the stench of rotten meat. I mean this smelt like something had died in the pan. This was as bad as when you come upon an animal that has died several days ago. Or the time on the farm when a small animal crawled under the house and died in the middle of summer. It was horrid. And now my kitchen smelt like that also.


I quickly put the lid back on the pan and moved it off the heat. I pulled out the 2 pieces of salmon that I had wrapped up and sure enough when I smelt them closer I could definitely smell the rot it was faint because they were really cold but it was there.


At this point I was no longer hungry and I knew I was going to toss all the food I had made anyway. So I plated it and took a few pictures before tossing it all in the trash and exiting my kitchen leaving the vent over the stove running at full blast.


I did message the store about the issue and I will be taking my receipt back to see if I can get my money back on the foul fish.


It was hours before I felt up to even making a slice of toast to eat. My stomach was churning from the smell all night. Since it is so cold I had to wait until morning to take out the trash so I could still smell the stench in the morning when I got up.

Monday, January 8, 2024

Southwest Shrimp Bisque


Of course the first thing I know someone out there is going to ask is this really a bisque? And to be truthful I am not really sure. I think I know what a bisque is and I even looked online to double check. I am still not sure if this is a true bisque or not. The original recipe that I based this recipe on was titled as a bisque so I decided to stick with it.


What I can tell you is this a very rich, very smooth, very yummy bowl of soup. It is perfect on a cold day or for a special dinner to celebrate whatever needs to be celebrated. Note I did say rich and that is not an understatement this is a very rich soup and should be saved for a special dinner. Or a Monday, like I did when I made this. I am going say I chose to have it when I did not only so I could share it with all of you but to ring in the new year in style.


There is just the perfect amount of spice in here to give it some zing but that is balanced with the cream so mellow it. With all the flavor the shrimp is still the star of the bowl.


When you get your shrimp if you have the choice of ones with shells on that is my preference. Unfortunately when I picked up my shrimp from the store I got the absolute last bag of frozen small shrimp in the store and they were peeled. At least they had their tales on. I say this because the first (optional??) step I like to do is take all those tails and shells if I have them and simmer them in a covered saucepan for about 10 minutes before I start the soup in my soup pot. This allows the flavor from those shells/tails to infuse the chicken broth. A small step but I really think it adds to the overall taste of the soup. And after all you paid for the flavor in those parts that are normally thrown away.


While the broth is getting infused we can get everything ready to make the soup. I like to have all my prep done before I start cooking, all veggies peeled and chopped, all seasonings measured out, all that stuff done so once I start cooking I don’t have to dash around trying to find things.


The first step is to cook the onion in some olive oil. Do this on a medium heat and cook them until they turn translucent and are starting to soften. I have found that a lot people I have talked to that say they don’t like onions in things aren’t cooking them long enough.


Once the onion is cooked add the garlic stirring it into the onions. It will only need a couple of seconds, just until you smell it.


Now add the spices stirring them in cook until again you smell the spices starting to warm up. This gives them, especially the cumin a much better flavor in the finished dish.


Add the flour and cook for about a minute stirring constantly. The mixture in the pan is going to be very stiff.


Then pour the infused chicken broth through a fine mesh strainer into the pan and stir it in very well. Add the cream again stirring really well.


Bring the soup barely to a boil and then cover the pan and simmer it over low heat for about 5 minutes.


Taste the broth of your soup and add salt and pepper if needed. This will depend on how well seasoned your chicken broth was to begin with.


Now add the shrimp and again bring to a boil. Then turn down the heat and simmer until the shrimp are cooked almost through. Stirring from time to time. This should take between 5 and 10 minutes.


While the shrimp cook move the sour cream to a small bowl.


Once the shrimp are cooked whisk ½ cup of the hot broth into the sour cream. Then transfer this mixture into the soup pot.


Cook stirring until the soup is hot. Be careful not to let the soup boil once the sour cream is added.


Ladle into two bowls and top with diced avocado and some chopped cilantro.


You can find a downloadable/printable version of this recipe here.


Southwest Shrimp Bisque


1 small onion, chopped

1 Tablespoon olive oil

2 garlic cloves, minced

1 Tablespoon Chili powder

½ teaspoon cumin

½ teaspoon ground coriander

1 Tablespoon flour

1 (14.5 ounce) chicken broth

½ cup heavy cream

½ pound small shrimp, peeled and deveined

½ cup sour cream

salt and pepper to taste


Avocado and chopped cilantro to top bowls of soup

Optional first step: combine the can of chicken broth and any shells/tails from the shrimp. Bring to a boil, reduce heat, cover and simmer for about 10 minutes to infuse the chicken broth with a bit more flavor.


In a medium soup pot heat the olive oil over medium heat then add the chopped onions and cook until they are translucent and starting to soften.


Once the onion is cooked add the garlic stirring it into the onions, cook just until fragrant.


Sprinkle the spices over the vegetable mixture and cook until fragrant.


Add the flour and cook for about a minute stirring constantly. The mixture in the pan is going to be very stiff.


Add the (infused) chicken broth to the pan and stir it in very well. Strain it through a fine mesh strainer if you infused it with the shells/tails. Stir the cream in to combine.


Bring the soup barely to a boil and then cover the pan and simmer it over low heat for about 5 minutes.


Taste the broth of your soup and add salt and pepper if needed. .


Now add the shrimp and again bring to a boil. Then turn down the heat and simmer until the shrimp are cooked almost through. Stirring from time to time. This should take between 5 and 10 minutes.


While the shrimp cook move the sour cream to a small bowl.


Once the shrimp are cooked whisk ½ cup of the hot broth into the sour cream. Then transfer this mixture into the soup pot.


Cook stirring until the soup is hot. Be careful not to let the soup boil once the sour cream is added.


Ladle into two bowls and top with diced avocado and some chopped cilantro.

Saturday, January 6, 2024

Cook the Cookbook Project- week 8


A
fter taking a short break for the holidays (and a some time because I caught whatever the nasty bug is going around) I am back with a post in the Cook the Cookbook Project.


This week we are finishing out the first chapter of the book featuring America’s favorite recipes from back in 1958. I know I have one menu that I will need to return to when I can get the meat for the main part of the meal. Other than that one menu I have now cooked my way through that first chapter.


Since the 2nd

chapter is all about seasonal favorites I won’t be cooking straight through it but rather making the recipes as the seasons change.


This week the menu consisted of baked beans, brown bread, a salad, and for dessert a baked apple.


So one by one what did I think of these dishes?


The baked beans, this week it was a really quick version of baked beans. Basically it had me cook some bacon, and then cook some onions in the bacon fat. Then stir in a can of baked beans along with some chili sauce and a bit of mustard. Then it went into the oven for about 45 minutes.


I did have to substitute the size of the can of beans called for. Apparently can sizes of baked beans have changed over the years so the balance might have been off just a bit although I did my best to scale the ingredients to fit the size of can I was able to get.


I know on the rare occasion my mom made baked beans when I was growing up this was pretty much what she did. They were good, I’m not the biggest fan of baked beans but these were good and something I rarely eat.


The portion of this menu I was most excited about was the brown bread. The recipe directed me to bake it in a washed out can. The problem was I couldn’t find anything at the local grocery store in the size can called for. I decided that rather than make myself crazy looking for a specific size can I would just divide the batter in my small loaf pans. The recipe said it would make 2 loaves in the cans, I got 3 in my small loaf pans. The recipe does note that the bread freezes really well if well wrapped.


Growing up my mom served this type of bread often. She never baked this one though it was one of the few breads she would buy at the store. And yes, it came in a can. I loved that stuff and I remember I could eat most of the loaf myself back in the day. For this reason I have been looking forward to this menu for ever since I saw it when I set up to do this project. The recipe is interesting, I have never made it before and I have to say it does taste like the canned stuff I remember. It has a small amount of flour and a bit larger amount of either graham cracker crumbs or dry bread crumbs. It gets its distinctive flavor from a healthy amount of molasses which also gives the bread its color and will keep it moist for a while. I did add the optional raisins since I remember they were my favorite part.


The salad was just a simple one using equal parts chopped veggies (raw or cooked) and torn salad greens, then dressed with an oil and vinegar dressing. So simple and the perfect counterpart to the sweetness of the baked beans.


For dessert there was a baked apple, this one with maple syrup, hence the name Baked Vermont Apple. Growing up my mom served baked apples a lot probably at least one day a week in the winter. I haven’t had one in years and I was reminded that I really am not a huge fan of them. But it was still fun to travel down memory lane.


So what do I think overall about this menu. I will be honest and say it was not my favorite out of the chapter but it was okay. I am very happy to have made it and ate it.