Have you checked out all my blogs?


Dollhouse Minis: http://joannesminis.blogspot.com/


18” Dolls: http://joannes18dolls.blogspot.com/


General Crafts: http://joannes-place.blogspot.com/


Friday, February 22, 2019

Kielbasa and Cabbage over Noodles


This is a recipe I have been playing around with for a couple of years making little changes here and there. I think I have it just where I want it so I thought it was probably time to share it with all of you.


This is a recipe I turn to a lot especially during the colder months of the year. It is filling and just a great comfort food all around. It also is made of ingredients I almost always have on hand and they are all inexpensive ingredients. The four main ingredients: kielbasa sausage, coleslaw mix, onion and noodles are pretty much always here. The other stuff I can work around if I am missing any of them.

So lets talk first about those ingredients that I do have on hand that show up here.

The kielbasa sausage I watch for sales on (the last batch I got was $1 for the ring) so I can stock up. I cut the larger piece into 4 oz chunks, wrap each chunk in plastic wrap and store them in the freezer in a labeled re-closeable freezer bag. They are surprisingly handy to have around. The coleslaw mix is also usually around $1 in my grocery store and I use it several times a week. Not only for coleslaw but also to throw into soups and casseroles. And of course onions and plain egg noodles are a must haves in my pantry.

If I am out of bacon I just use cooking oil or butter the seasonings are pretty much standard fair if you are missing the caraway seeds or the paprika just skip it, the dish will still be good but I do recommend you pick some up so you can get the full experience.

The part of this dish that takes the longest is wilting the coleslaw mix before you start cooking. If I am short on time I occasionally skip this step but it is better if you have the time. This just gives the dish a better texture in the end. And don't worry about the amount of salt you are rinsing a lot of it off before you use the cabbage.


The amounts I am giving here is for 1 serving but I have scaled it up for 3 with no problems at all. Just multiply the amounts by the number of servings you need. (and use a bigger pan)

Kielbasa and Cabbage over Noodles

3 cups coleslaw mix
1 tsp salt
1 strip bacon, chopped
¾ cup wide egg noodles
¼ lb Kielbasa sausage (sliced ¼” thick)
small onion, chopped
1 clove garlic, minced
½ teaspoon caraway seeds
¼ teaspoon paprika
salt and pepper to taste
¾ cup wide egg noodles

Place the coleslaw mix into a colander and give it a quick rinse under cold water. Add 1 teaspoon salt and mix together. Place the colander over a bowl to catch any drips and allow to stand for about 45 minutes. (this allows the cabbage to wilt a bit) Rinse and drain really well.


Cook bacon in a medium saute pan until crisp. Remove bacon to use as garnish and reserve drippings in pan. Add sausage slices and onion to pan of drippings and cook until the onion is tender. Add the garlic, caraway seeds and paprika to onion mixture and cook until fragrant, stirring often.

Add the rinsed coleslaw mix, season with salt and pepper to taste and mix well. Cover and cook over medium-low heat for 15-20 minutes.

Meanwhile cook the noodles in boiling water as directed on package and drain well.

Serve the cabbage mixture over a bed of the noodles.

Sprinkle with the reserved bacon.

Serves 1

Monday, February 11, 2019

Be My Valentine Cupcakes (small batch)

This is the first of what I hope will be a once a month series of cupcakes that are themed for each month. We will be using our divided cake mix portions from my last blog post. If you missed that post here is a link to it. Basically I show you how to divide a box of cake mix from the grocery store so you can make small batches of cupcakes.


This cupcake actually caused me to loose some sleep because I woke up at 1AM one morning with the idea starting to form in my brain. I couldn't go back to sleep until around 4 because I kept thinking of what I wanted to do with it. In those 3 hours although I missed out on sleep I came up with this cupcake recipe. I had to be at work that day at 9AM but as soon as I got home I started working on my test batch. They turned out just as I had imagined during those hours of not sleeping.

My inspiration for these is simply a box of Valentine's Day chocolates. I wanted to represent those wonderful chocolates in a cupcake form and make something special that you can make for someone special.

So for the base of the cupcake I wanted a really nice rich, dark chocolate cupcake. I used my Devil's Food cake mix and by using regular strength coffee in place of the water I knew that would deepen the chocolate flavor without adding much in the way of coffee flavor. I simply made a cup of coffee (use whatever plain coffee you have) and allowed it to cool to room temperature. The rest of the ingredients were done as normal for my cupcakes. I got 7 cupcakes this time which is pretty normal sometimes I do get 8 sometimes 6 it all depends on how much batter goes in each cup of the pan.

Bake as directed on the box (350° F for 20 minutes) be sure to test a couple of them to make sure they are all cooked.

Just before the cupcakes are done baking we are going to make up a small batch of Cherry Jello. I use the kind with real sugar so that is what the measurements I am giving will work with.

Now it was time to frost these beauties. I used my go chocolate frosting but replaced some of the liquid with more of that coffee. My standard cocoa powder is the Hershey Special Dark variety. If you love dark chocolate and can find this in your grocery store I definitely recommend picking it up. The result is a rich dark chocolate frosting that pipes beautifully and tastes divine. You will notice that I use vegetable shortening in my frosting instead of butter. That is because a nice fresh batch of shortening doesn't really add any flavor of its own while I find that although I love butter the flavor can be overpowering in frosting.

Here are the recipes I hope you like these cupcakes. I look forward to bringing you more special cupcakes in the months to come.

Be My Valentine Cupcakes

1 egg
1/3 cup coffee (room temperature)
3 ½ Tablespoons vegetable oil
¼ teaspoon vanilla extract
1/3 of a box of devil's food cake mix (15.25 oz size box)


Line the wells of a muffin/cupcake pan with paper liners. 

Heat oven to temperature required on your cake mix box directions.
Combine the liquid ingredients and beat well. Add the cake mix, stir and then beat with hand held mixer for 1 minute 15 seconds to 1 minute 30 seconds.


Divide batter between the prepared liners and bake as directed on the box. 


During the last few minutes of baking prepare the Jello.


Combine
1/3 boiling water
2 Tablespoons plus 2 teaspoons of the cherry jello powder

Stir to combine, if the jello doesn't dissolve I usually put mine in the microwave oven for about 30 seconds to dissolve it. Allow to cool for about 10 minutes then transfer to a squeeze bottle. (If you don't have a squeeze bottle you can use a spoon it is just a lot messier)


When cupcakes are cooked through use a bamboo skewer to poke holes in each one (I like 5) Then carefully pour the jello over all the cupcakes. Try to divide it evenly and allow it to soak into the cupcakes.


Cool on a rack for 10 minutes then move to the refrigerator to cool completely.


Chocolate Frosting

1 ½ cups powdered sugar
¼ cocoa powder
3 Tablespoons all vegetable shortening (Crisco)
2 Tablespoons room temperature coffee
1 Tablespoon half and half or milk (this amount is approximate you might need a bit more or a bit less to make the frosting the correct consistency)

Mix the powdered sugar and cocoa powder then add the shortening and using a hand held mixer combine well. Add the coffee and beat thoroughly. Continue beating and add the half and half (or milk) until the correct consistency is reached.


Put frosting into a piping bag fitted with a Wilton 4B pipingtip. Pipe the frosting in a simple swirl sprinkle with holiday sprinkles and enjoy.

Yield:7 to 8 cupcakes

Tuesday, February 5, 2019

Small Batch Cupcakes from a Cake Mix


I love to bake, I find it to be not only enjoyable and a wonderful creative outlet it is also a good stress reliever for me. I find that if I am having a stressful week if I can take a short time to bake something I feel so much better.

For many years I only baked from scratch and I still do sometimes but I do love to make quick batches of cupcakes from boxed cake mix. I know the box makes around 24 cupcakes and that is very far from being a small batch. However, because of the way cake mix is made it is really easy to divide it up to make smaller batches. Think about it, they don't make that stuff box by box they make huge amounts and divide it up to the amount for the box. I am going to show you how I divide it up a bit more to make just a few cupcakes.

The first step is to look at the directions on the back of the box. Check to see how many eggs the entire box needs. That is how many potions we are going to divide into. That's because it is a lot easier to divide the liquids than the egg. (a white and a yolk are different in size and act differently in the batter)

I have found that most of the cake mix in my grocery store asks for 3 whole eggs for most flavors. White cake mix usually gives that option as well an all egg white option that calls for 4 whites. (Angel food cake mix doesn't rely on any added eggs and I haven't tried it yet, that will be a blog post later on) As a note I do prefer my white cake to made from just egg whites so I make 4 portions of white mix and 3 of most others.

I happened to be just about out of cake mix a while back when I came upon a sale, I picked up my 3 standard flavors for $.78 each. I try to keep white, yellow and Devil's Food on hand all the time. Those are my most used flavors and the ones I turn to repeatedly. I do pick up other flavors as I want to or as I see something I want to try.

This time since I was pretty much out of mix in my cupboard I divided all three the same day. Sometimes I wait until I am going to use the box the first time and sometimes I do like I did this time and get all the mess done with at one time. I just do a quick wipe of the measuring tools between flavors and then I can clean up everything at one time.

I only took pictures of the Devil's Food being divided thinking I was going to use it to make a sample batch of cupcakes for this blog post. Then when it came time to make cupcakes I decided to make white ones instead since I had an egg white to use up. More about those cupcakes later on.

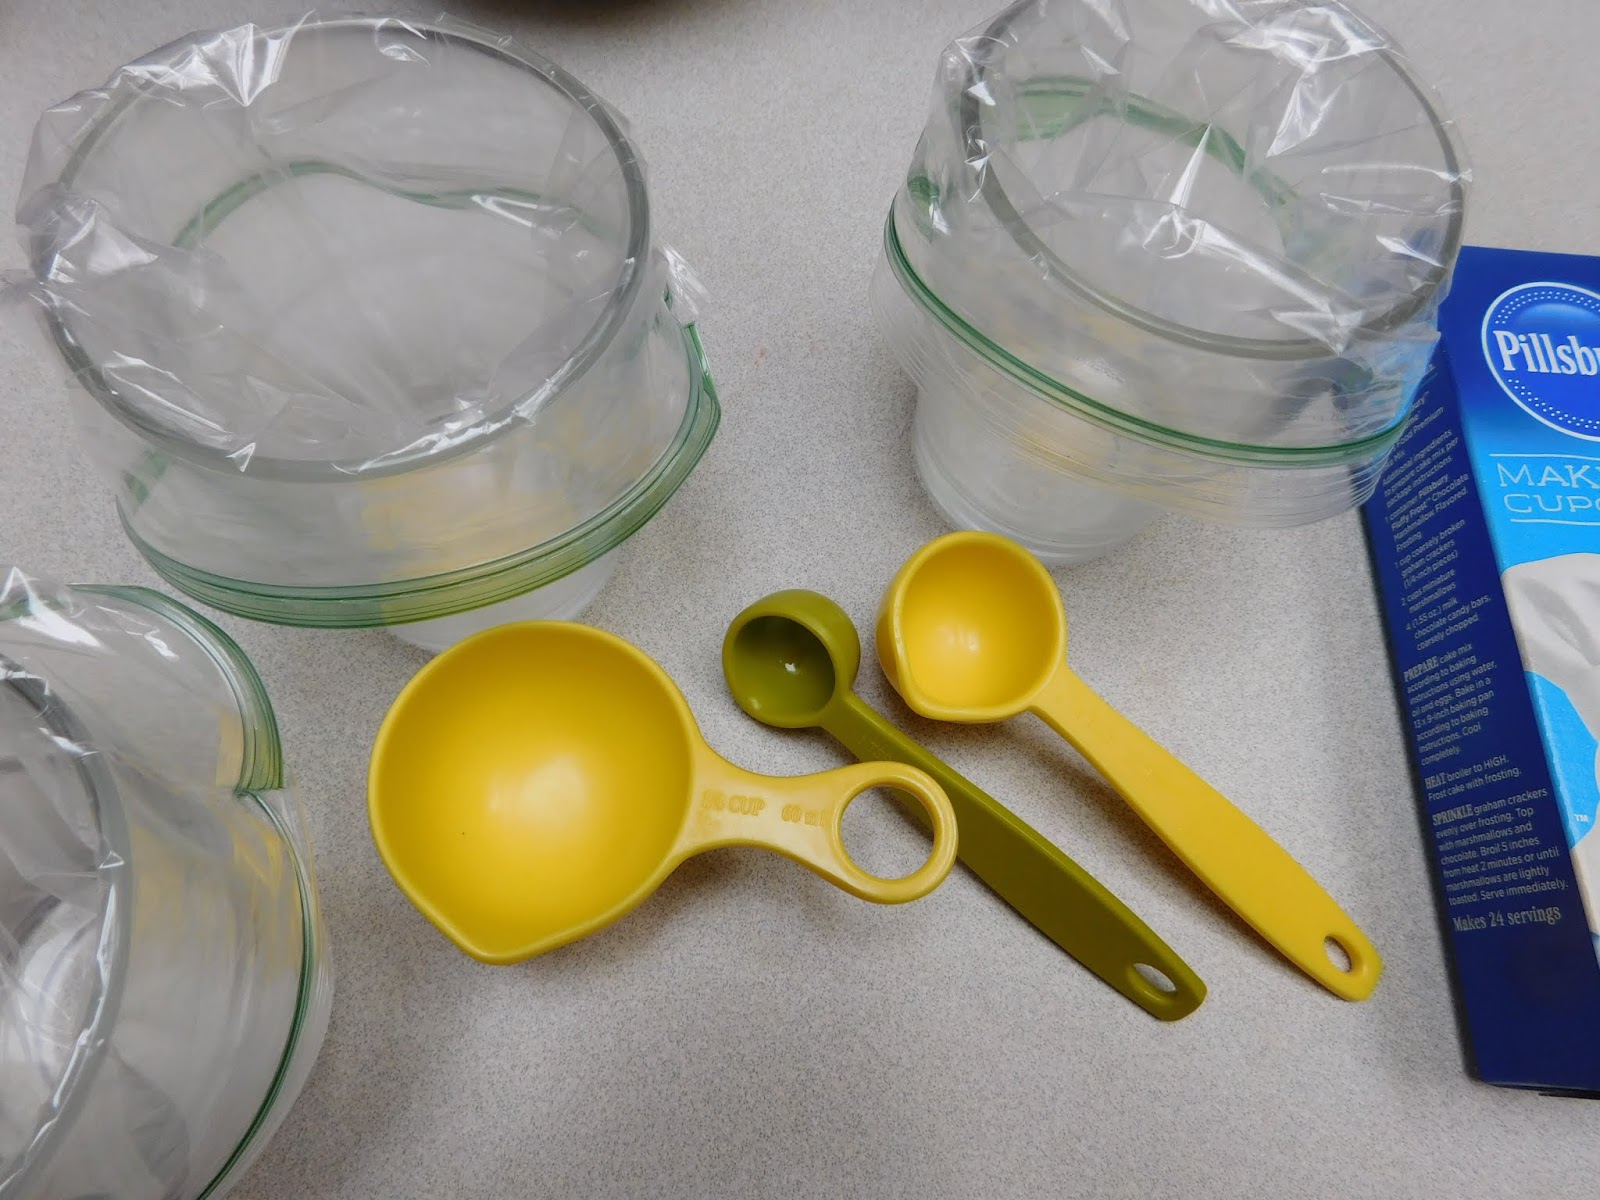
Anyway, check to make sure how many eggs the mix calls for and get out that many zipper style sandwich bags. I like to use small drinking glasses to hold my bags upright and open (see the photo)

Also gather some measuring tools- a ¼ cup dry measuring cup, 1 Tablespoon measuring spoon, and 1 teaspoon measuring spoon.


Remove the bag of cake mix from the box and before you cut the bag open kind roll it around to make sure it is well mixed (just in case the ingredients settles during shipment/storage)

Now cut the bag open carefully and measure out the dry mix into all the bags. I use the measuring cup first and put one scoop into each bag. Making sure you put the same number of scoops in each bag. When you get to the point you don't think you have enough to add ¼ cup to each bag switch to the Tablespoon measure and use it the same way followed by the teaspoon measure. You will probably need to eyeball the very end of the mix.

Now just seal the bags up and put them back in the original box for storage. I find they keep just fine for a few months.


Other than the amounts of ingredients to add to the mix there are a couple of changes that you will need to remember.

First when mixing up your batter combine all the liquids together really well before you add the cake mix. (I do this even when I am using an entire box of cake mix though)

Then after you add the cake mix to the liquids only beat the mixture for about 1 minute 15 seconds to 1 minute 30 seconds. I find that most boxes of cake mix tell you to beat the batter for 2 minutes and for the small quantity I find that over mixes the batter and I have problems with the cupcakes falling.

The other change I recommend is to add a bit of vanilla extract to the liquids (another think I do most of the time when I make up a box of cake mix) I find the vanilla kind of hides the “cake mix” flavor and makes the finished cupcakes taste a bit more like scratch made.

I created a PDF for you to print out, cut apart and tape to your box(es) of cake mix so you can write down the amounts of everything you need and the above changes. You can find it here.

Now for those amounts of liquids you will need to use, here is a handy list of the ones that seem to be the most common.

If you are making 3 portions and your mix calls for:

1 ¼ cup use- 1/3 cup + 1 Tablespoon + 1 teaspoon
1 cup use- 1/3 cup
½ cup use- 2 Tablespoons + 2 teaspoons

If you are making 4 portions and your mix calls for:

1 ¼ cups use- ¼ cup + 2 Tablespoons
1 cup use- ¼ cup
½ cup use- 2 Tablespoons

Here are some photos of my cupcakes and the process of making them. As you can see it is pretty much like making the entire box just using the smaller amounts.

When I started making my cupcakes I had every intention of making them with water like the box calls for. Then I remembered I had a carton of milk with just a tiny bit left so I used the milk in my cupcakes. I especially like white cupcakes made with milk because of the texture the milk gives them. If you haven't tried it I do recommend you give it a try. 

 
liquids combined

cake mix added

beaten for 1 minute 15 seconds


in the pan
baked and cooling

ready to eat

Use your favorite frosting on your cupcakes and enjoy.

Thursday, August 9, 2018

Home Chef

I do want to begin this post by saying that the people at Home Chef have been wonderful. I really wish I could say the same about the company they have hired to deliver their product in my area. I have no idea how they chose the delivery company or how wide an area this delivery company covers for them. I only know my experience with them. I will not name the delivery company so don't ask. I am not going to open that particular can of worms.

So I was really excited to try Home Chef, it was one of the first of the meal delivery companies I heard about. One of the couples I watch on YouTube gets meals from them and has wonderful things to say about the foods they get. I have to admit the meals they have shared on their Vlogs played a part in me wanting to go on this adventure of trying the different meal kits.

I have now tried twice to receive my kits from Home Chef and so far I have completely stuck out at actually getting a box delivered to me in time to use it.

The first time (almost a month ago now) I picked out my 2 meals and they both looked amazing. I paid my money and everything looked good. I was very excited when I got the tracking information on my package the morning of the expected delivery. Everything seemed to be good to go. Then the delivery day/night came and went with no package arriving at my home. I looked online at the tracking and for over an hour after the latest expected delivery time it still said my package was out for delivery. Then the tracking changed and told me there was a problem with delivery and it would be delivered the next day. Hmmmmm...... this just didn't sound good at all.

I decided to immediately send an email to the shipping company inquiring about my package (they have the form right there on the tracking page). Late the next morning I got an email back telling me that they had misplaced my package and were searching their facility for it and it would be delivered as soon as possible. Mind you we are in the middle of a heat wave here in Oregon and my box was supposed to contain a beautiful piece of salmon! Not a good thing at all.

I decided to contact Home Chef to see if they would be able to resolve this issue. I talked to a wonderful customer service representative, Nick,who was able to at least fix things so I am not out the money I paid. He assured me that if the box arrives today (1 day late) it will still be perfectly safe but just in case he credited my account I can receive another box to replace the one that seems to be lost.

The shipping company updated my tracking to say that my package was out for delivery, then it said it was delivered. When I again couldn't find the package the next day (by this time the food had probably gone bad) there was no actual answer from them Then the tracking again the  told me the package was “out for delivery”  and I got yet another notice the next morning that it had been delivered. I searched and could not find the box any where. This finally "delivery day" was on Friday for a box that should have arrived on Wednesday.

I picked out 2 new dishes to be delivered 2 weeks later and again they looked amazing. I was truly excited at the thought of trying them. I was also a bit apprehensive about the delivery.

Between the time the first box was supposed to be delivered and the day I was supposed to receive the second box (in excess of a week and a half past the original delivery day) I actually did finally find the first box. It was in the ditch along the road, not the road I live on mind you the next one over. It was partly covered by blackberry bushes and very hard to retrieve. It was really amazing I actually saw it at all, but as soon as I did I just had a feeling it was either my Home Chef box or one belonging to one of my neighbors. I pulled over and checked the box and it was indeed my shipment. It was over a quarter mile from the end of my driveway! It also smelt like rotting food because that was exactly what was contained inside of it. I did load it into my truck and bring it home. I didn't want to leave it littering the road with my name and address on it. I will have to now dispose of it properly (it is sitting on my back porch in the meantime)

The day my second try at getting a Home Chef order I kept track of my tracking information. I checked it often throughout the day and evening. The Home Chef page says the package should arrive by 9 PM on the delivery day. I finally gave up at 10 and went to bed. The next morning I checked the tracking again and it said that my package was still out for delivery. I decided to drive down to where I had found the last box just in case it was there, it wasn't. 
 
Around 8 or 9 in the morning I got a message that the box had been delivered the night before and at this point the tracking was updated to show this also. I again took a drive to the spot the last box was found as well as a drive to the end of the road I live on and back home. There was no package to be found.

At this point I again called Home Chef and again the customer service person (I failed to get her name, I was more than a bit upset/angry at this point) was wonderful. I took her up on the offer to have my money refunded (which happened immediately) and she apologized and promised to contact the shipping company to see if she could find out anything.

So while I would love to be able to post my opinions on the Home Chef product I instead am posting my experience trying to actually even get my hands on the product.

For me this was a terribly disappointing experience, I really did want to try the foods that look so amazing on the website.

Compared to the experience I had with Hello Fresh this was a nightmare. Hello Fresh not only didn't charge for shipping they use UPS who actually can manage to get the package to the recipient. (I think I forgot to mention I had to pay $10 for the privilege of having my package shipped)

In my opinion a shipping company has one job- to take packages from point A to point B. Point A being wherever it was shipped from and point B the address on the package. This un-named company certainly has failed at this and because of their failure I feel I missed out on an fun experience and had a lot of extra stress besides.


Maybe if you live in town or in another part of the country your experience receiving Home Chef would be different but for me I am not willing to try them again.

Thursday, July 26, 2018

Hello Fresh

The first of the home delivery meal kits I am trying is from Hello Fresh. I choose the option of 2 meals for 2 people for my delivery (this is the amount/setting I plan to use for all of the meal kits I try when available)


Hello Fresh has 3 plans available for you to pick from.

They offer their “Classic Plan” which seems to offer about a dozen choices of meals to pick from. You can choose to receive 2,3, or 4 recipes per week each serving 2 or 4 people. The base cost of this plan is $9.99 per serving (with free shipping) This is the plan I picked.

They also offer the “Veggie Plan” where you receive 3 recipes per week to serve either 2 or 4 people. This plan also costs $9.99 per serving and has the free shipping. This plan offers vegetarian friendly options though there were only 3 to pick from for the week I looked at.

Lastly they offer the “Family Plan” which serves 4 people and you can choose to receive either 2 or 3 recipes per week. The cost of this plan is $8.74 per serving again with the free shipping. This plan offered 5 recipes to choose from for the week I looked at it. They say that the recipes on this plan are ones the entire family will love.

Hello Fresh box was delivered by UPS which I do love since I have the My Choice account with UPS so I get tracking information sent to me automatically. I am also able to set my delivery preference through their ap and get delivery updates also through the app. This makes me much more comfortable about deliveries in general. So delivery choice was a definite plus for me. The fact it was free was even better.


The box was delivered to my porch on a very hot afternoon and since I happened to be at home at the time I was able to bring it right in the house. Everything in the box was well packed and all items were properly cold. The bags on top were pretty close to refrigerator temperature even though the outside temperature was in the 80's. The meat was at the bottom between 2 large frozen ice packs and was very cold. So packing was also a plus.


I immediately looked over everything in the box and moved the food to my refrigerator. Each meal (minus the meat) was bagged in a brown paper bag that was clearly labeled. (one of the bags did tear in shipping) I love the convenience of the meals being all together in the single bag. So much easier when I am ready to prepare dinner.


Sweet Potato and Black Bean Tacos

The first meal I made was the Sweet Potato and Black Bean Tacos. This meal is vegetarian and if you know me or have read my blog posts you know that I am definitely not vegetarian but I do enjoy a good vegetarian meal from time to time. I chose this selection because I have noticed a lot of recipes that combine black beans with sweet potatoes and since I love both of these items I have really wanted to try the combination. I did move some of the items (sweet potatoes, avocado, lime, and the onion) to my kitchen counter a few hours before I was going to prepare dinner so they could come to room temperature. Those are items I would normally store at room temperature and prefer to work with them that way. I have to say the dish was very easy to prepare, a bit of chopping, grating and then into the oven and a skillet. The ingredients were all of excellent quality. The only complaint I have is the avocado was extremely under ripe so it really wouldn't mash but it still tasted very nice in the finished dish. Since the avocados were refrigerated I don't think waiting a few days would have made much difference.


I did like the dish very much and will be saving the recipe to make again. All the flavors went together very nicely and it was a filling dinner.

The amount in the photo of the finished dish is as close to half of the meal as I could get. I thoroughly enjoyed it for dinner and enjoyed the leftovers couple of days later for my lunch.


I really enjoyed this dish a lot, I am going to be making it in the future for sure (easy to do since I did receive the wonderful illustrated recipe card) but also I will be adding the avocado crema to some of my own dishes since it was wonderfully tasty on its own also.


Crispy Cheddar Frico Cheeseburger


I do apologize that I forgot to take any photos of the ingredients before I made this dish. It totally slipped my mind. For this dish the only things that were needed that were not on the bag were: salt, pepper, olive oil, and sugar.


I did do things slightly differently than the recipe for this dish. It was very hot the day I made this so I decided to move most of the cooking to my grill. I did make the Onion Jam in a skillet in my kitchen but I did all the rest of the cooking on the grill. I just used the same temperatures and times as the recipe directed and it all turned out perfectly. In fact this may be the best tasting burger I have ever eaten. Again it was a super easy recipe and made with ingredients that I can easily get at the store.


My Thoughts

So what are my thoughts on the Hello Fresh shipment I received. I do love both recipes and as I said earlier I will be making both dishes again. I loved trying new flavor combinations, in for me that is the biggest draw of the whole meal kit thing. I love to try new foods and this is a really easy way to do just that.

It is way too early in my process of trying the different kits to say if I will order from Hello Fresh again but it is certainly tempting.


Wednesday, July 18, 2018

Meal Kits

I'm pretty sure you would have to be living under a rock to not be aware of the massive number of meal kits that you can have conveniently delivered right to your door. There are so many of them advertising everywhere and so many bloggers and you-tubers are talking about them too. I have to admit I have been curious about them.

After watching several of the you-tubers that I normally watch talking about various kits I decided to do my own research. Being really cheap, or-ahhh, frugal (that sounds better right) I starting looking for deals on some of the kits.

Some of the things I have heard I know I disagree with. The thing that comes to my mind first is the claim that they are cheaper than shopping. I have looked at the prices and I know what I spend for things and I know that there is no way I am spending the amount per meal that these kits cost (regular price, not including discounts). If they are cheaper for some people then I think we need talk about shopping habits a bit.


However, I do see that they are very convenient mainly because most of the prep work seems to be done for you. Also I love to try new foods and I love to experiment with new flavor combinations and for me that is one of the draws. It is also why I have purchased several of the meal kits that my local grocery store carries. (I did a blog post on the first one of this, which I did get for free)

So back on topic. I have two meal kits ordered/paid for. One is due to arrive this week (Hello Fresh) and one next week (Home Chef)

Both of these companies were offering introductory deals so the price was significantly lower than the normal price. I will be posting blogs on each of these after I receive them telling you what I thought about them, how much I paid and show you what I get.

I am also looking at some of the other companies that offer the kits to order in the future.

The big question is probably do I intend to continue with any of these. The answer would be maybe. If the food is good enough, and the recipes tempting enough I might. I wouldn't be doing them every week, maybe one or two a month for a change of pace from what I normally make. After all, I do love to cook but I also really enjoy grocery shopping and finding the best deals. For me that really is half the fun of it. I also love to create new dishes and to try to re-create things I have eaten or even read about.

So I hope you will enjoy this process with me in the coming weeks/months as I explore the world of Meal Kits.

Tuesday, July 17, 2018

Grilled Cheese Sandwiches with Caramelized Onions

This week I am sharing what has recently become my favorite sandwich of all time. I am just kicking myself for not coming up with it years ago. It blends one of my favorite sandwiches with caramelized onions (which I adore) to make a sandwich that is good anytime of year.


Since it is summer and the middle of a heatwave right now it goes great with a salad. In the dead of winter pair it with a bowl of your favorite soup and you will be cozy and warm.

My choice for the bread on this is a really dark rye, but feel free to use your favorite. I just love the combination of the dark rye with all the other flavors.

You can also play around with the cheese choices, my preference is Muenster and Sharp Cheddar but if you have another favorite try it out.

I used a WallaWalla Sweet Onion that weighed just over a ½ pound and it was close to perfect for two sandwiches. You can really use any onion for caramelized onions but a nice sweet onion is even better and just sooooo yummy. The only real secret to caramelized onions is to cook them on low heat until they reach a nice rich golden color.


Grilled Cheese Sandwiches with Caramelized Onions

3 Tablespoons butter
1 small to medium (about ½ lb) Sweet Onion, sliced
pinch kosher salt
1 teaspoon dark brown sugar
4 slices of dark rye bread
Dijon mustard
2 slices (1 ½ oz each) Muenster Cheese
2 slices (1 ½ oz each) Sharp Cheddar Cheese

Melt 1 Tablespoon butter in a heavy skillet over medium heat. Add the onion slices and a pinch of salt. Stir and cook just until the onions start to soften, about 3-5 minutes.

Reduce heat to low (as low as your stove will go) add the brown sugar to the onions and stir to coat. Cook 20 -25 minutes, stirring often until the onons are golden brown and look glazed. They should be very soft at this point. If at anytime they start to get crisp at the edges remove from heat and allow to cool a few minutes before continuing.

While the onions are cooking prep the rest of the sandwiches, lay out the bread and spread all 4 slices with mustard (the amount is up to you, I don't measure I just put on the amount that looks good)

Place the Muenster cheese on 2 slices and the cheddar on the other 2.

Once the onions are cooked divide them evenly between the slices of the bread with the Muenster cheese then top with the slices with the cheddar.

So at this point your layers of sandwich should be as follows:
rye bread
mustard
muenster cheese
caramelized onions
cheddar cheese
mustard
rye bread

Turn the heat back up to medium under the skillet you have been using and add 1 Tablespoon of the butter. Once the butter melts carefully add the sandwiches. Cook about 3 or 4 minutes until the bread is toasted.

Add the last Tablespoon of butter flip the sandwiches and cook another 3 or 4 minutes until the other side is toasted and the cheese has melted.

Enjoy!!