Have you checked out all my blogs?


Dollhouse Minis: http://joannesminis.blogspot.com/


18” Dolls: http://joannes18dolls.blogspot.com/


General Crafts: http://joannes-place.blogspot.com/


Friday, August 25, 2017

Pizza Kits

This week I thought I would share my very favorite recipe from my collection of Investment Cooking recipes, Pizza Kits! What is a pizza kit you might be asking- well simply put it is a bag with all (or most- we'll talk about that later) of the stuff you need to make a pizza.


You have to understand that I love pizza, I just don't always want to go to town to pick up a pizza. (I live in an area that has no delivery- fun fact I've never actually had food delivered, ever) Also as much as I love pizza I don't really want to get a huge pizza and have to eat it all by myself. I know that the grocery store has frozen pizzas but I have never been a fan of those, they always taste like a frozen pizza and most to the time it seems like all the toppings end up on one side of the pizza and the other side is bare.

With a pizza kit you spend part of a day getting all the stuff ready and package it up. Then when you want a pizza all you have to do is thaw and assemble. By keeping the toppings separate until you assemble the pizza it does seem to taste fresher. Also a lot of times I will add things from the fridge to the pizza when I put it together.

So on prep day for these kits I make enough dough for 6 small pizzas, then they along with their toppings are frozen for later use. I like to make 6 at a time because a lot of the items I use for the toppings work out even that way. Most times I make two types of pizza each time so 3 of each.

Another perk of making these kits yourself at home is you are in control of everything that goes into/onto your pizza. So if for instance you don't do gluten use a gluten free crust recipe and gluten free toppings. Maybe you don't/can't do dairy again use dairy free cheese and you have a pizza you can eat. Same with vegetarian options or whatever your needs dictate.

For the crust I am sharing the one I am using currently, it not by any means the only option. I started using it in an effort to use more whole wheat flour in my diet. Since it is sweetened with honey it seems like maybe it might be a bit healthier....... Anyway feel free to use your favorite pizza dough recipe. For every 12” pizza your recipe makes you will get 2 small pizzas for your kits.

Since the dough (being a yeast dough) takes the longest I usually start my process by starting the dough.

Pizza Dough

1 ½ cup warm water
1 Tablespoon yeast
2 Tablespoons honey (or sugar)
¾ teaspoon salt
2 cups whole wheat flour
2 cups all purpose flour

(I use my stand mixer for this, feel free to hand mix/hand knead the dough)

Combine the water and yeast in the mixer bowl and allow to sit for about 15 minutes to give the yeast time to bloom. You should see some bubbling that shows the yeast is alive.

Add honey, salt and whole wheat flour and beat until combined. Allow this mixture to sit at room temperature for about an hour or two. This step is optional but does give the dough a better texture.

At the end of the rest time I change out the paddle attachment on my mixer for the dough hook at this point.

Add the all purpose flour and knead the dough for about 6 to 8 minutes.


Form the dough into a ball and place it in a greased bowl. Cover the bowl and allow the dough to rise in a warm place for about an hour.

Preheat the oven to 400°F.

Punch the dough down and divide it into 6 equal portions.

Roll, stretch, pull the dough pieces into discs that are about 8” in diameter. And I am using the term disc very loosely. Personally I don't care if my pizza is perfectly round and mine usually end up shaped in some roundish shapes.

Now it is time to partially bake the crusts for about 8 minutes. You want them to just barely start to brown.

Cool the crusts thoroughly before you wrap them.

Meanwhile you need to prepare your pizza toppings. This time I made Ham and Pineapple Pizzas and The Works Pizza (a combination style) 3 of each.

Here is the list of what I used to make these.

1 (8 oz) can pineapple tidbits or chunks
3 slices of deli ham (I prefer a Black Forest Ham for this)
2 Italian Sausage links
Mushroom slices
Black olives
Sliced pepperoni (about 15-18 slices)
1 jar (15 oz) pizza sauce
8 oz (2 cups) Shredded cheese, I use an Italian Style Blend but Mozzarella works too.

6 gallon size zip-lock freezer bags
6 quart size zip-lock freezer bags
zip-lock sandwich bags
zip-lock snack bags

When you are putting the following items into their individual bags be sure to get as much air out of the bags when you seal them. The less air in these bags the better the results will be and the longer they will keep in the freezer.

Divide the pineapple into 3 of the snack bags.
Cut the deli sliced ham into bite size pieces and put into 3 snack size bags.

Cook the Italian Sausage and drain well and allow to cool. When completely cool divide between 3 snack size bags.

Cook the mushroom slices in the same pan you cooked the sausage in, drain and allow to cool. When completely cool divide between 3 snack bags.

Place about 2 Tablespoons of sliced olives into each of 3 snack bags.

Place about 5 or 6 slices of pepperoni into each of 3 snack bags.

Place ¼ cup of pizza sauce in each of 6 sandwich bags.

Place 1/3 cup of shredded cheese into each of 6 sandwich bags.

At this point I make out a card to go into each kit. It has the name of the pizza, the baking instructions, and the date I made the kit. I put these cards into sandwich bags just in case something in the kit leaks.

So now I create fill a quart freezer bag with the toppings for the kits.


In the 3 bags for the Ham and Pineapple Kits I place:

1 bag ham
1 bag pineapple
1 bag sauce
1 bag cheese
1 bag with the index card

In the 3 bags for the The Works Pizza Kits I place:

1 bag cooked sausage
1 bag mushroom slices
1 bag olive slices
1 bag pepperoni
1 bag sauce
1 bag cheese
1 bag with the index card

Again get as much air out the bag as possible.

Store these bags in the fridge until you are ready to put the pizza kits together.

Make sure that the crusts are completely cooled to room temperature before you bag them up so that they don't get condensation in the bags.
Once the crusts are cooled place a par baked crust into a gallon zip-lock freezer bag along with the quart bag of toppings. Again get as much air out of the bag as possible and seal the bag.

Place the bags in the freezer.

When you want to have pizza all you need to do is thaw out the pizza kit and assemble the pizza. At this point you can add what ever you want to. There are some ingredients that I prefer to not freeze like green pepper, onions, spinach, etc.

Preheat the oven to 425°F


Cook the assembled pizza for 7-10 minutes and enjoy!

Friday, August 4, 2017

Toad in the Hole


This week I decided to share a breakfast recipe I first made years ago when I was in college. I was going through some old recipes a while back and found it again.


If you haven't run into Toad in the Hole before as I understand it we can thank our friends in old England for this one. Basically it is a large popover with meat (in this case sausages) in the bottom.

This is a really easy recipe but don't tell anyone else that, it's our secret. You can make this one to impress that special someone and they will think you have some fantastic skills in the kitchen.

Since the batter can be held in the fridge for up to 24 hours this is also a great one if you are cooking for just yourself. You can either mix it up on the first day and then make it again on day 2 or use that leftover batter to make 2 popovers to go with another meal. (they are great with salad for lunch)

The batter calls for an optional egg white, I use it if I happen to have one on hand but it really isn't necessary. It does make the bready part pouf up more so if you trying to impress someone add it (or if you have one to use up) but don't stress if you don't have the extra white.

For the sausages this recipe uses the Brown & Serve ones from the freezer aisle of your local store. I have subbed in regular cooked sausage links and that works too. You could also use any cooked meat in place of the sausages. Bacon or ham also work really well.


Toad in the Hole

4 to 6 Brown & Serve sausages (thawed)
Butter & jam (optional)

batter:

1 egg
1 egg white (optional)
½ cup half and half (or milk)
½ cup flour
¼ teaspoon salt

4 to 6 Brown & Serve sausages (thawed)
Butter & jam (optional)

Preheat oven to 400° F.

In a medium bowl beat the egg (an egg white if you are using it) Blend in the half & half (or milk) then stir in the flour and salt.

Put this mixture into the blender and process for 1 minute or until no lumps remain. (at this point the batter can be stored in the fridge for up to 24 hours)

Place sausages in 2 10 ounce glass or ceramic baking dishes. Place the baking dishes with the sausages into the preheated oven for 5 minutes.


Pour the batter into the hot baking dishes (immediately after removing from the oven)

Place the baking dishes in the hot oven for for 20 minutes.

Turn the oven temperature down to 350°F and bake an additional 15 to 20 minutes.

Serve immediately.

Note: if you want to make just 1 toad in a hole and 2 popovers preheat 2 6 ounce custard cups in the oven with the casserole/sausages. Use half the batter for the toad in a hole. Then divide the remaining half the batter between the 2 preheated custard cups. Bake as above but remove the popovers from the oven after 10-15 minutes at 350°.


Friday, July 28, 2017

3 (or 4 or more) Way Meat Mix

This week's blog post is a little longer and actually contains multiple recipes. That's because this post is based on a meat mix recipe. This recipe is part of my collection of what I always refer to as my “investment recipes” because just like a good financial investment these recipes pay off over time.

This meat mix is a recipe I found in one of my fairly old cookbooks in my cookbook collection. (yeah, I am dorky enough to actually collect old cookbooks) In that book it was simply called 3 Way Meat Mix. Over time I have adjusted the recipe to more to my tastes and come up with more ways to use the base mix. In fact just about every time I make this I come up with ideas for more ways to use it. The ones here are my current favorites.

So to start you need to make the meat mix:

3 Way Meat Mix

½ cup chopped onion
1 Tablespoon oil
2 lbs ground beef
2/3 cup ketchup
½ cup water
¼ cup coarsely chopped celery
2 Tablespoons lemon juice
1 Tablespoon dark brown sugar
1 ½ teaspoons Worcestershire sauce
1 ½ teaspoons salt
1 teaspoon vinegar
¼ teaspoon dry mustard


Sweat the onion in the oil just until it because fragrant then add the ground beef and cook until browned (breaking the meat up while it cooks)

Drain well.

Add the rest of the ingredients bring to a boil, turn the heat to low, cover and simmer for 30 to 40 minutes.

Remove the lid and cook uncovered for about 15 minutes to cook off most of the liquid. (watch so the mixture doesn't burn)

Remove from the heat and cool.

Use a measuring cup to portion the meat mix into zip lock bags each containing 2/3 cup.
I just use regular sandwich bags for this step, remove all the air then store all the bags together in a gallon size freezer bag that is labeled.


Store the bag of the meat mix in your freezer until you need a quick dinner.

Each bag of meat mix will be enough for 1 or 2 servings depending on your appetite and what you serve as sides with it.

********


Dinner #1 Quick & Easy Chili
1 1/3 cups (2 of your bags) of 3 Way Meat Mix
1 can (14 ½ to 16 oz) dark red kidney beans (undrained)
½ to 1 cup tomato (or tomato based vegetable) juice
1 Tablespoon chili powder (or to taste)
Hot sauce to taste (I use Chipolte Tabasco)


Combine all ingredients in a saucepan and heat. The amount of juice you need will depend on how thick you like your chili. As for the hot sauce, I will leave the amount up to you.
Serves 2


I usually only add the ½ cup of the juice and I consider the consistency to be perfect. You might notice in the photo of the chili I serve my chili over rice and I get 2 very generous servings from this recipe.

********


Dinner #2 Quick & Easy Sloppy Joes

2/3 cup (1 bag) 3 Way Meat Mix
Hamburger bun, toasted

Heat the meat mix and serve on a toasted hamburger bun. This will either make 1 double open faced sandwich (covering both the top and bottom buns or 2 more traditional sandwiches)


********


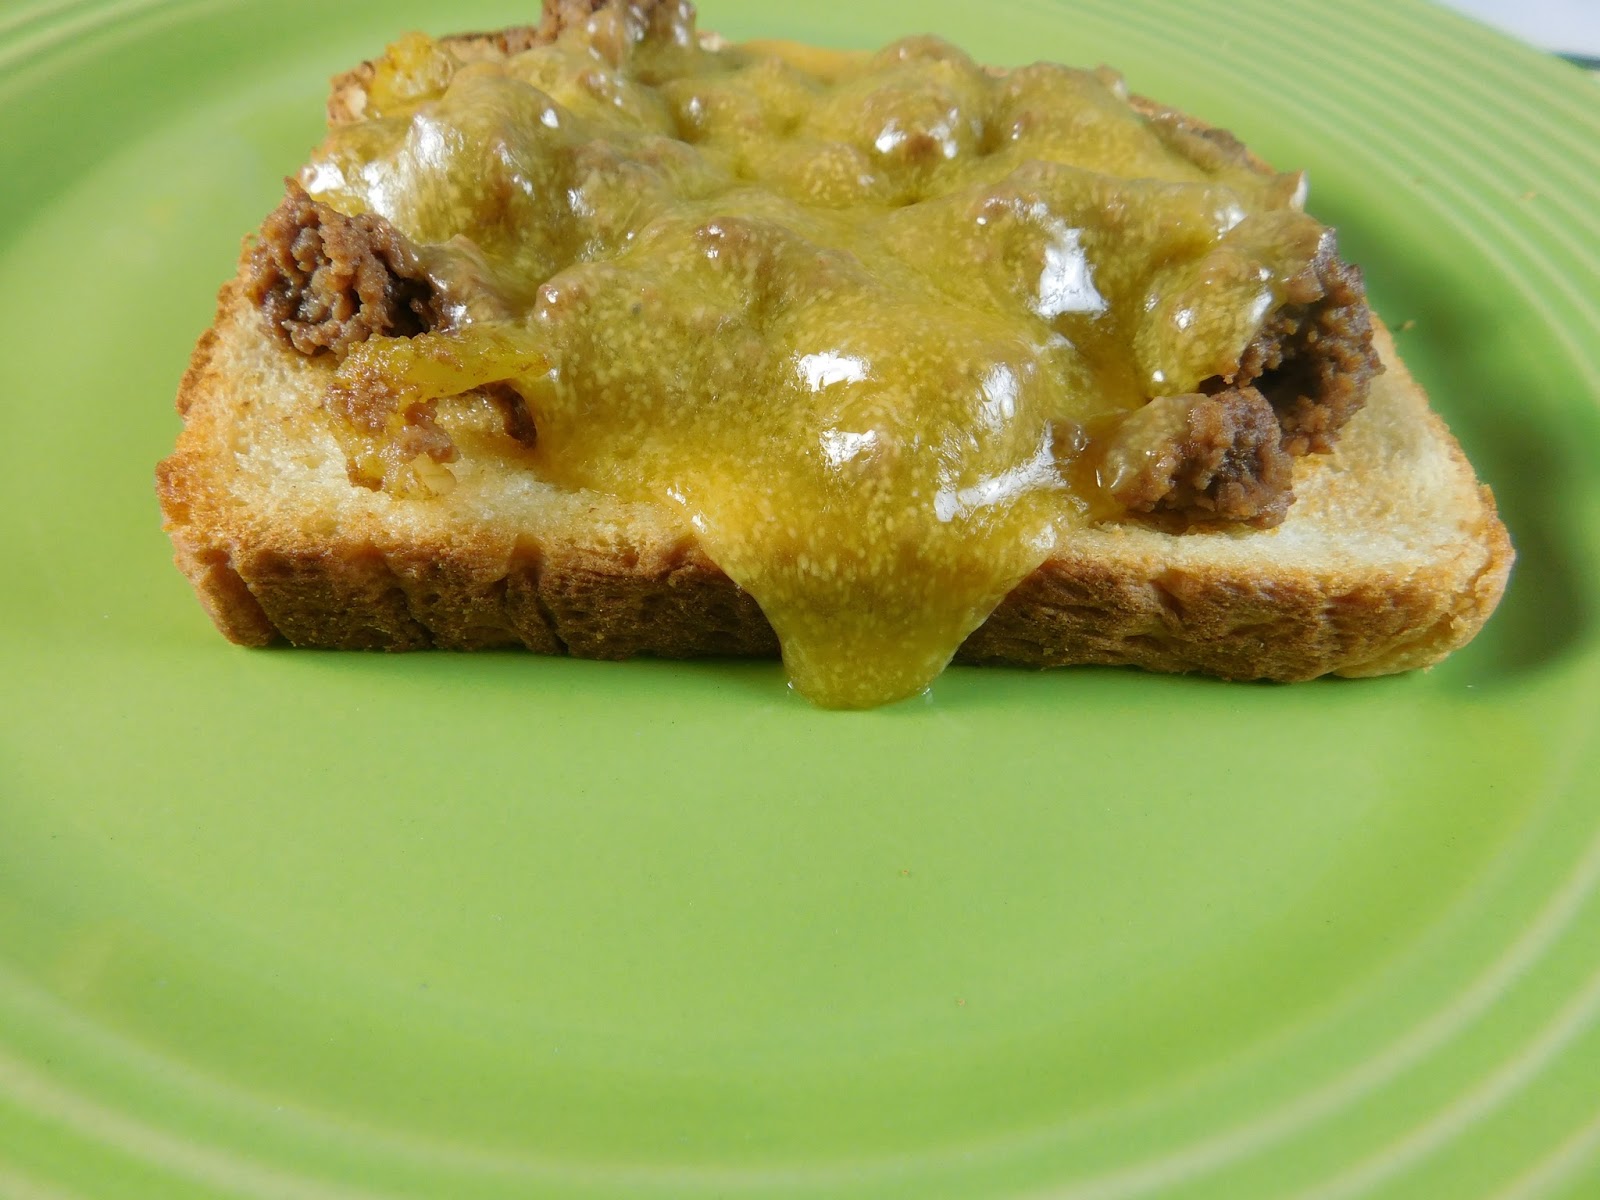
Dinner #3 Cheesy BBQ Sandwich

2/3 cups (1 bag) 3 Way Meat Mix
2 slices cheddar cheese
2 slices bread, toasted

Heat the meat mix.

Place toast on a baking sheet. Spoon hot meat mix over bun, top with cheese and broil until cheese melts.

********


Dinner #4 Taco Salad

2/3 cup (1 bag) 3 Way Meat Mix
½ teaspoon cumin
¼ – ½ teaspoon chili powder
Salad mix (I use the kind from the bag in the grocery store)
toppings of your choice
I used:
sliced olives
sour cream
salsa
grated cheese
sliced green onion

tortilla bowl (optional)

*feel free to use whatever toppings you like on your taco salads.

I like to use a baked tortilla bowl for my taco salad but that is totally optional.

Add the cumin and chili powder to your thawed meat mix and heat. (I use the microwave for this)

Place your salad mix onto a plate, into a bowl or into a tortilla bowl, top with the heated meat mix. Top with your favorite taco salad toppings and enjoy.


********
Other ways to enjoy the meat mix

Now for some other ideas for using this meat mix.

Serve the heated mix over cooked rice with or without toppings of you choice.

Mix the thawed meat mix with mayo, a bit of mustard and a bit of chopped dill pickle and use it as a sandwich filling.

Serve the heated meat mix over a baked potato


Now its your turn, I am sure you will find ways I haven't even thought of to serve this meat mix. 

Friday, July 21, 2017

Chocolate Chip Cookies


I think Chocolate chip cookies were the first small batch cookie recipe I looked online for. It was also the one that took the longest to find/re-write to make it similar to my family favorite recipe. I made so many failed batches of cookies on the trail to this recipe. One of the things I love about chocolate chip cookies is how quick they are to make. You mix them up and bake immediately. Most of the recipes I found for the small batch ones required that the dough either be chilled in the fridge or frozen for a while before baking. I am assuming that this was to make the cookies not spread too much. Even with the chilling I had a lot of spreading issues with most of the recipes. I felt this was a fault in the balance of butter to flour in the base recipes so I started playing around with the balance. I am really happy with the recipe I have come up with, it is the closest to my family favorite recipe that I have able to come up with.


So like the other small batch cookie recipes on this blog this one makes 1 dozen or fewer cookies. I have been getting 12 cookies every time on my test batches. (the only time I got more was when I dumped in some extra chocolate chips to empty the bag)


Be sure that when you combine the flour, baking soda and salt that you really stir it together. Since we are talking about such small amounts it is extra important to really mix it so everything is evenly spread through the dough.

As with all my baking I only use real butter so that is what this was tested with, if you insist on using margarine your results may vary. Also before you ask I use regular butter not the un-salted variety so that is what the amount of salt is balanced for.


Chocolate Chip Cookies

2/3 cup all purpose flour
¼ teaspoon baking soda
1/8 teaspoon salt

¼ cup butter, softened to room temperature
¼ cup dark brown sugar
2 Tablespoons granulated sugar

½ teaspoon vanilla
1 egg yolk

½ cup chocolate chips


Heat oven to 350° Fahrenheit.

In a small bowl combine the flour, baking soda and salt really well and set aside.

In a medium bowl combine the butter and both types of sugar and using a small mixer beat them together thoroughly. (you want this mixture to be light and well combined)

Add the vanilla and egg yolk to the butter mixture and again combine well.

Add the flour mixture to the butter mixture and slowly mix to combine well.

Carefully stir in the chocolate chips.

Using a cookie scoop or spoon portion out your cookies on an un-greased cookie sheet.

Bake for 8-10 minutes

Allow to cool on cookie sheet for about 5 minutes before moving to a wire rack to cool.

Store in an airtight container.


Friday, July 14, 2017

Quick and Easy Caramel Coffee Cake


I have fallen in love with this recipe because not only is it really yummy it is so quick to make. The secret is it is made entirely in the microwave!! Yeah, in the microwave. I timed making it this time and in under 20 minutes (closer to 15 minutes) I had a delicious coffee cake ready to eat. That time includes allowing time for the coffee cake to cool down so you won't burn yourself on the hot caramel.

I love fast and easy recipes like this because they are great to pull out when someone drops by and you feel you want to serve some kind of snack. By the time the pot of coffee is finished brewing this little beauty will be almost ready. No one needs to know how easy it was. (we won't tell if you don't)


Quick and Easy Caramel Coffee Cake

2 Tablespoons butter
¼ cup packed dark brown sugar
2 Tablespoons chopped nuts (I like walnuts the best but pecans would be good too)
2 Tablespoons light corn syrup
¼ teaspoon spice (cinnamon, apple pie spice, or pumpkin pie spice- use what you have)
1 cup Bisquick or other baking mix
¼ cup water


Put the butter in a 1 quart casserole dish and put in the microwave for about 30 seconds (on high) to melt.

Stir in the brown sugar, nuts, corn syrup, and spice then put back in the microwave for about a minutes. You want the mixture to be bubbly.

Tip the casserole slightly to get the mixture to run to one side and place a shot glass (or small juice glass) in the center of the casserole dish. When you set the casserole down the sugar mixture should surround the bottom of the glass.

Now combine the baking mix and water to make a thick dough. Drop the dough onto the sugar mixture (by spoonfuls trying to keep it evenly spaced around the glass)

Microwave at 70% for 4 minutes (if your microwave doesn't have a turntable rotate the casserole after 2 minutes)

Use a wooden pick to check that the dough is cooked all the way through (pick inserted in the dough should come out clean) if not cook it up to 30 seconds more at 70%.

Remove the casserole dish from the microwave and immediately remove the glass from the center of your coffee cake. (be careful it will be very hot)


Turn the casserole dish upside down on a serving plate, allow the dish to remain on the coffee cake for 1 minute to allow all the caramel mixture to drip down onto the coffee cake. Remove the casserole dish and allow your coffee cake to cool a few minutes before serving. 


Friday, July 7, 2017

Quick & Easy Summer Pasta Salad

I love a good pasta salad especially on that has lots of veggies in it. If it is also incredibly easy that is even better.


This salad is great because you can change it up depending on what is in your fridge. This time I used the veggies I list in the ingredients list but feel free to change them up depending on what you like and what you have on hand. (more about that after the recipe)

Since the salad needs a few hours to set so the flavors can blend it is great for those days when the temperatures are soaring. Just put the salad together in the morning and let it hang out in your fridge until dinner time.

If you want to turn this salad into a meal instead of a side dish just add a cup or so of cooked meat.


Quick & Easy Summer Pasta Salad


¾ cup uncooked spiral shape pasta
¼ cup finely chopped onion*
¼ cup finely chopped celery*
¼ cup finely chopped green bell pepper*
¼ cup finely chopped red bell pepper*
1 hard cooked egg, diced
1 Tablespoon sliced ripe olives
2 Tablespoons prepared Ranch salad dressing
1 Tablespoon Italian salad dressing (I prefer a creamy style on in this)
1/8 teaspoon garlic powder
1/8 teaspoon dried basil
dash of salt and pepper

Cook the pasta according to the directions on the package. Drain and rinse in cold water.

Combine the veggies, diced egg, olives and the cooked pasta.

In a small dish combine the two salad dressings and the seasonings. Stir to combine well.

Add the dressing mixture to the pasta mixture and toss to coat.

Cover and chill in the fridge until serving time.

  • You can use any combination of veggies that add up to 1 cup. I like to stick with around 4 because that number of flavors seems to combine well. In the past I have used corn, cucumber, radishes, tomato, peas, and a lot more that I can't think of at the moment. Also you can vary the type of onion to your preference. Red onion and green onion are my personal favorites but use what you have/love.


This is a recipe that you can definitely change up depending on what you have on hand and what you love to eat. The combinations are practically endless.  

Friday, June 30, 2017

BBQ Pork Sandwiches


On a hot day there is nothing like a dinner you can put on the table in just minutes. If you have some leftover cooked pork (leftover pork roast is perfect) this one is on the table in about 20 minutes.


The first step is to mix up the BBQ sauce. This one takes the short cut of your favorite bottled sauce then it gets a few additions (only 2 actually) and it becomes something that is just amazing. One of the ingredients might surprise you but this sauce has quickly become my favorite. I have made this with several different flavors and brands of bottled sauce and they all turn out great. Don't worry you won't actually taste the cola it just lightens up the bottled sauce and makes it taste a lot fresher.

While the sauce is simmering you can cut up that cooked pork. After that all you need to do is let the sauce and the pork get to know each other and you have a wonderful dinner. I serve this on purchased hamburger buns but I think it would also be really good over a bed of rice.


BBQ Pork Sandwiches


½ cup bottled BBQ sauce
½ cola (regular with sugar not the diet stuff)
1 Tablespoon dry minced onion
1 ½ diced cooked pork
2 split hamburger buns


Combine the BBQ sauce, cola and dry onion in a small saucepan and bring to a simmer. Allow to simmer about 10 to 15 minutes. This allows the flavors to mellow and the onion to soften.

Add the cut up pork and simmer for another 5 minutes or until hot.


Serve on buns.